The Quick and Healthy Cookbook
One of the biggest struggles people have when trying to eat healthy is finding the time.
- The Quick and Healthy Cookbook
- Baked Honey Paprika Chicken Tenders Recipe
- Beef Honey Curry Stir Fry Recipe
- Cardamom Coconut Balls Recipe
- Chicken BBQ Wrap Recipe
- Frozen Chocolate Covered Banana Treats Recipe
- Fruits & Cream Tortilla Recipe
- Goat Cheese Quesadilla Recipe
- Hawaiian Ham & Pineapple Grilled Cheese Recipe
- Honey Cheddar Sourdough Grilled Cheese Recipe
- Loaded Chicken Pasta Soup Recipe
- Mussels & Linguine Pasta Recipe
- One Pot Cantonese Noodles Recipe
- Pasta Arabiata (Filipino Style) Recipe
- Pasta With Mushroom & Asparagus Recipe
- Quick and Easy Lomein Recipe
- Sausage & Shrimp Recipe
- Sizzling Chicken Mushroom Recipe
- Smoked Pork Sausage Hakka Noodles Recipe
- Smoked Salmon Rollups Recipe
- Smoked Salmon Rollups Recipe
- Best Quick and Easy Cookbooks
With work, family and other commitments in our daily lives, finding the time to prepare healthy meals can seem impossible. Spending hours slaving away in the kitchen is probably the last thing you want after a long day and because of this, fast foods, takeouts and TV dinners can seem very appealing.
However, if you choose the right recipes, eating healthy can be fast and simple. You can cook up delicious healthy meals in mere minutes, as long as you have the right healthy recipes on hand.
This Quick & Healthy Cookbook provides you with those recipes and allows you to enjoy healthy meals in 30 minutes or less. It includes recipes that can be used for breakfast, lunch, dinner, snacks and dessert. The recipes also incorporate a wide range of tasty ingredients, so you can enjoy lots of different flavors and cuisines as you try them out.

Each recipe contains text instructions for preparing the recipe and is supported by gorgeous food photography for each step of the recipe.
So, keep reading to find a fast and delicious healthy meal you can use today!
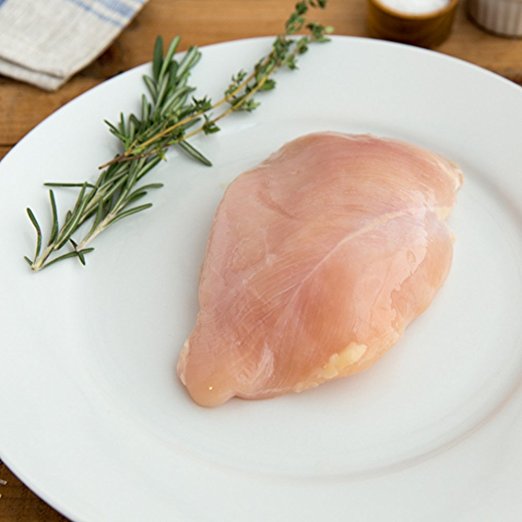
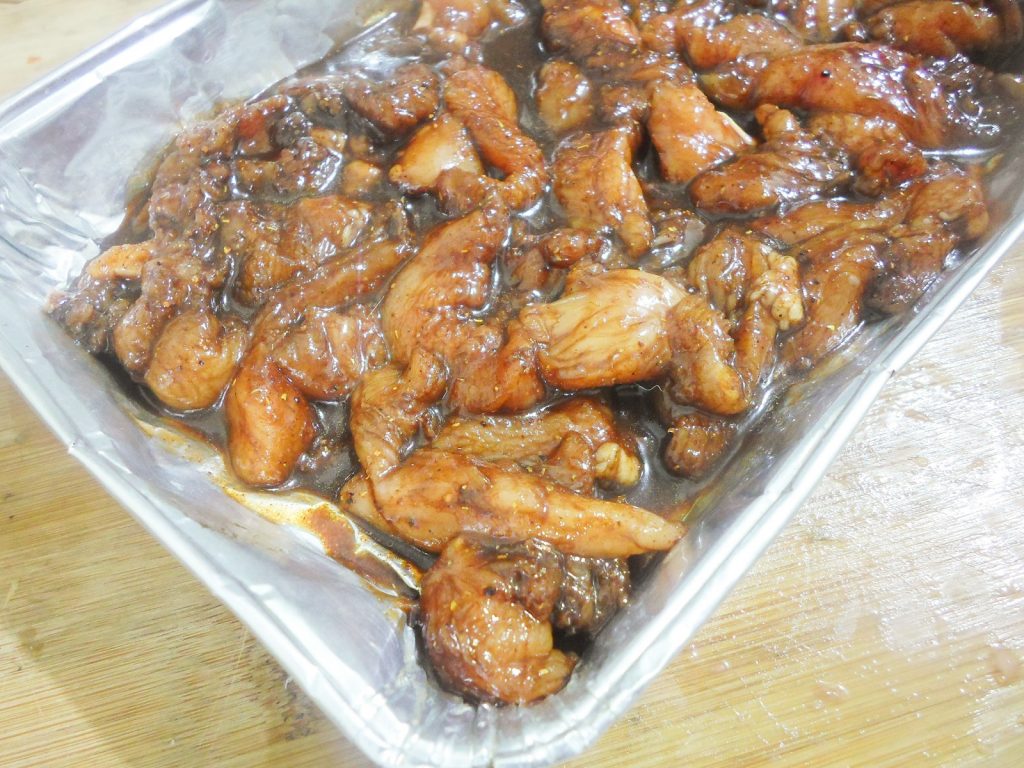
Baked Honey Paprika Chicken Tenders Recipe
Who wants to have fuss-free tasty dinners? We sure do! On a diet? Eat it with salad, or if you’re looking for something more filling, pair it with chips or rice. Try this recipe for baked honey paprika chicken tenders and you’ll surely be a fan.
What You’ll Need:
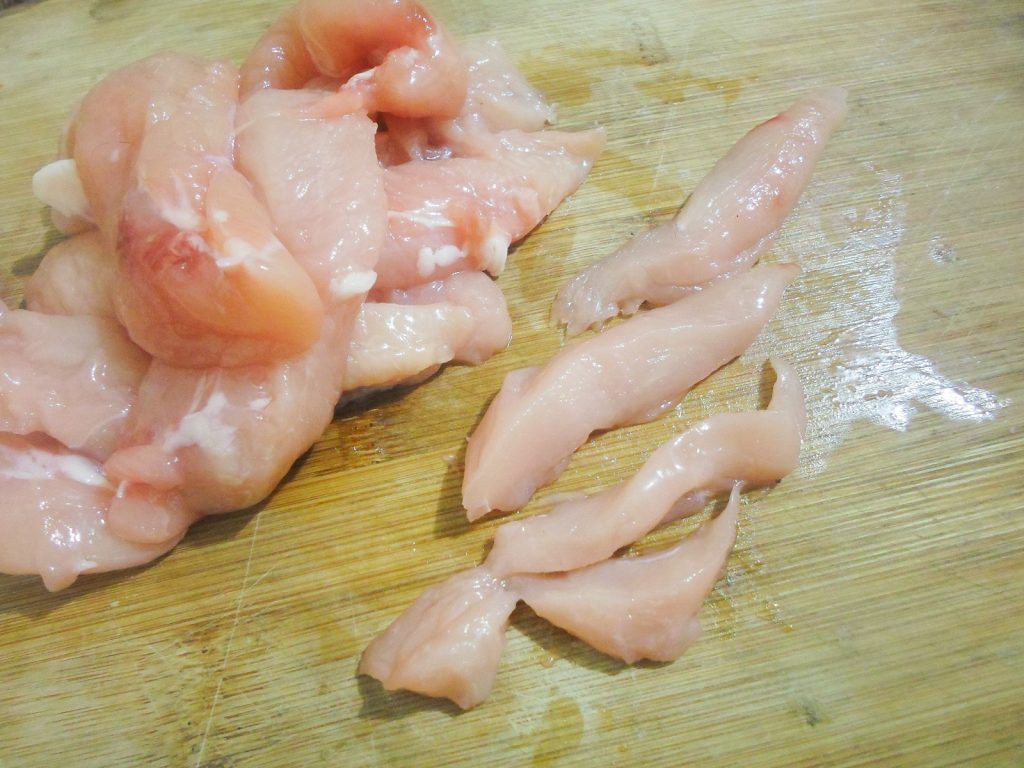
- 1 lb chicken tenders, sliced into finger-thick slices
- Half a cup honey
- 1/3 cup dark soy sauce
- 3 tablespoons olive oil
- 1 tablespoon paprika
- 1 ½ to 2 tablespoons curry powder
- Salt and pepper to taste
Let’s Get the Oven Smoking for Some Baked Honey
Paprika Chicken Tenders!
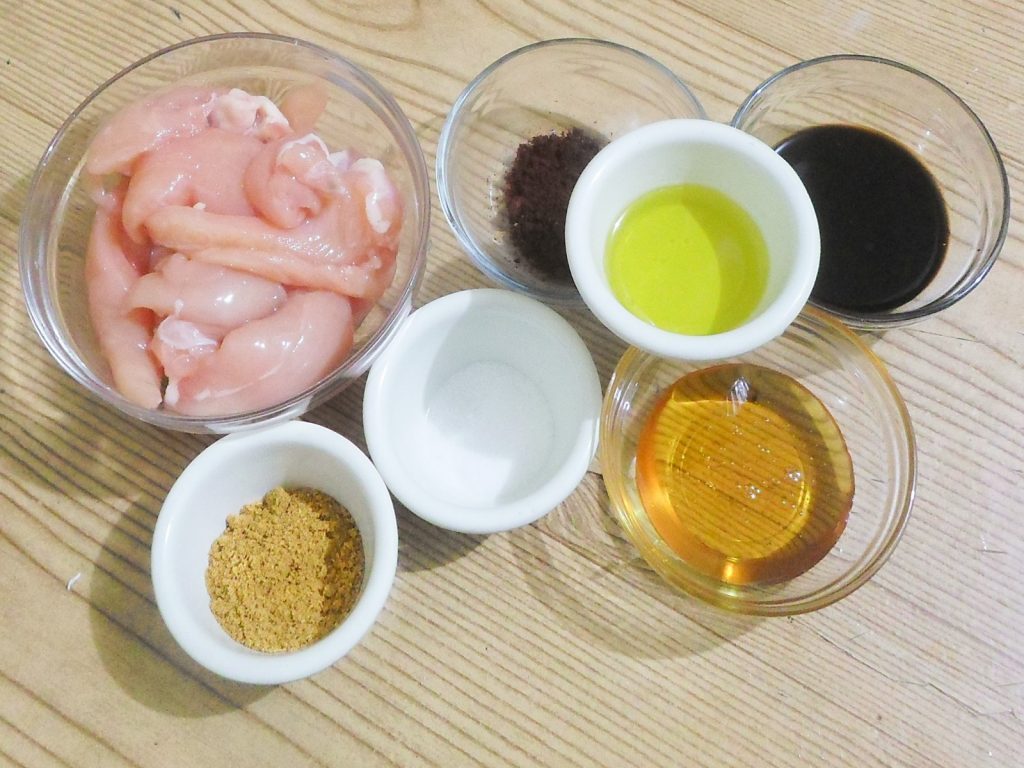
- Preheat oven to 200C and gather all your ingredients.
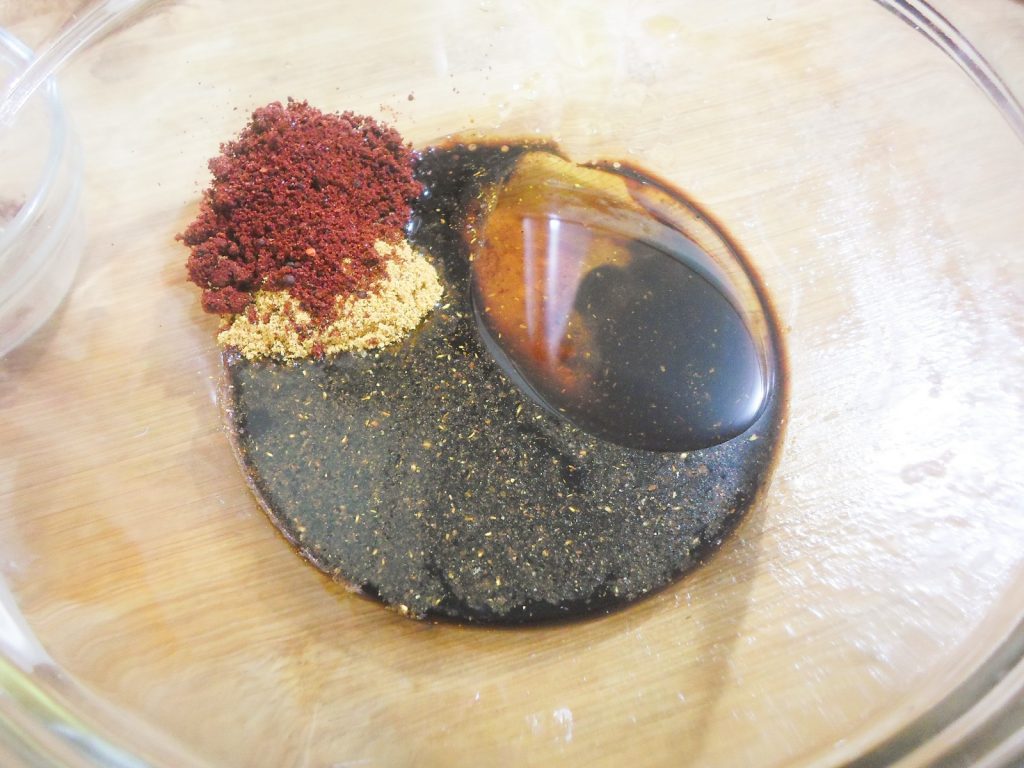
- In a bowl, combine the soy sauce, paprika, curry powder, honey, and olive oil.
- Slice the chicken into half an inch thick strips so they will cook faster and absorb more flavor.
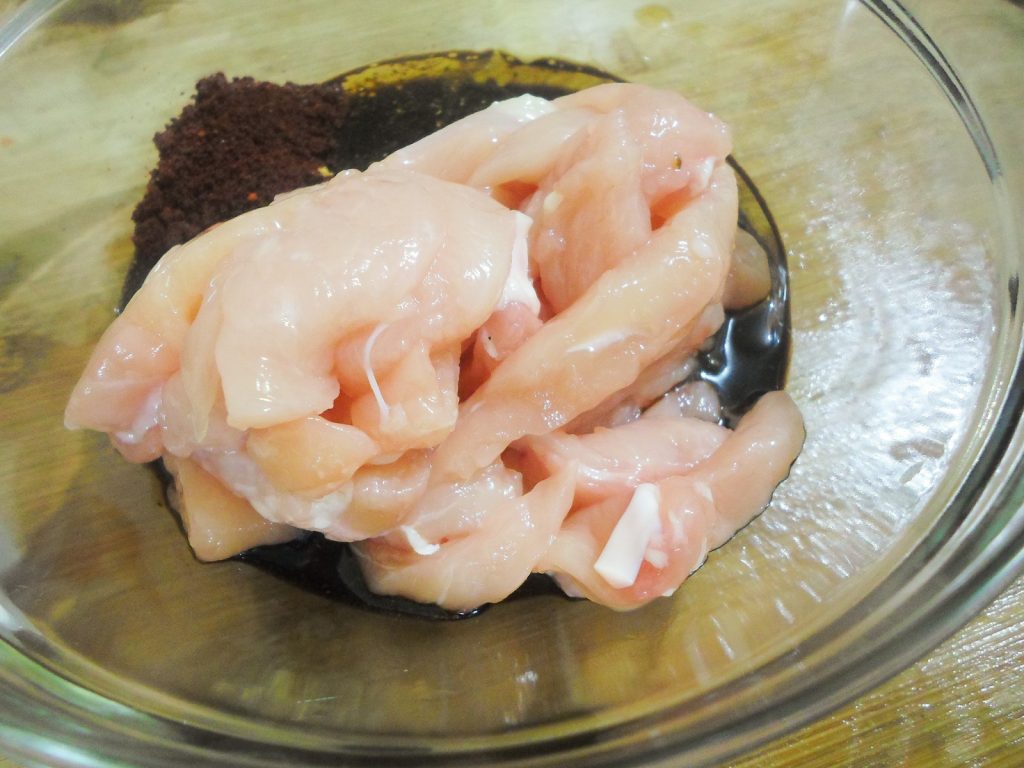
- Dump in the chicken and mix. Season with salt and pepper to taste.
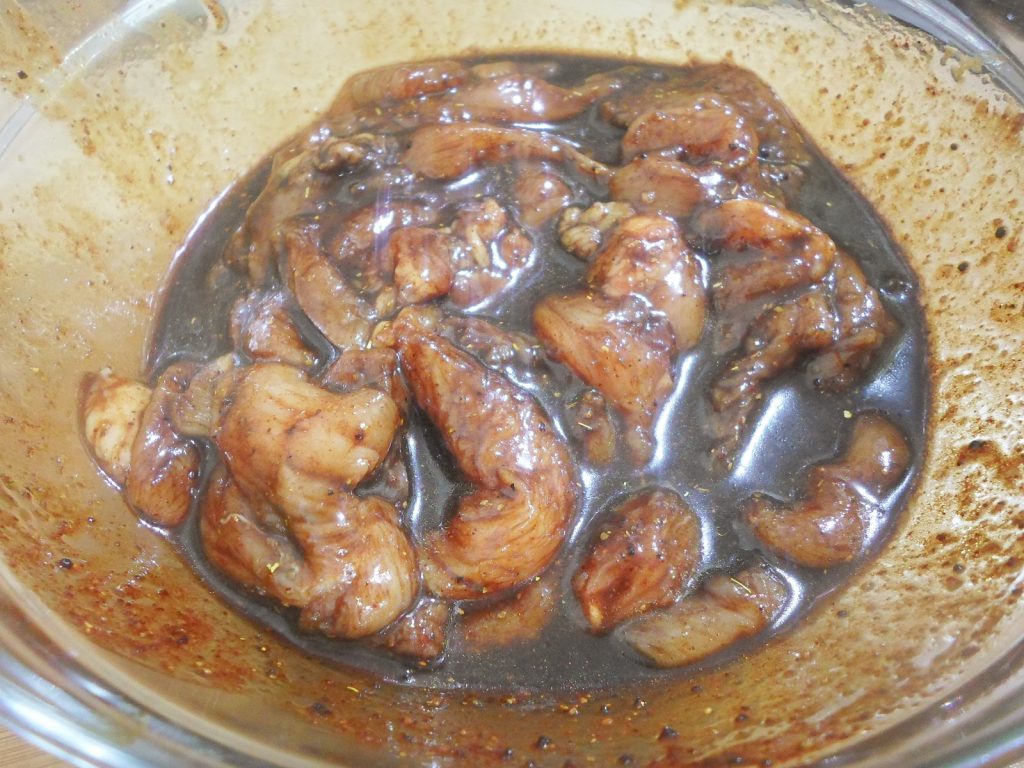
- Let the mixture stand for 10-15 minutes.
- Place in a roasting pan and spread evenly so that the chicken pieces are just 1 layer.
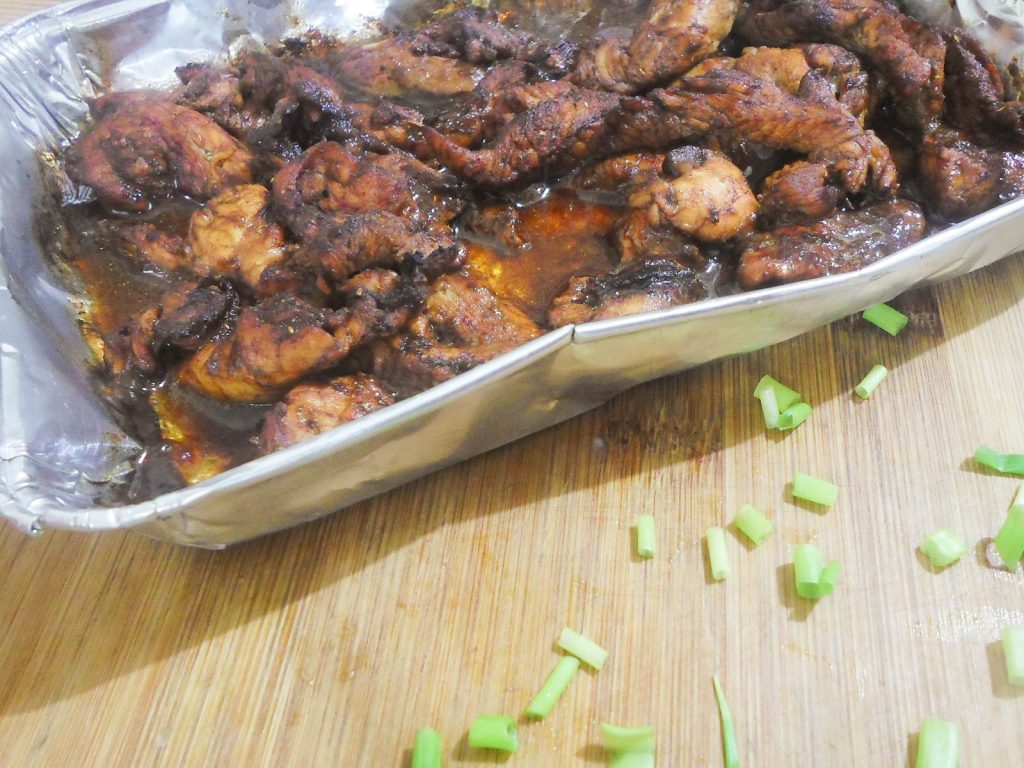
- Bake for 20 minutes and done!
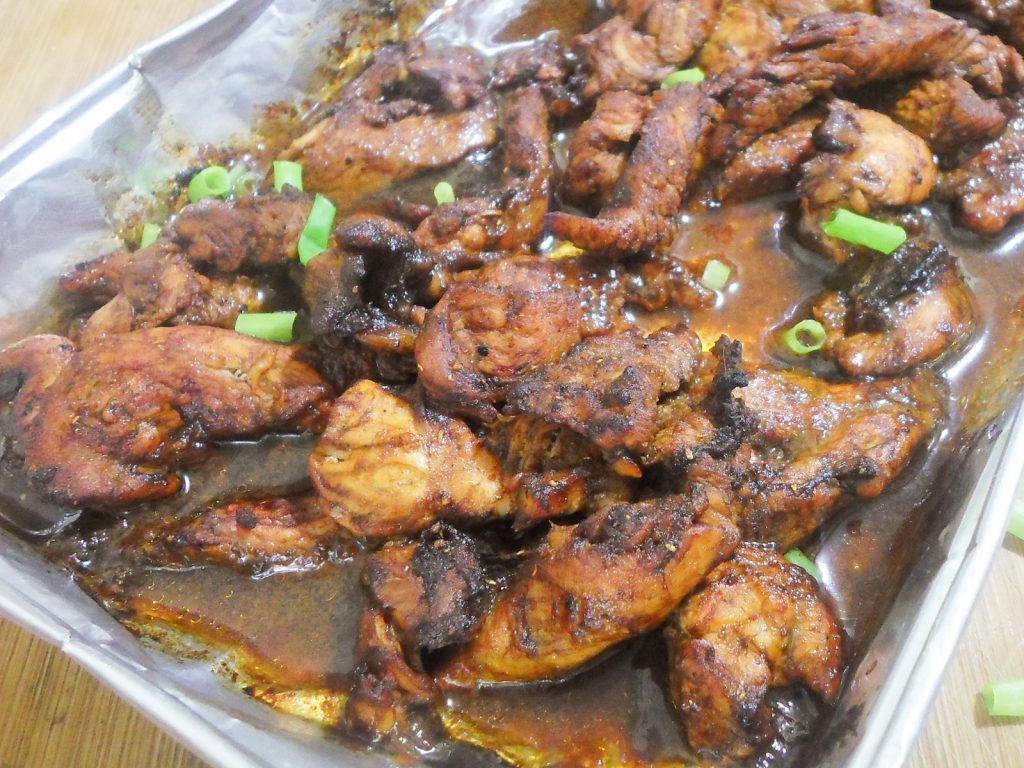
- Garnish with spring onion and enjoy!
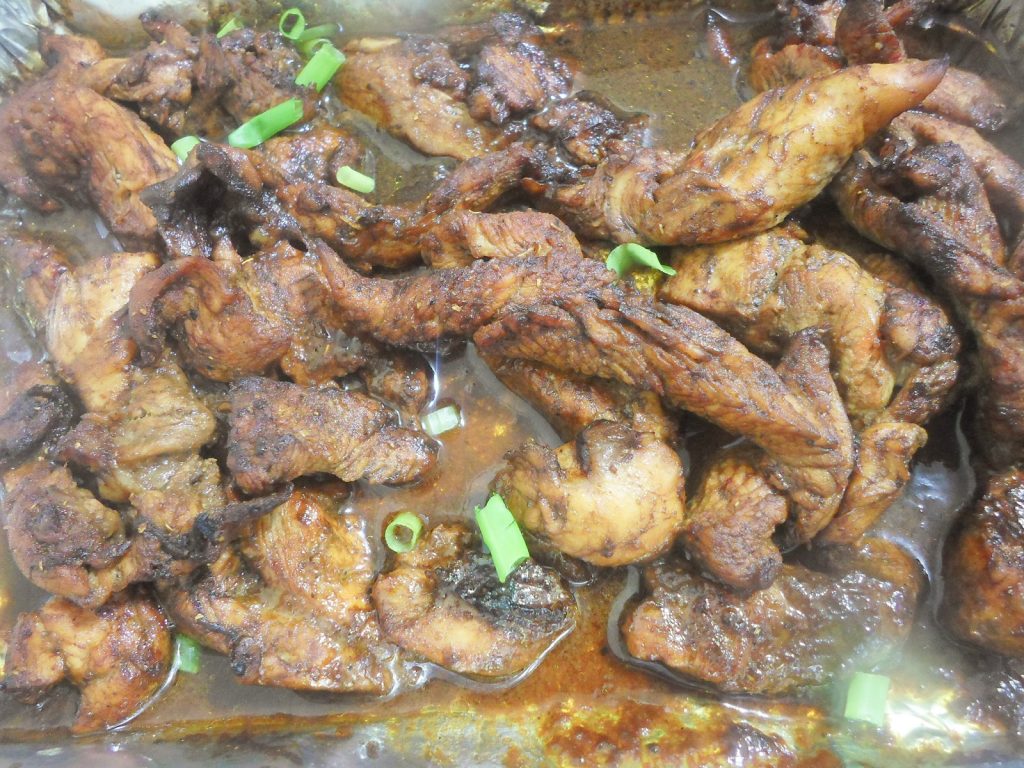
- This recipe serves 2-3 persons and the marinade/sauce can flavor up to 2 lbs of chicken if cooking for more persons.
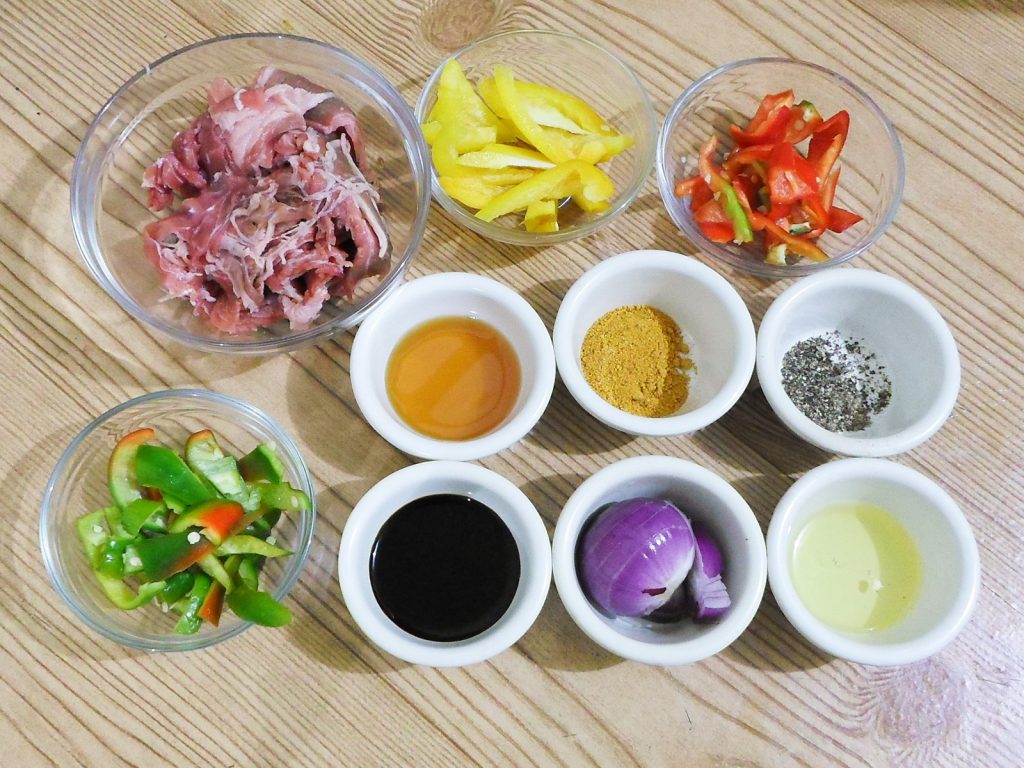
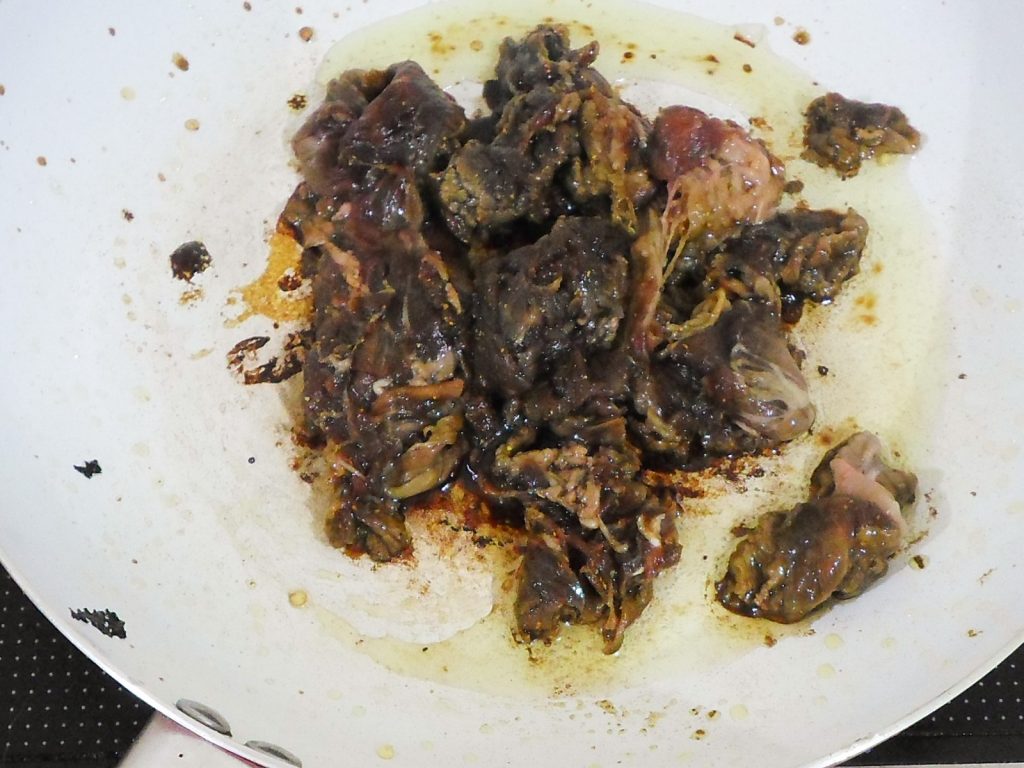
Beef Honey Curry Stir Fry Recipe
Craving something out of the ordinary but is easy to prepare and takes only a few minutes? You will surely love this recipe for Beef Honey Curry Stir Fry. Imagine succulent pieces of thinly sliced beef, in a smoky sweet and a bit spicy sauce with colorful veggies, it’s a delight is it not? This dish can be served with pita bread, pasta, noodles, or steaming hot rice, and it’s even better the next day. Yay!
What You Will Need:
- Half a pound of sukiyaki cut beef
- Half a cup of honey
- Half a cup of soy sauce
- 4 tablespoons curry powder
- 4 tablespoons of oil
- 1 teaspoon ground black pepper
- 1 medium sized red onion, sliced
- 1 medium sized red bell pepper, sliced into strips
- 1 medium sized green bell pepper, sliced into strips
- 1 medium sized yellow bell pepper, sliced into strips
Let’s Get Cooking!
- Prepare all the ingredients that you’ll need.
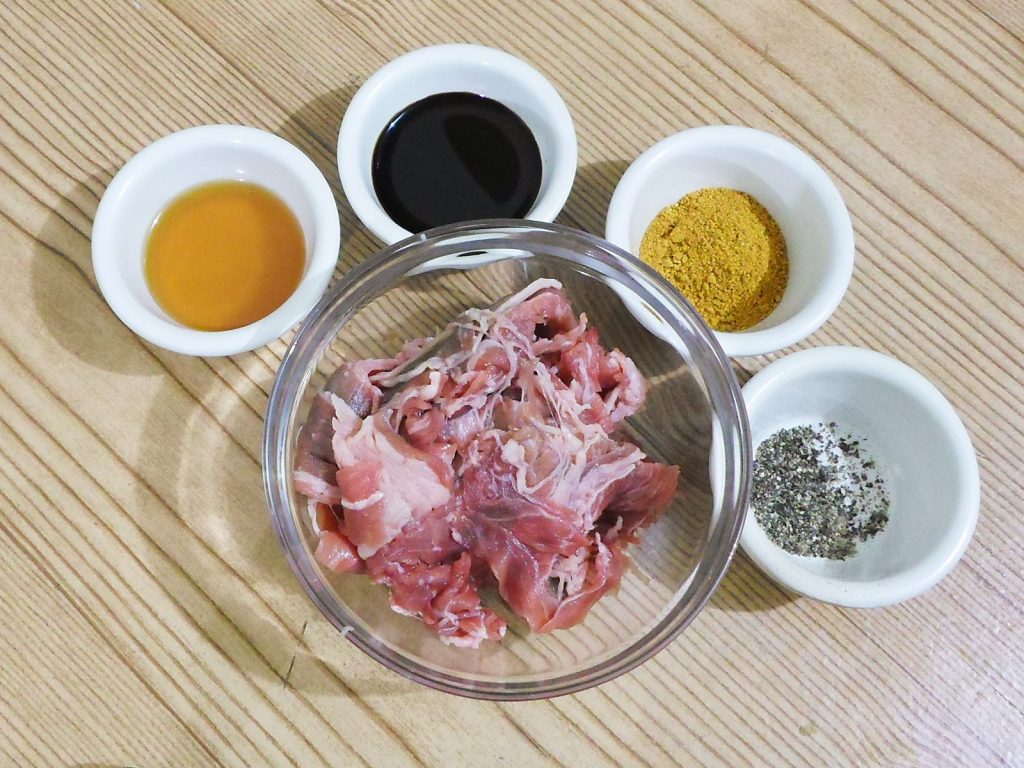
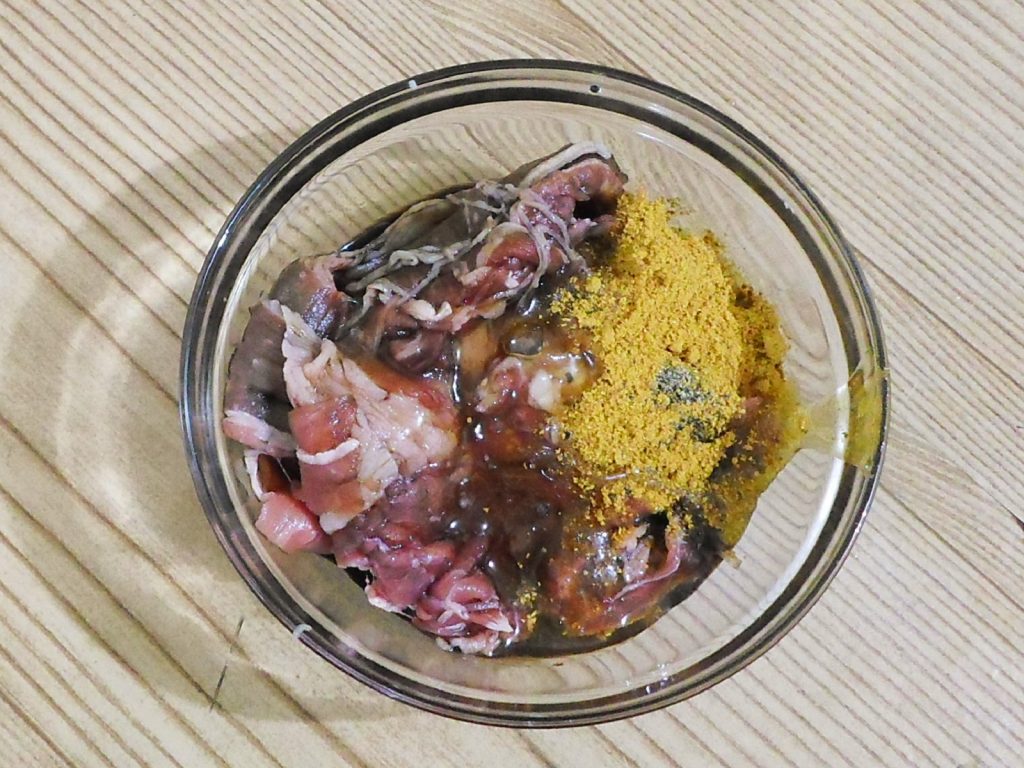
- Marinate the beef with marinade made of soy sauce, curry powder, honey and ground black pepper and let it stand for 15 minutes.
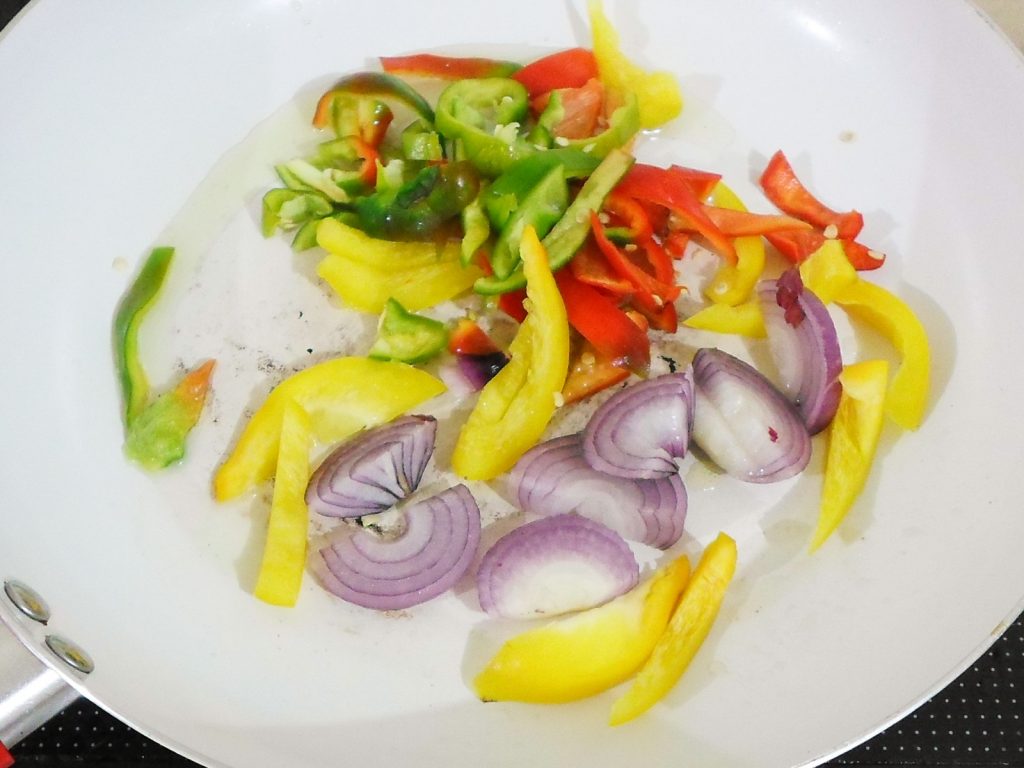
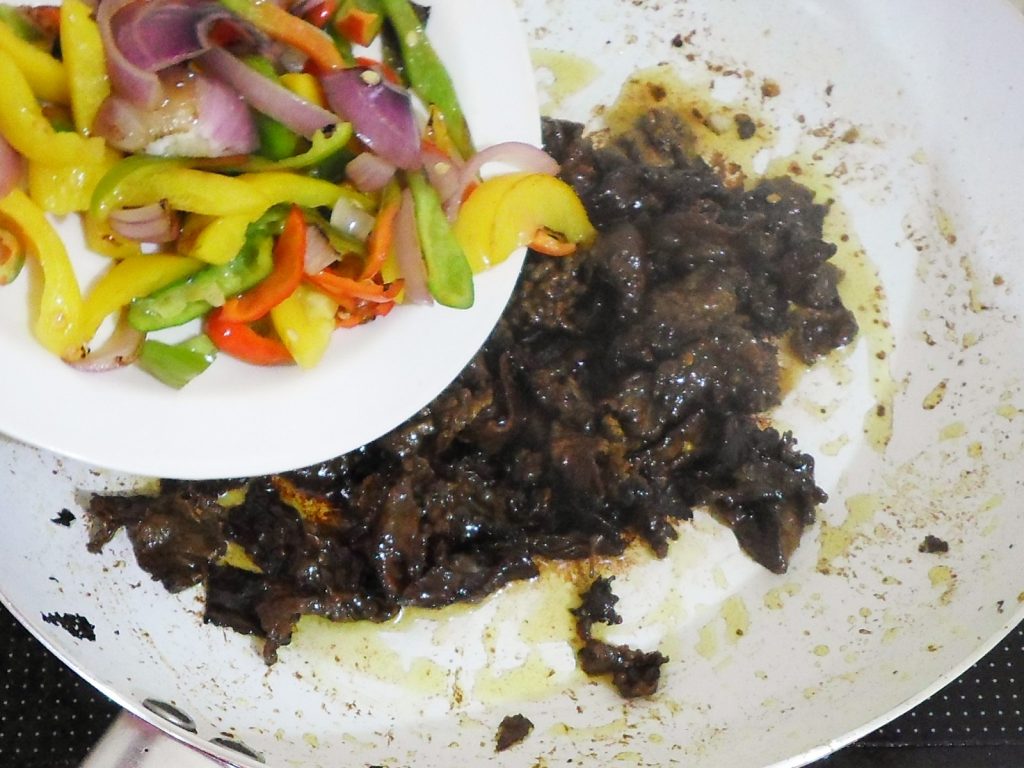
- Using half of the oil, sauté the red bell pepper, green bell pepper, red onion and yellow bell pepper over high heat for a few minutes (usually just a little over a minute), taking care that the vegetables are cooked but not wilted. They should remain crunchy for great texture. Take the cooked vegetables off the pan and set aside.
- In the same pan, add in the remaining half of the oil and cook the beef together with the marinade over medium heat until the sauce thickens and the beef is cooked through. This only takes 3-5 minutes. Turn off the heat.
- Toss the cooked vegetables with the beef in the pan to coat it with some of the sauce and to bring all the flavors together.
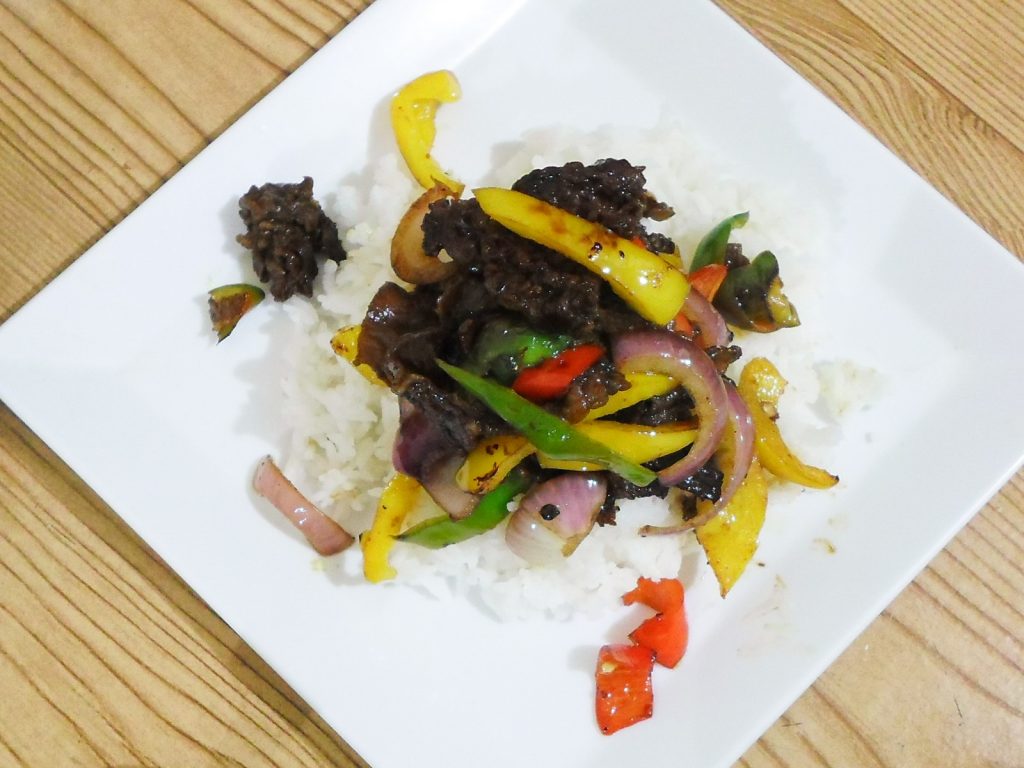
- Serve over steaming hot rice, mashed potato, or even pasta! This recipe makes for about 3-4 servings.
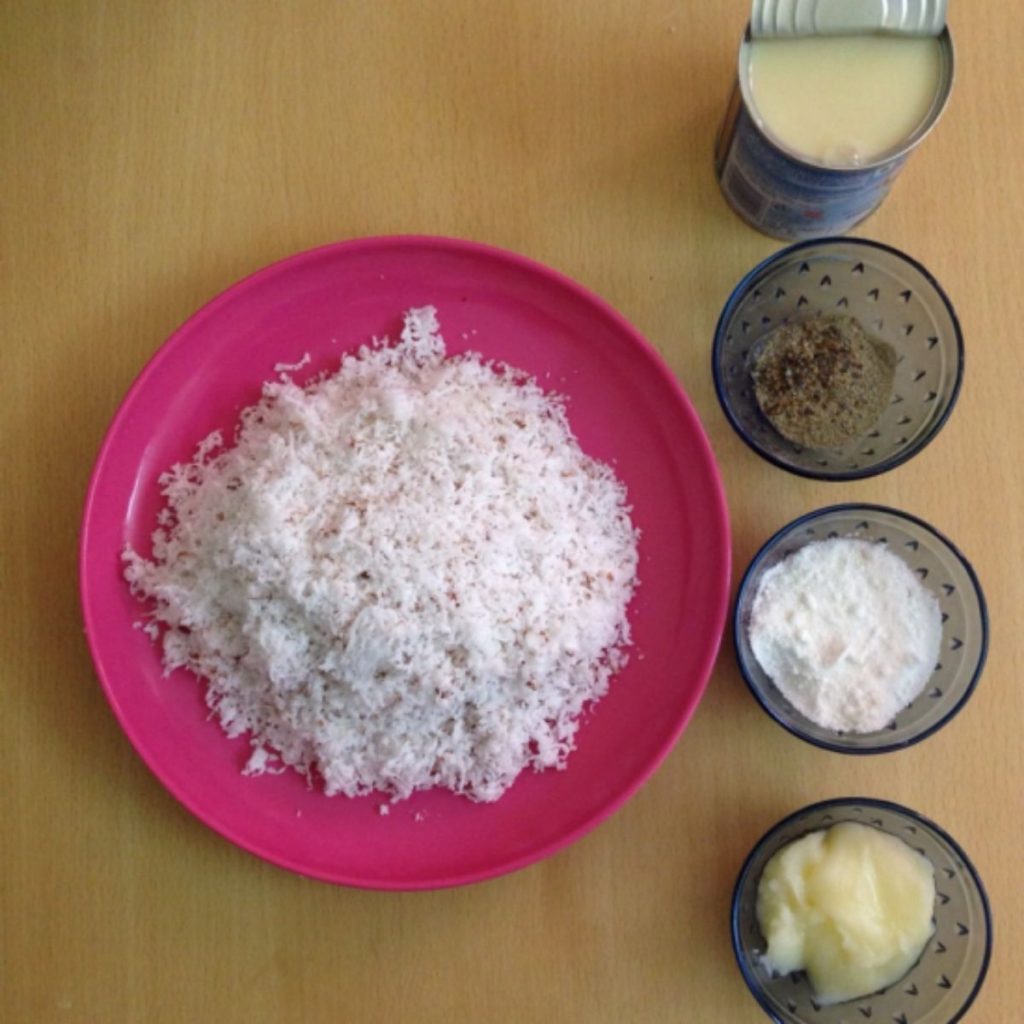
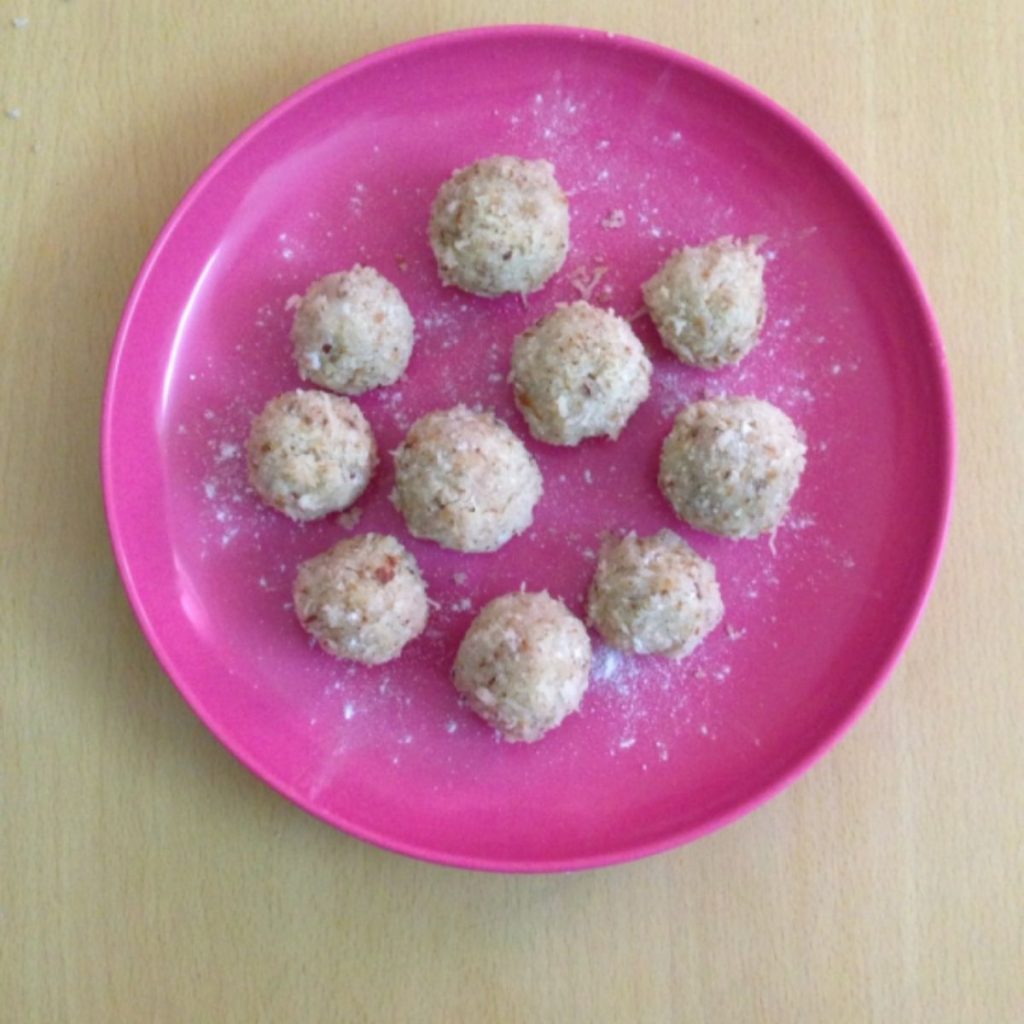
Cardamom Coconut Balls Recipe
This recipe is a not only simple but very quick to make, and can be prepared within 20 minutes. This coconut cardamom ball is a very tasty dish and is usually eaten at the end of a meal and is served or distributed at special occasions. If you have a sweet tooth this recipe is a must try. So let’s gets started!
What You’ll Need:
- Dry Coconut Powder
- Cardamom Power – 1 tbsp.
- Grated Coconut – 1 ½ coconut
- Clarified Butter (Ghee) – 2 tbsp.
- Condensed Milk – 2 tbsp.
Preparation:
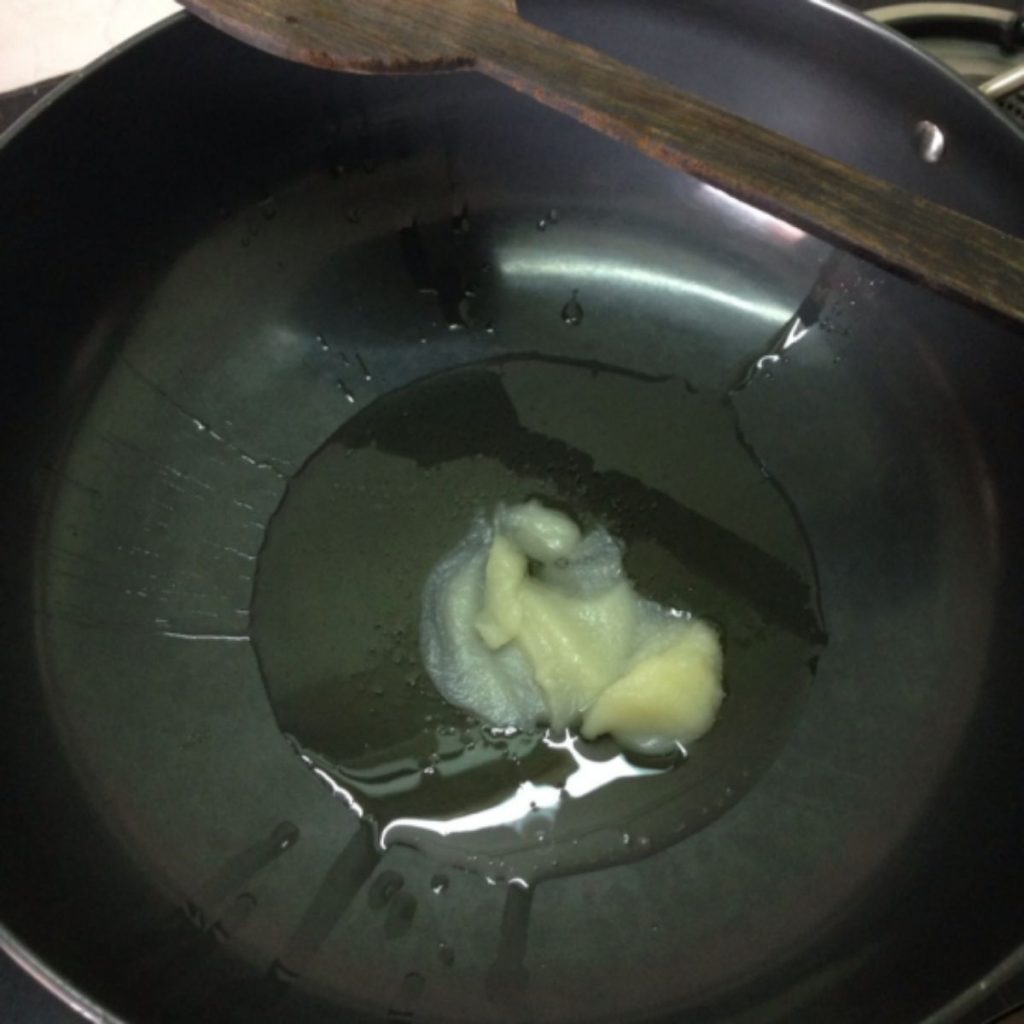
- Add 2 tbsp. of clarified butter into a heated nonstick pan.
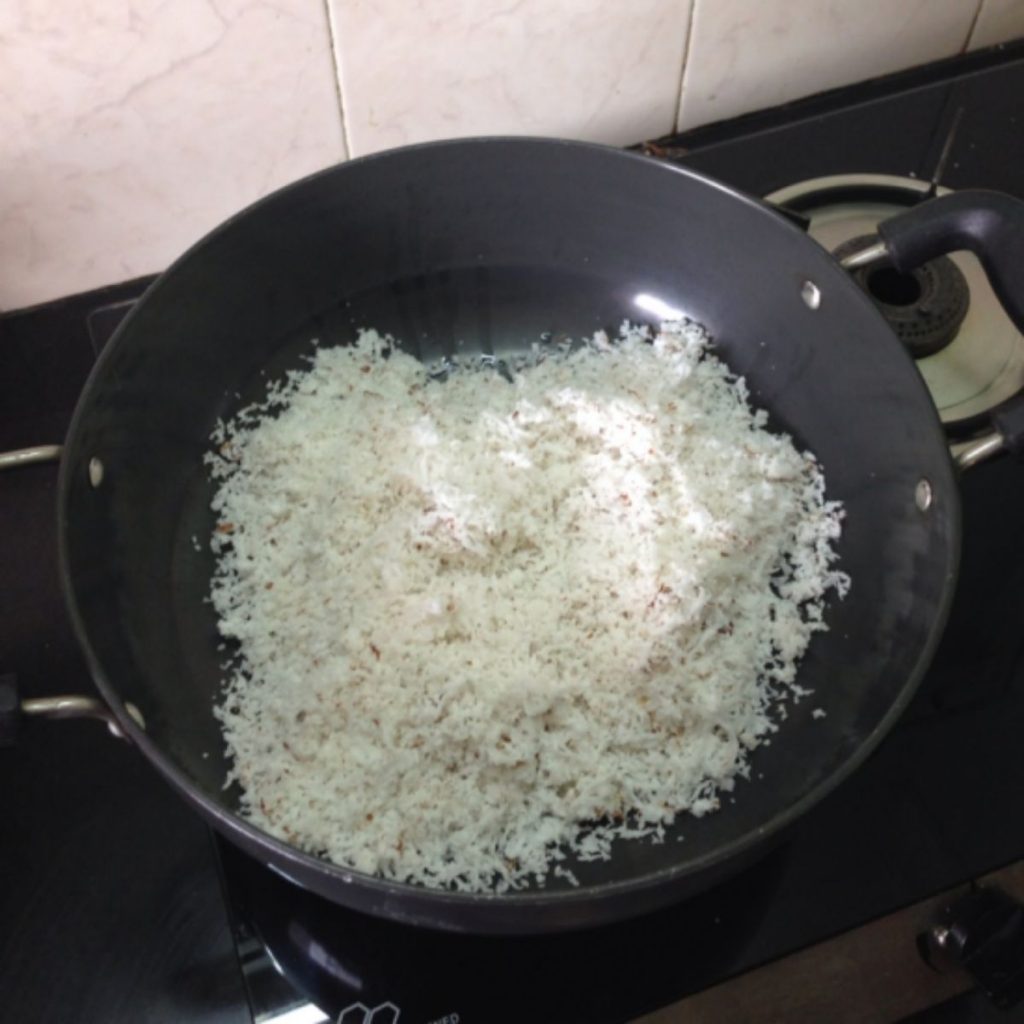
- Add the grated coconut into the pan.
- Cook it till it turns slightly golden brown.
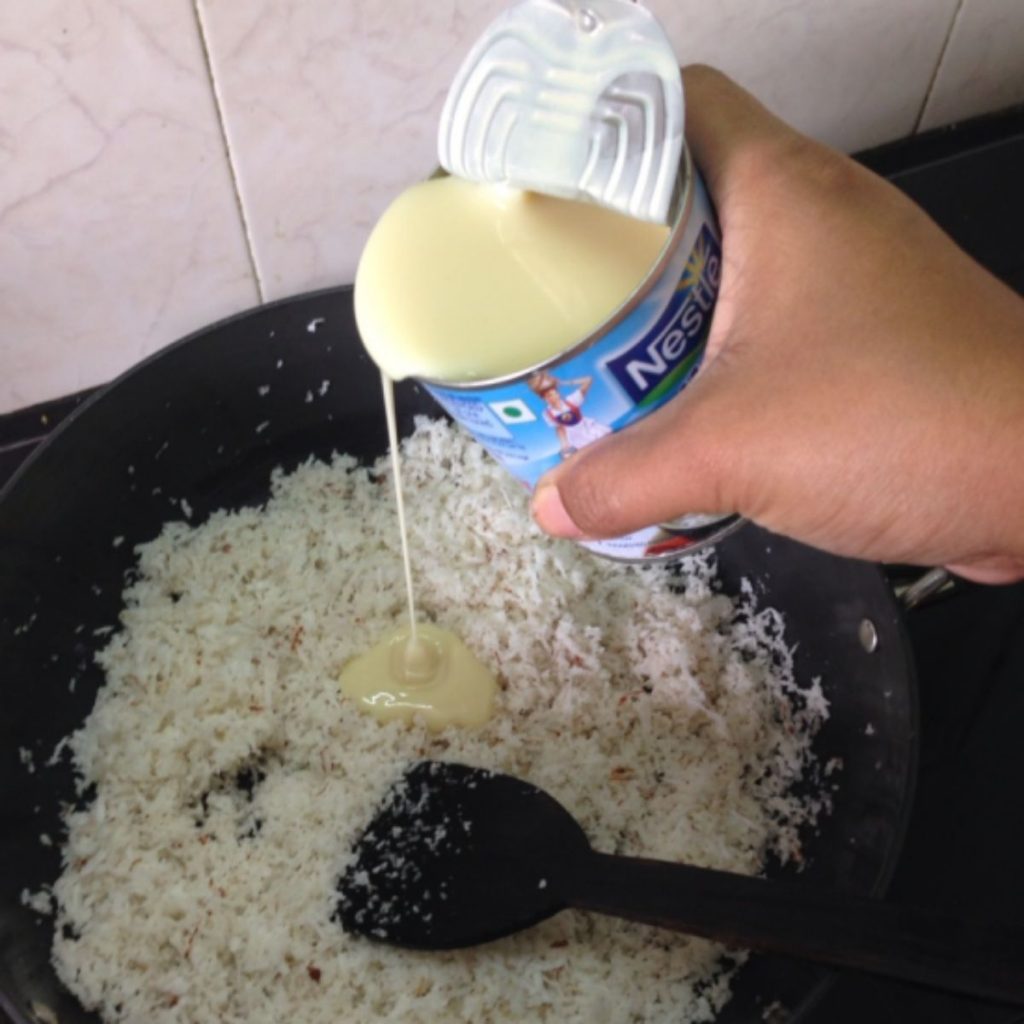
- Then add the condensed milk. I added 2 tbsp. of condensed milk into it. The choice is actually yours. If you like it sweet you can add more.
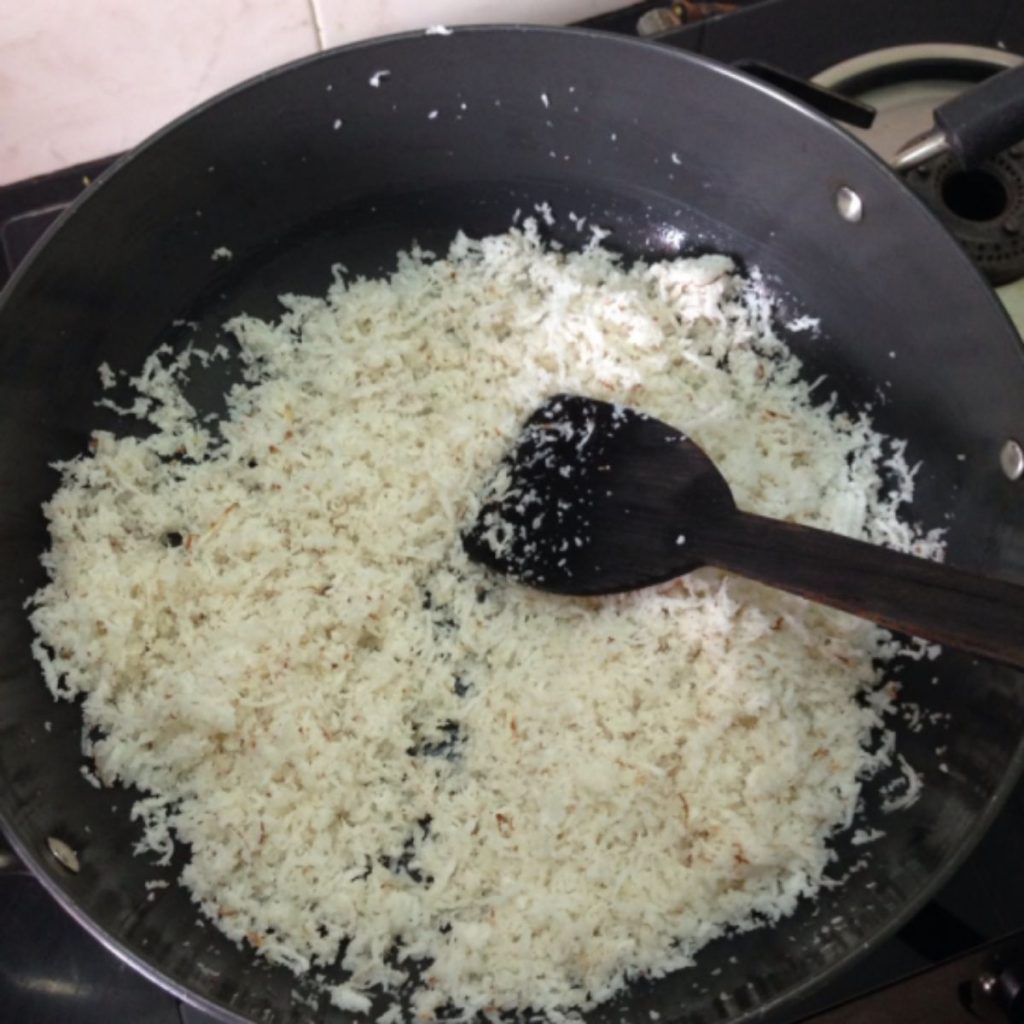
- Cook for 5 minutes. The coconut will cook better with the condensed milk in it. The coconut will absorb the condensed milk.
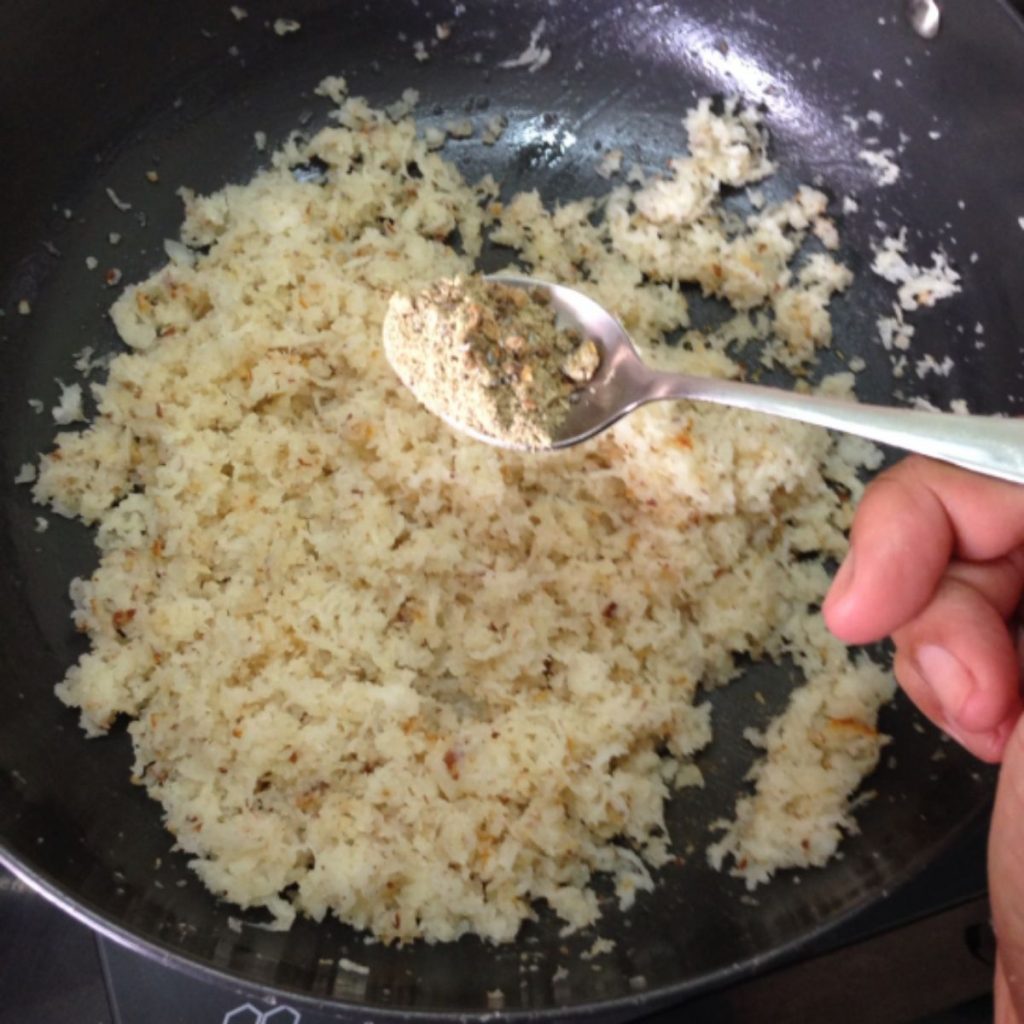
- Add 1 tbsp. of Cardamom Powder into the mixture. Cook it till it becomes slightly more golden brown and then take it off the pan and let it cool down.

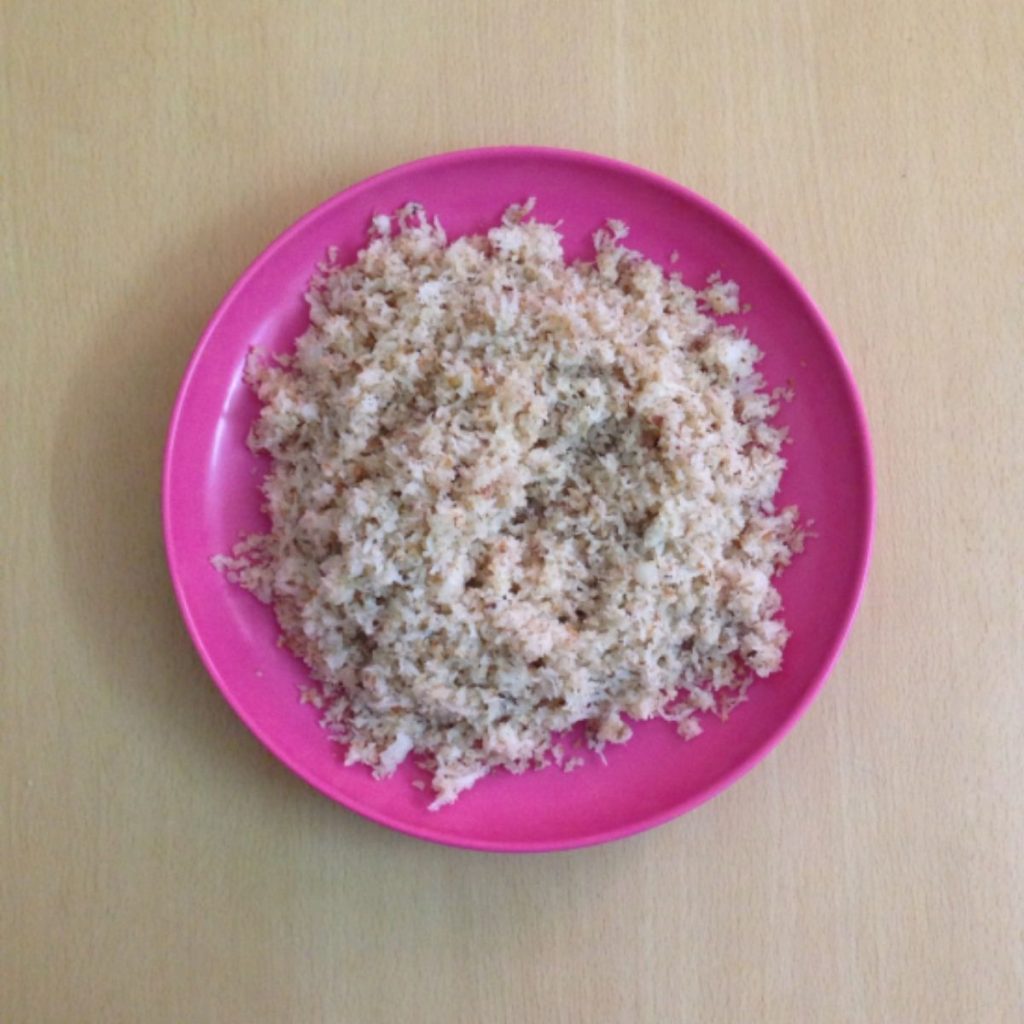
- Then in another plate add the dry coconut powder.
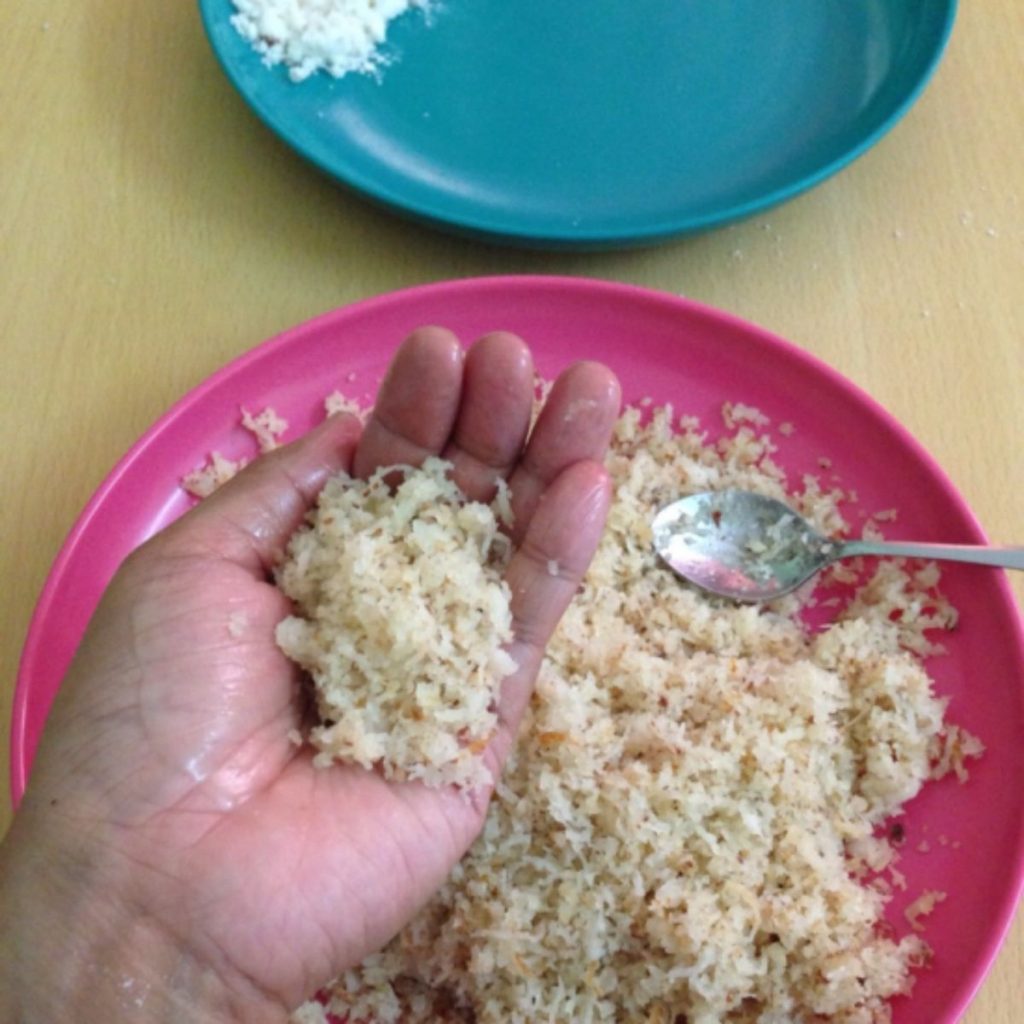
- Apply some clarified butter on your palm and then take 2 spoons of the mixture into your palm.
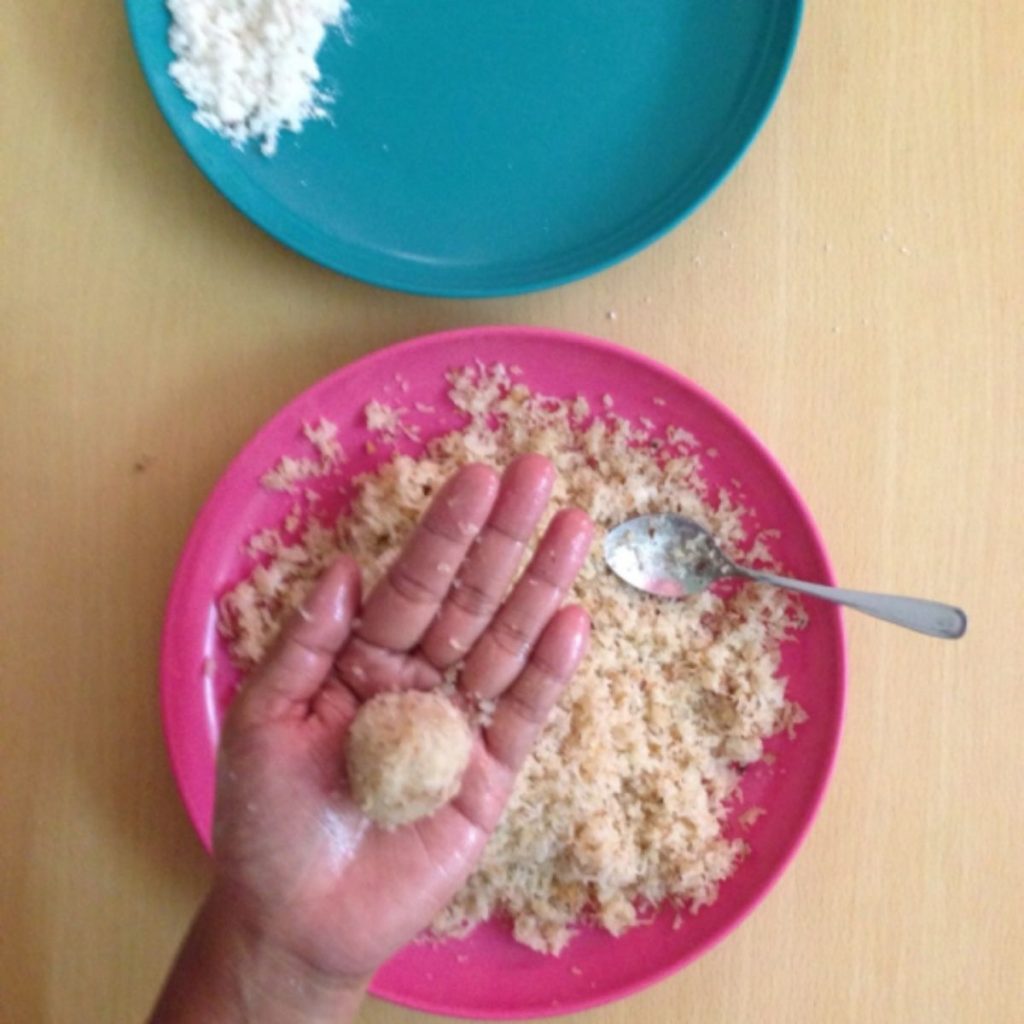
- Make a ball out of the mixture in your hand.
- Once you have acquired the right shape put the cardamom coconut ball into the dry coconut powder and cover it up. This will secure the ball from falling apart.
- There you go, simple Cardamom Coconut Balls are ready to be eaten. Enjoy!
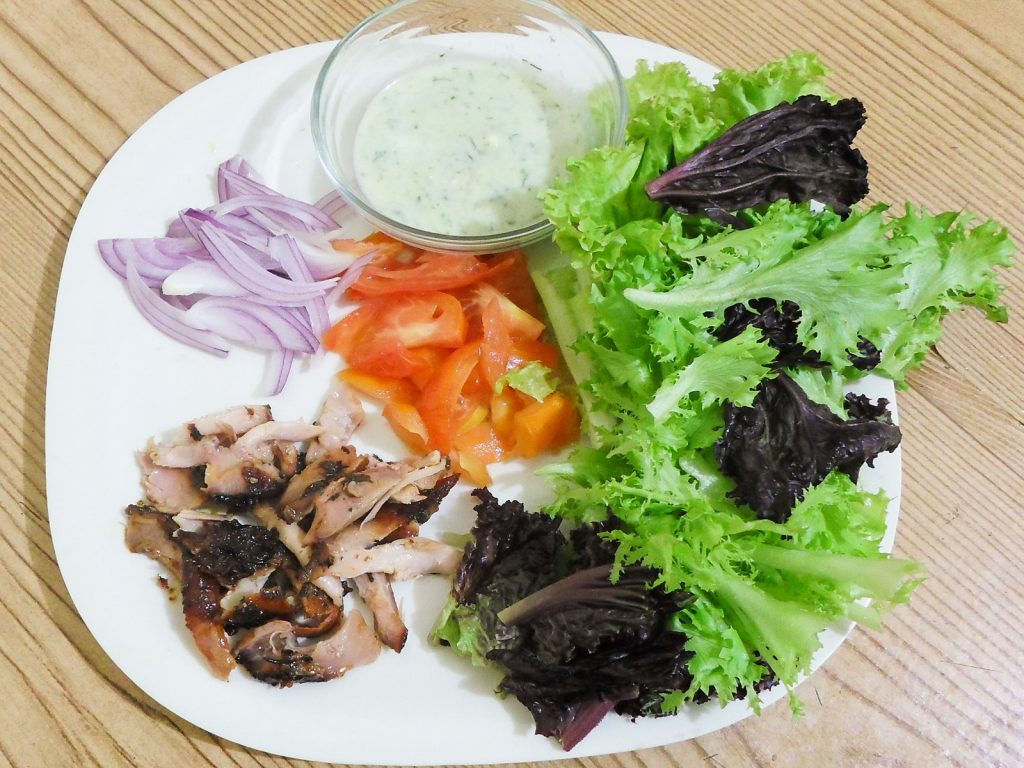
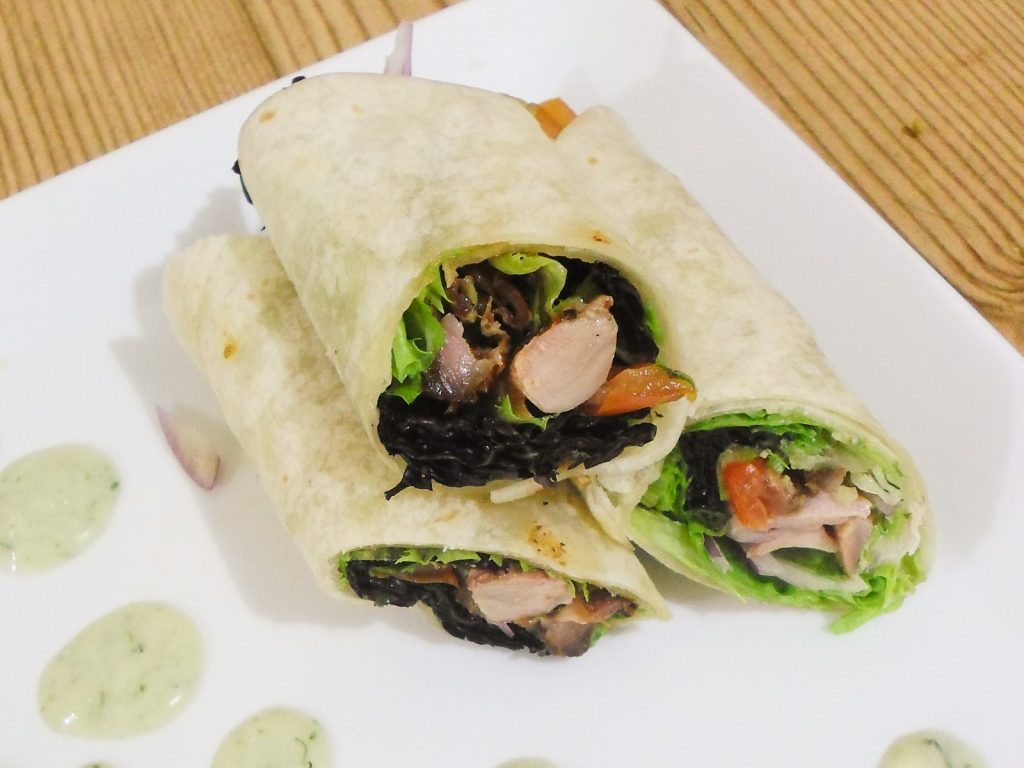
Chicken BBQ Wrap Recipe
With the good weather comes afternoons and evenings spent barbecuing and grilling your favorite meat but what can you do with the leftovers? If you have some leftover chicken barbecue or even some leftover chicken from the deli, you can easily transform that into another superb meal which is great both hot and cold. Not only that, it also performs well as packed lunch and picnic food too!
What You’ll Need:
- ½ cup of shredded chicken meat (from chicken barbecue or perhaps roasted chicken
- 1 10-12 inch flour tortilla
- 1 small red onion, chopped thinly
- 2 small tomatoes or 1 big one, sliced thinly as well
- 1/3-1/2 cup ranch dressing or your favorite creamy and tart dressing
- 2 cups of assorted lettuce leaves or your favorite greens
Let’s Wrap Up Some Chicken Barbecue Tortilla!
- Make sure you’ve got all the ingredients that you need.

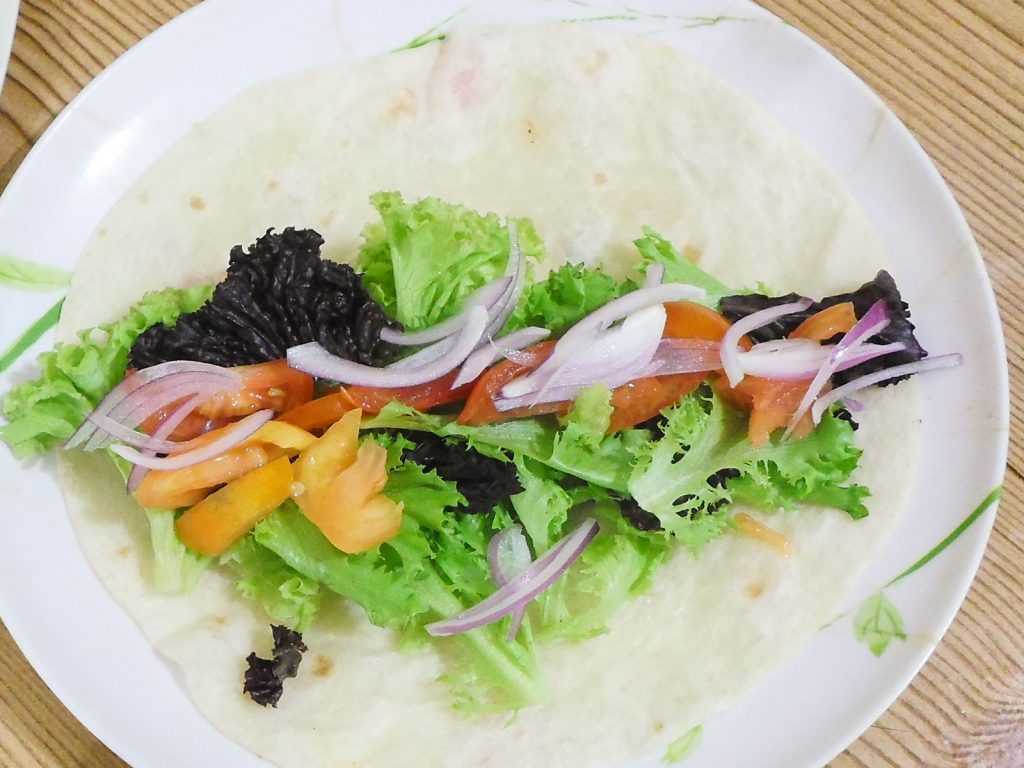
- Prepare the ingredients, chop what need to be chopped, shred what needs to be shredded and heat the flour tortilla in your pan. Allow to cool.
- It’s time to wrap things up! Just layer the tomatoes, onions, and lettuce on top on the tortilla.
- Add in the chicken and top it off with 2-3 tablespoons of the ranch dressing.
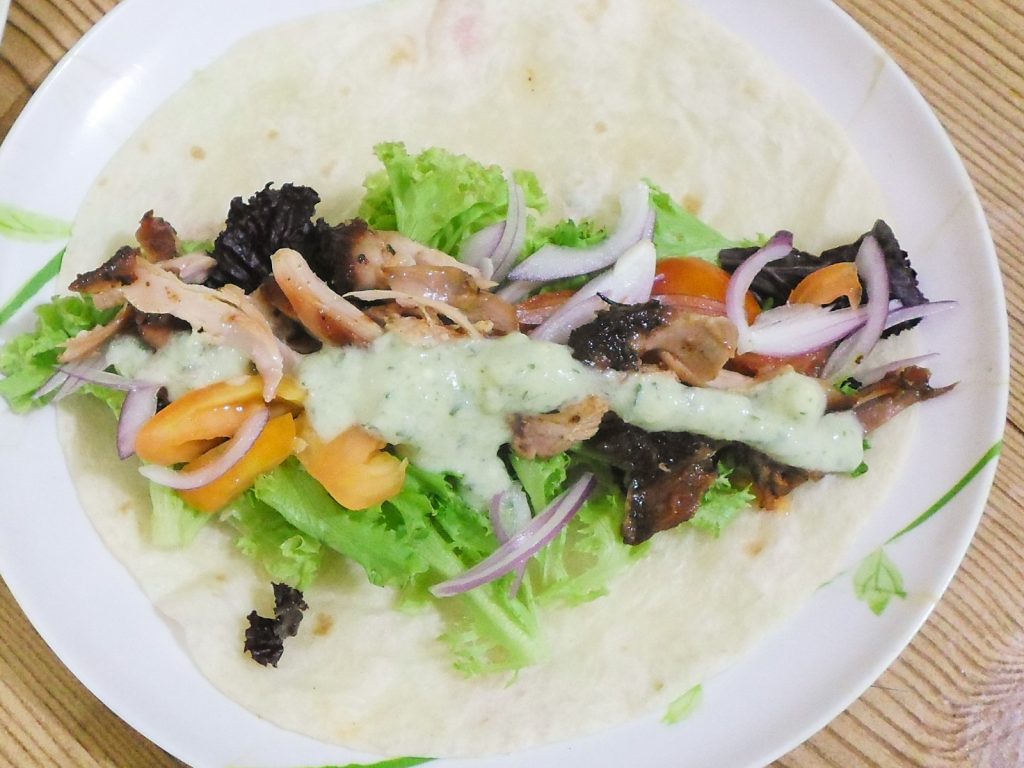
- Roll it tightly and slice up, or serve as 1 whole piece as a complete meal!
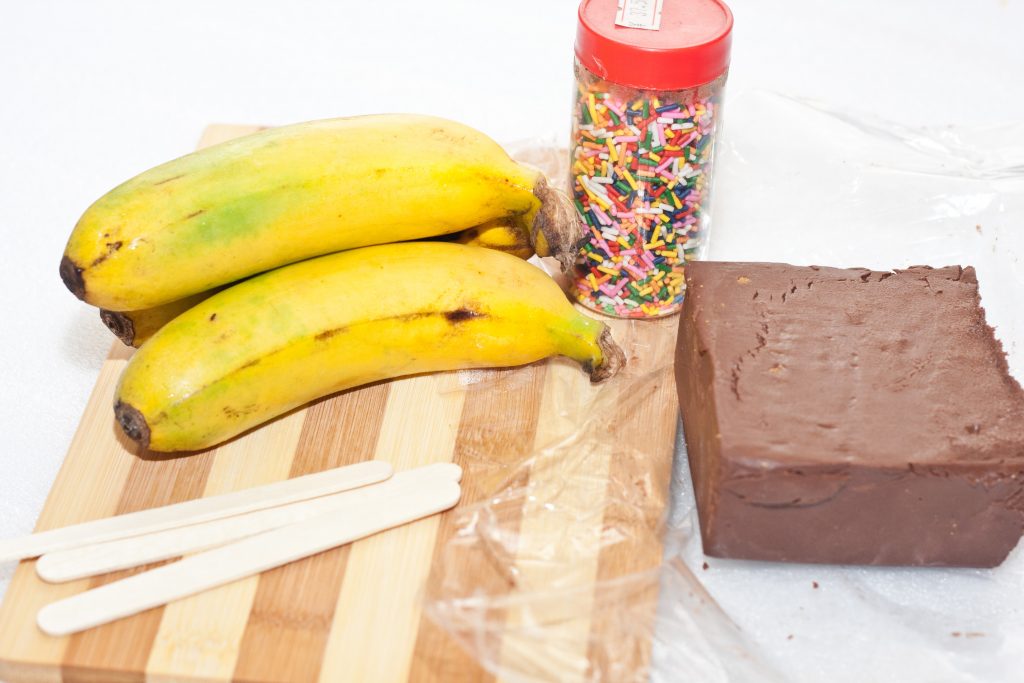
Frozen Chocolate Covered Banana Treats Recipe
Do you need a quick yet attractive looking treats for your upcoming party or reunion? Or are you finding cool kitchen activities that you love to do with your kids? Or better yet, your kids hate bananas? Then this is the right tutorial for you! Today we will be making a quick, yet fun activity that would definitely catch the attention of your kids or guest. You can make several of these in minutes and you can finish in no time!
This will not only encourage your kids to eat bananas, but this is also a healthy alternative to junk foods that your kids maybe addicted to. So if you are interested, then let us start making this!
What You’ll Need:
- Several bananas
- A block of sweetened chocolate
- Several popsicle sticks
- Rainbow sprinkles
Method:
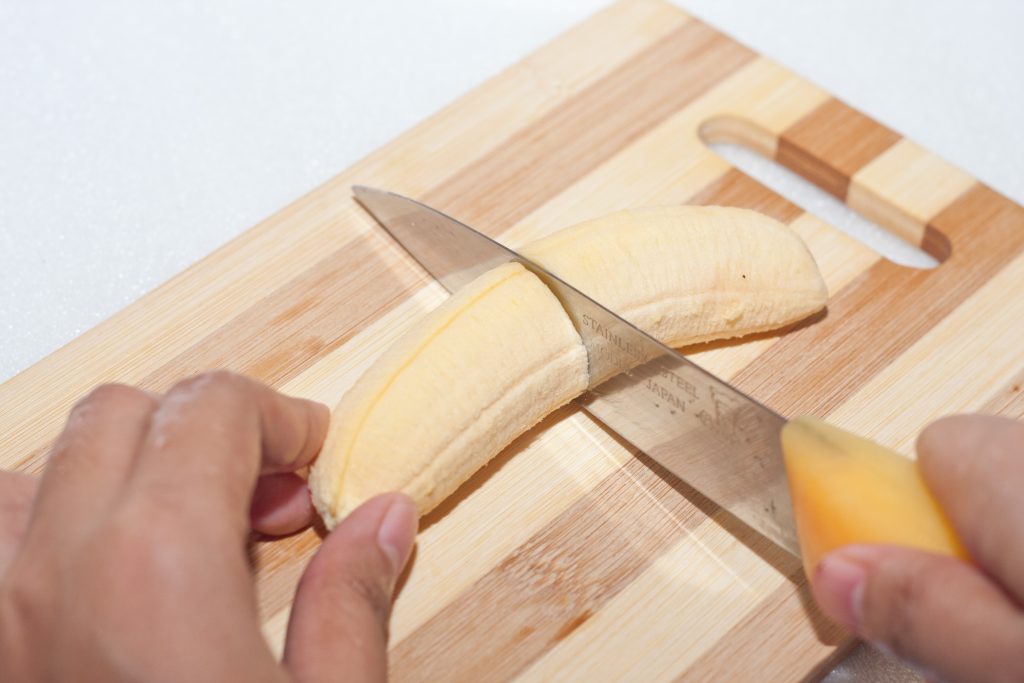
- Peel the bananas.

- Cut the bananas in half.
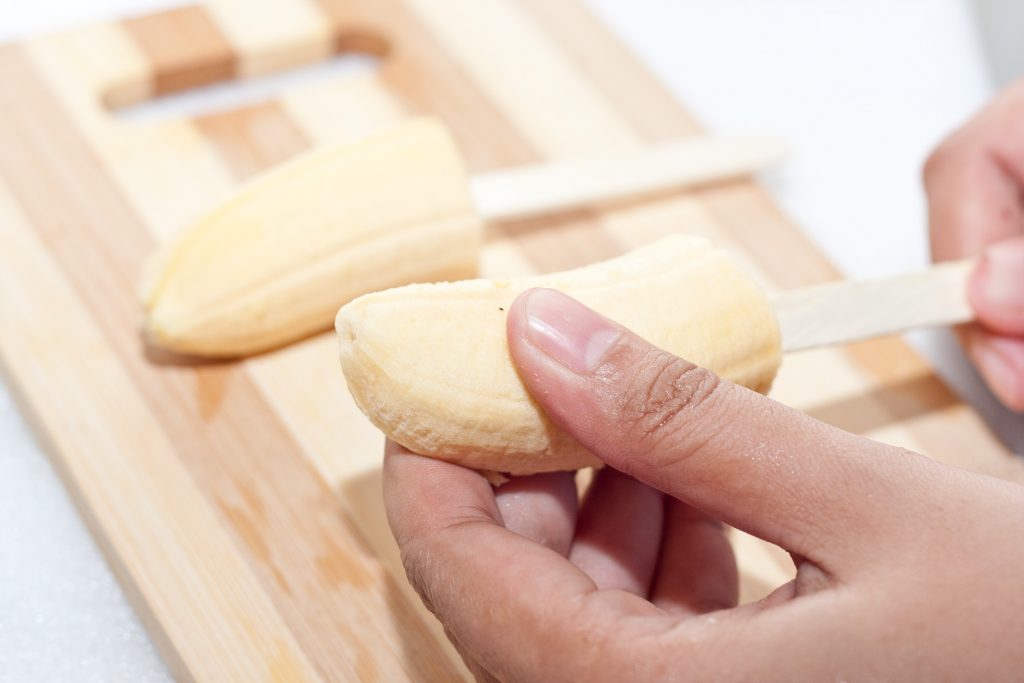
- Stick the bananas on the popsicle sticks.
- Slice the chocolate bar into small pieces and place it in a microwavable bowl or container.
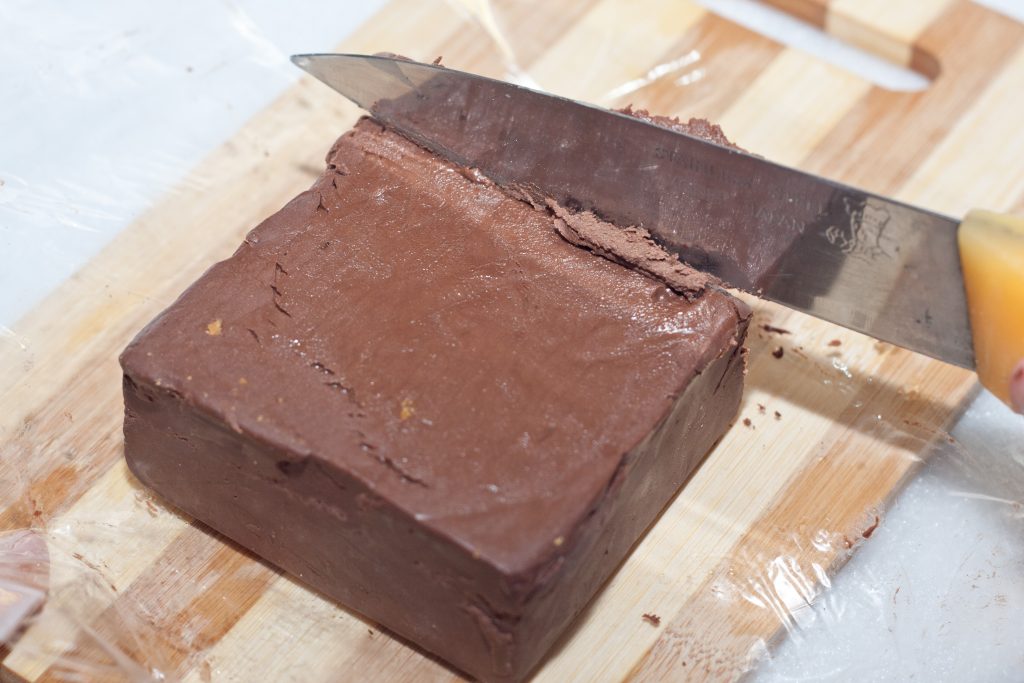
- Place the chocolate in a microwave oven for 2 to 3 minutes. Make sure to check the chocolate every minute to make sure that the chocolate will melt evenly and prevent it from burning.

- Dip the banana on the melted chocolate. Be quick in doing this step since most of the melted chocolate tends to solidify in an instant. That would still vary on the type of chocolate bar you used. You have the option to cover it completely or leave the bottom part bare, it is all up to you.

- Carefully sprinkle the rainbow sprinkles around the chocolate-covered banana. This is perfectly done when the chocolate is still in its liquid or semi-liquid state. Put the chocolate-covered bananas in the freezer for 30 minutes.

- Finally done! You can now serve the chocolate covered bananas to your guest or your kids!

This frozen chocolate banana can also be consumed immediately without using the fridge at all. This is a perfect treat for your kids who don’t love bananas at all. They would definitely love this and will surely be attracted with the multicolored presentation of the treats. Hope you liked it! Enjoy!

Fruits & Cream Tortilla Recipe
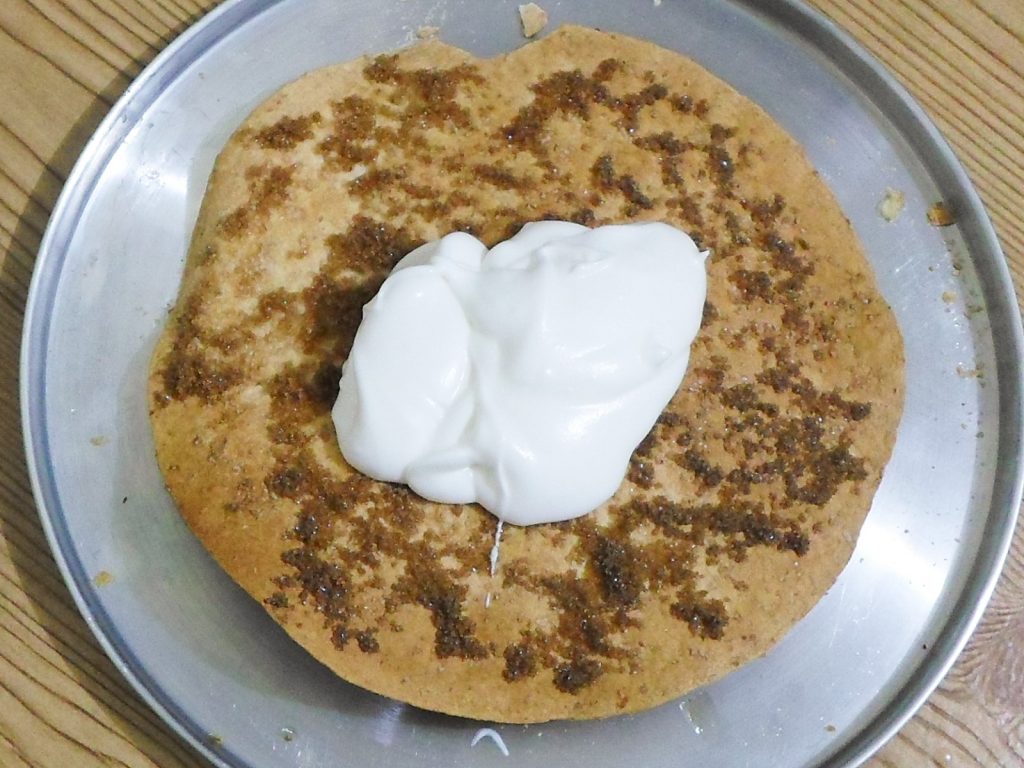
For an exceptional twist on fruit desserts, try this fruits and cream tortilla recipe. You may have this as a snack, as a dessert, or just to have something new and unique to indulge your sweet tooth. Imagine crisped up whole wheat tortilla smothered in fluffy whipped cream with a hidden brown sugar crunch and some tart berries. It’s refreshing and indulgent at the same time.
What You Will Need:
- 1 10-12 inch whole wheat tortilla (you may use a regular one instead)
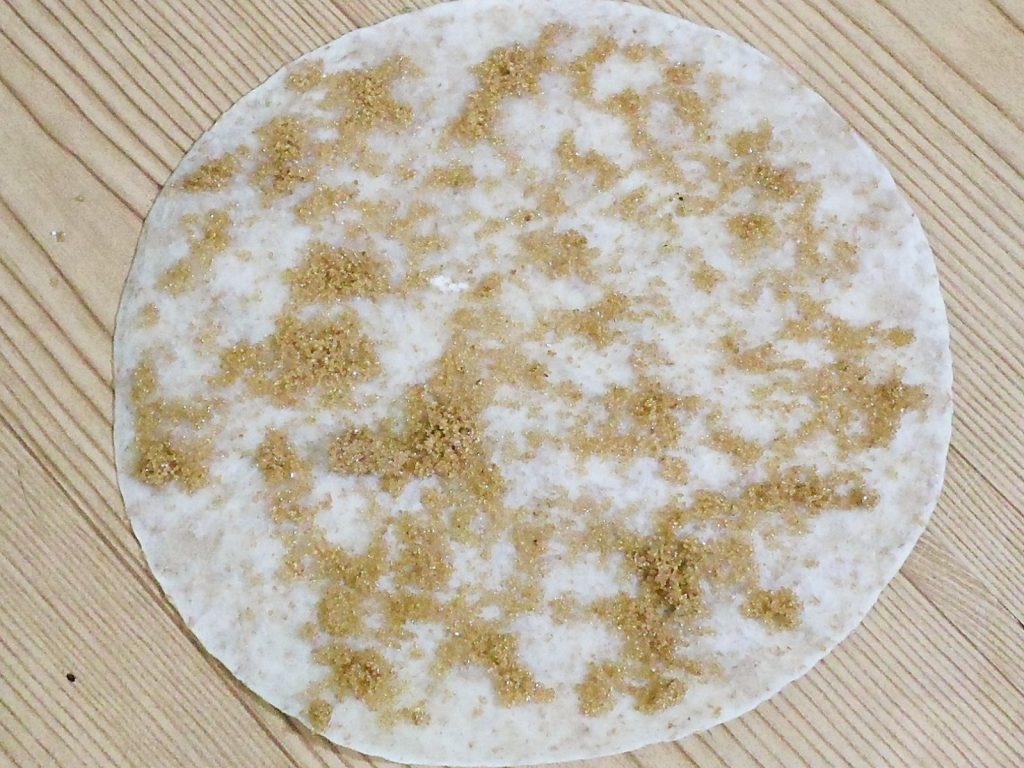
- 2-3 tablespoons brown sugar
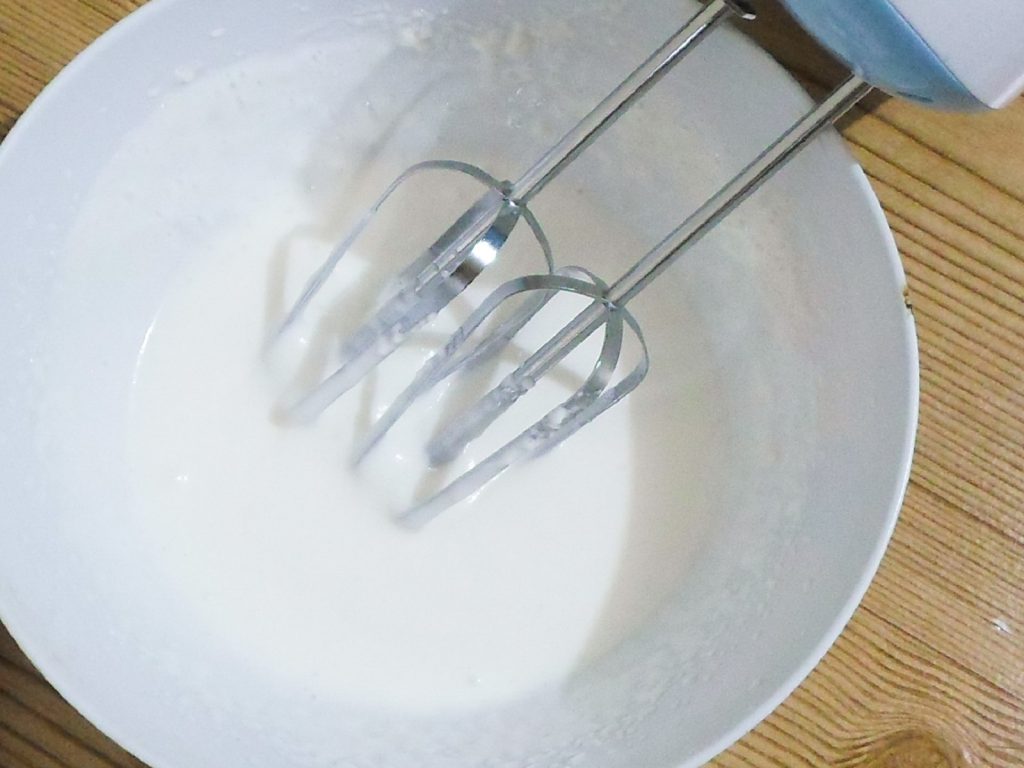
- ½ cup whipping cream or 1-1/2 cup fully whipped cream
- ½ cup fresh or frozen raspberries (you may use strawberries too)
- ½ cup fresh or frozen blackberries (you may use blueberries too)
- 2 halves of canned peaches (or use fresh peaches)
Sweeten Up Some Tortilla!
- Gather everything you need for the fruits and cream tortilla.

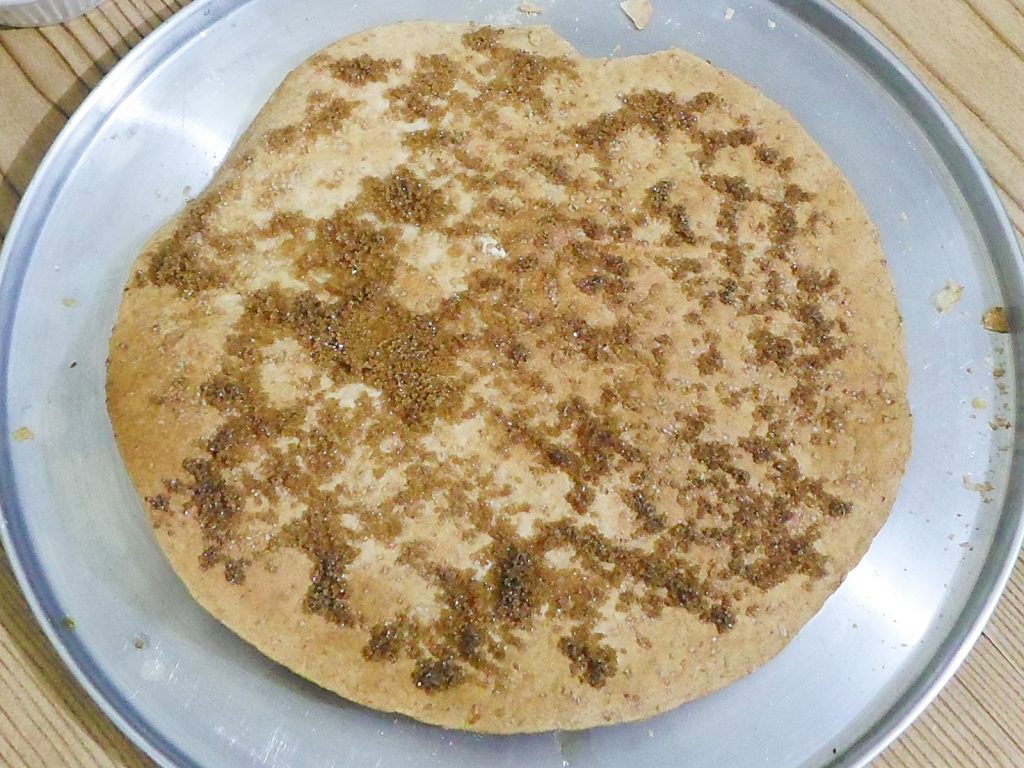
- Spread the brown sugar over the tortilla and bake for 5-10 minutes at 175C. Ovens may vary on how soon they crisp up the tortilla without burning the sugar.
- Once the tortilla has been browned and has crisped up, take out of the oven and let cool completely for an hour or more before going to the next step.
- Whip up the cream or use store bought whipped cream.
- Dollop the whipped cream over the tortilla a few minutes before serving.
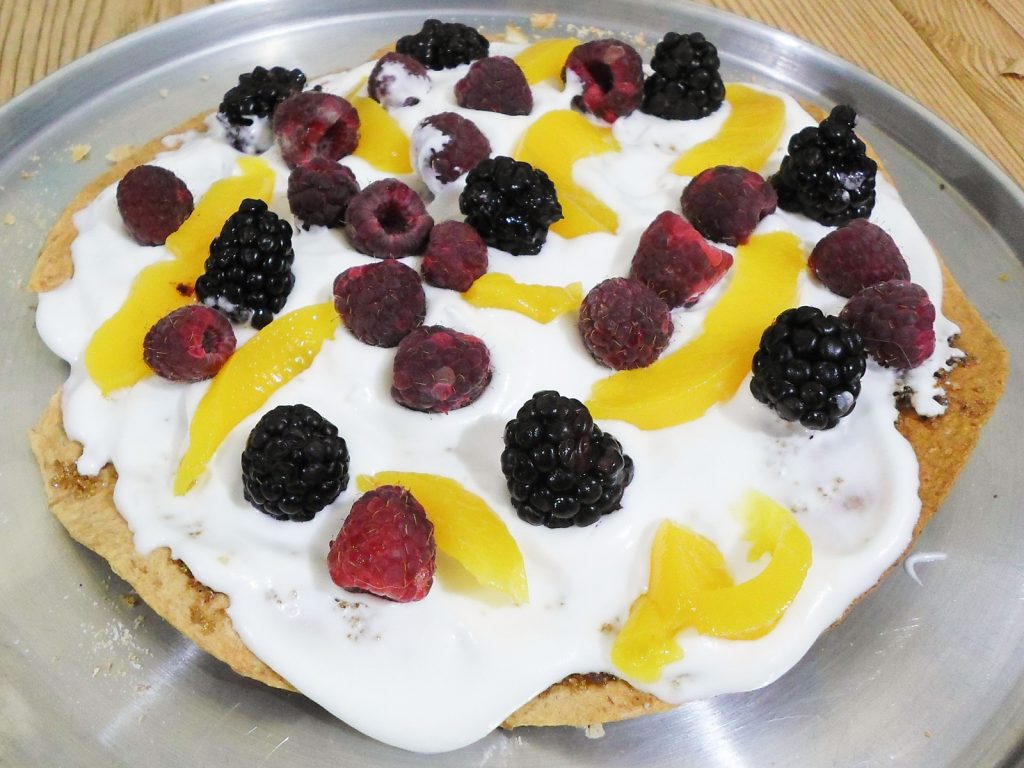
- Slice the peaches into thin wedges and arrange over the cream.

- Add in the berries and serve like fruit pizza.
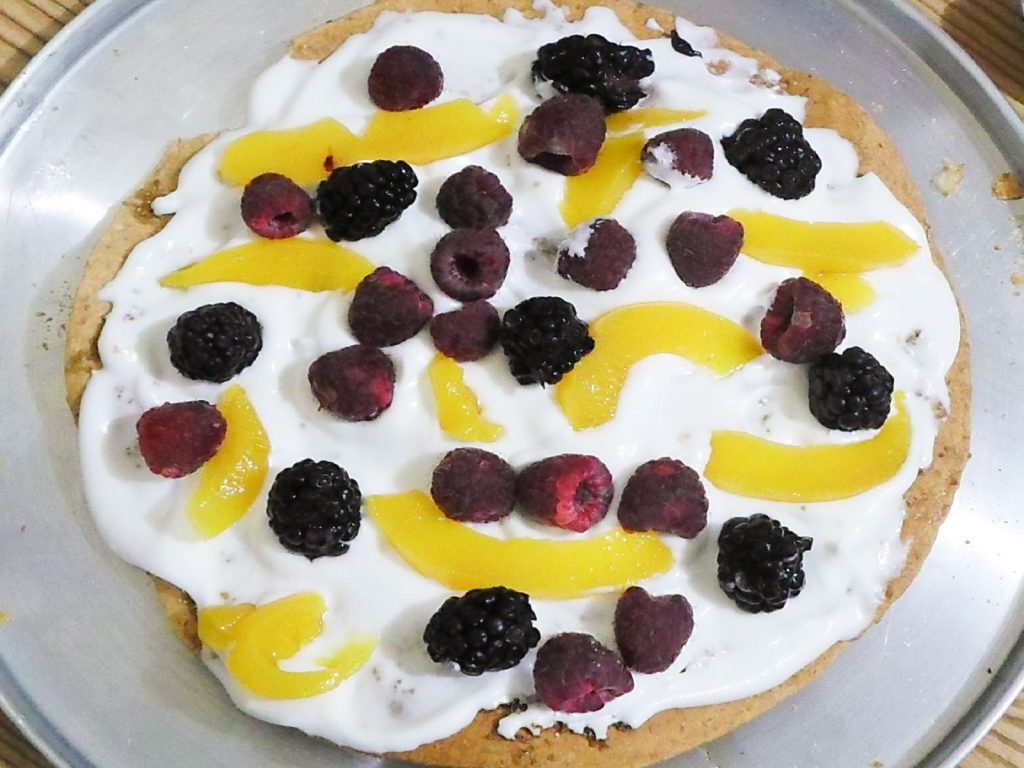
- Best enjoyed with hot tea or coffee.
Goat Cheese Quesadilla Recipe
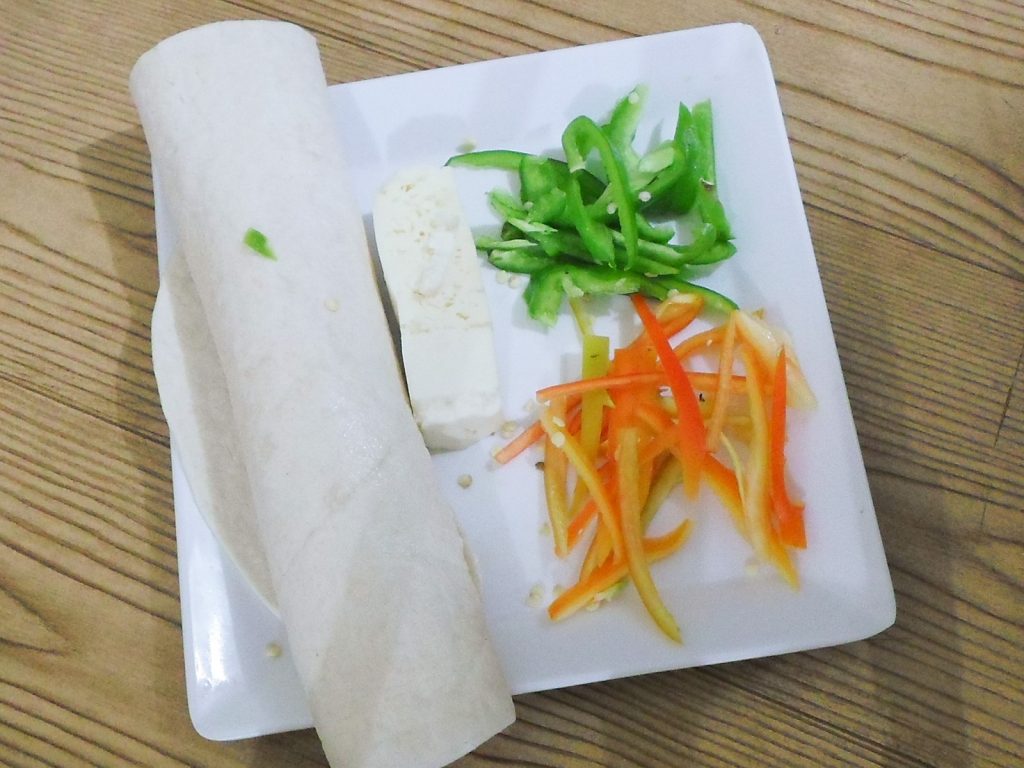
Craving some quesadilla but have only a few ingredients? If you have some tortilla and happen to have some goat cheese or mozzarella, then this recipe is definitely for you!
What You Will Need:
- Flour tortillas (this recipe uses 12 inch diameter flour tortillas)
- 1 small red bell pepper, cut into strips
- 1 small green bell pepper, cut into strips
- 3-4 ounces of goat cheese
Let’s Flip Some Quesadillas!
- Get everything you need ready and set to go.
- Using a non-oiled non-stick pan on medium heat, heat up both sides of the flour tortilla.
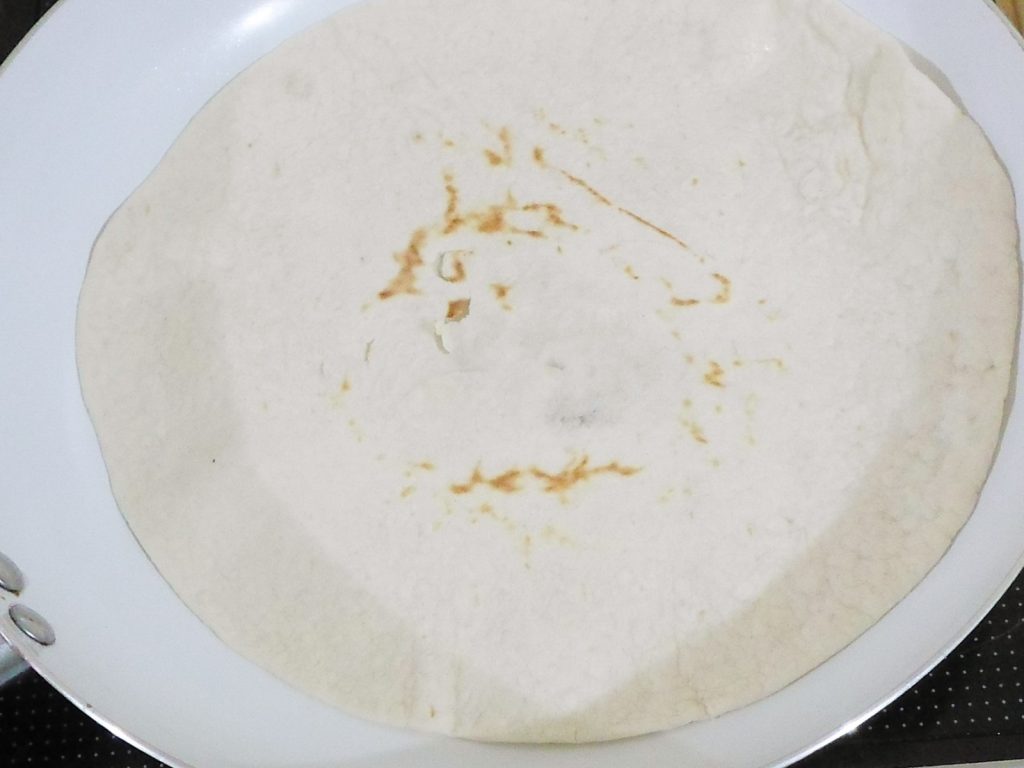
- Place the red and green bell peppers, and the goat cheese on one side of the flour tortilla.
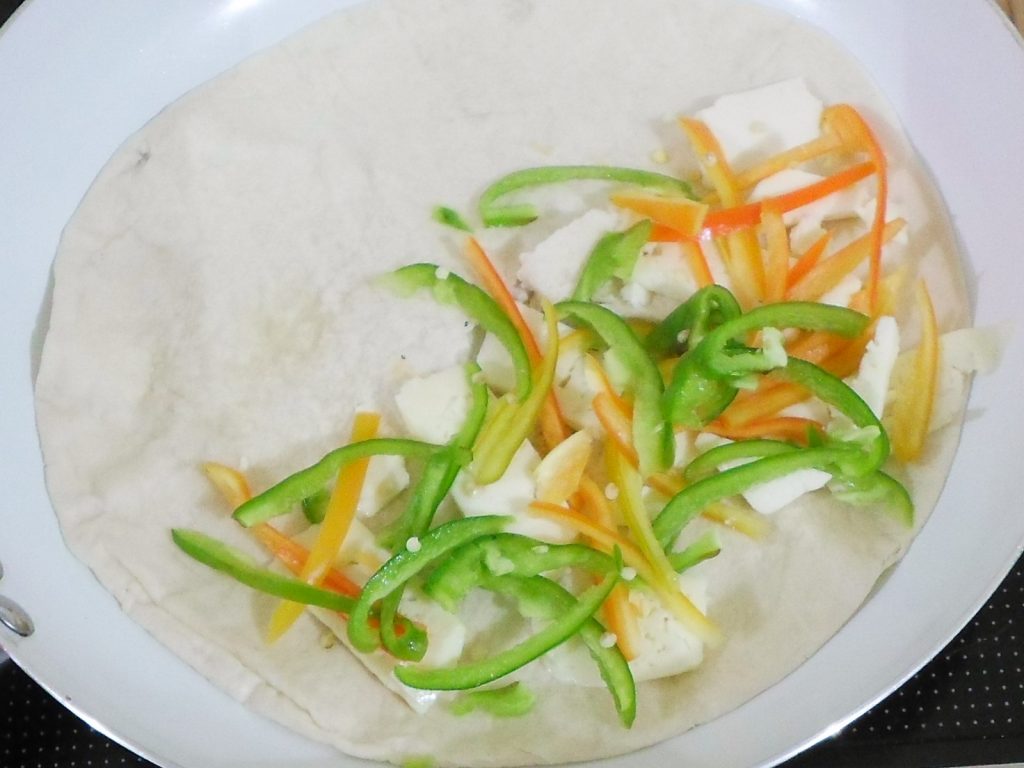
- Fold the flour tortilla in half and flip until both sides are browned and the cheese have melted.

- Cut the quesadilla in manageable wedges and serve with hot sauce and mustard for filling meal. This recipe serves two for snack portions and 1 for dinner. What’s great is that you may substitute the goat cheese for mozzarella or other mild cheese, making this dish totally customizable and convenient!

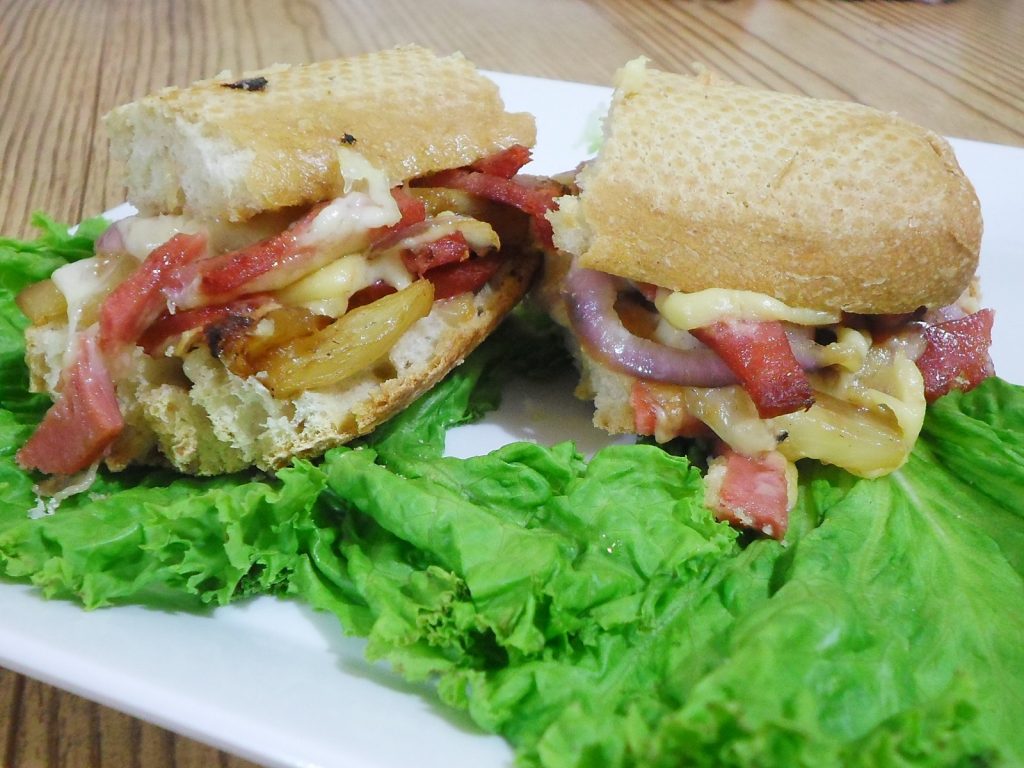
Hawaiian Ham & Pineapple Grilled Cheese Recipe
Everyone loves a good grilled cheese sandwich but it can get boring after a while. For a new take on grilled cheese sandwich, why not make yourself a Hawaiian inspired one with some juicy pineapples, delectable ham and red onions? This is a pumped up version which you can serve for dinner and that your whole family will fall on love with.
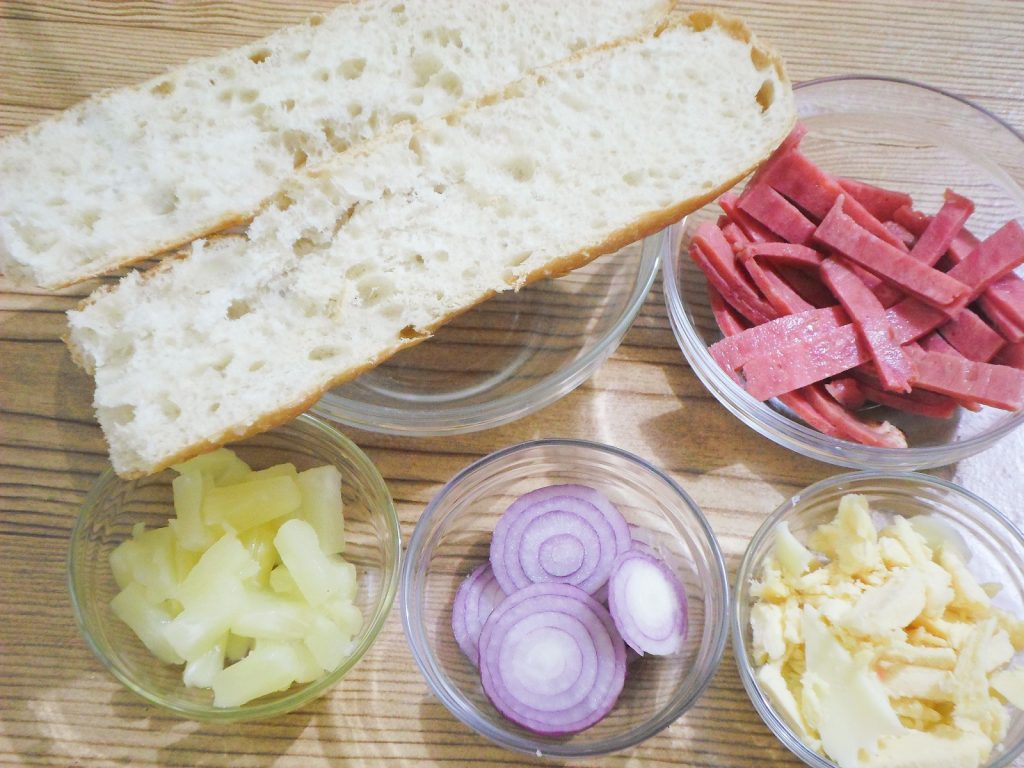
What You Will Need:
- Half a baguette cut lengthwise
- 2/3 to 1 cup of your favorite cheese (in this recipe we use mozzarella and mild cheddar mix)
- 4 ounces of ham, chopped into strips
- One medium sized red onion, cut into rings
- Half a cup of pineapple chunks
Time to Create a Mean Grilled Cheese Sandwich!
- Gather all your ingredients. It is best to have everything prepared at the start for faster cooking time later.
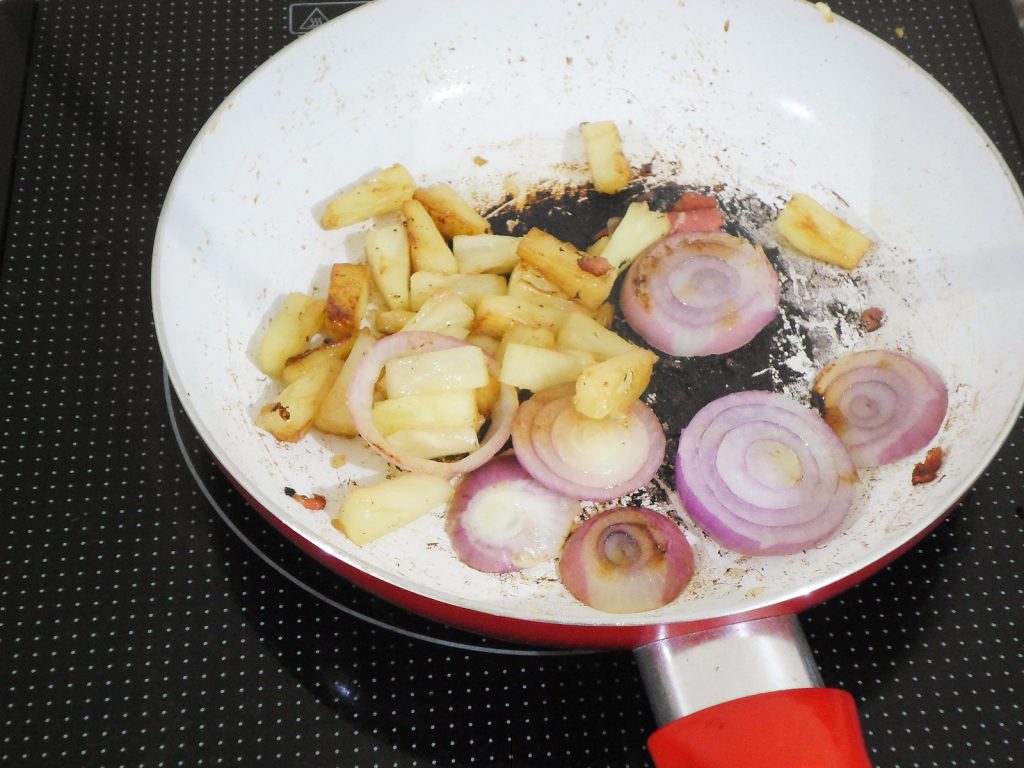
- Fry the ham in its own fat. Set aside but reserve the fat in the pan for the onions and pineapples.

- Increase the heat to medium high, pan-grill the pineapples and onions until they develop some color or caramelizes a bit.
- On your bread, add half of the cheese, spreading them out.

- Place the ham and onions over the bread and cheese.

- Add in the pineapples and the remaining cheese and place in a baking tray and put under your broiler until the cheese has fully melted. You may also use a toaster oven on high for 5 minutes.

- Here are the lovely halves of your sandwich! If you like, you can serve it this way as an open faced sandwich, but its double the goodness when you slap them together to create a grilled cheese sandwich overload.

- One serving is half of the done sandwich.

- Or enjoy it as mini sandwiches by cutting it into 4. You may add in some mustard or barbecue sauce but it’s really not needed ad the juicy pineapple and the ham makes for a perfect combination together with then onion and creamy cheese!
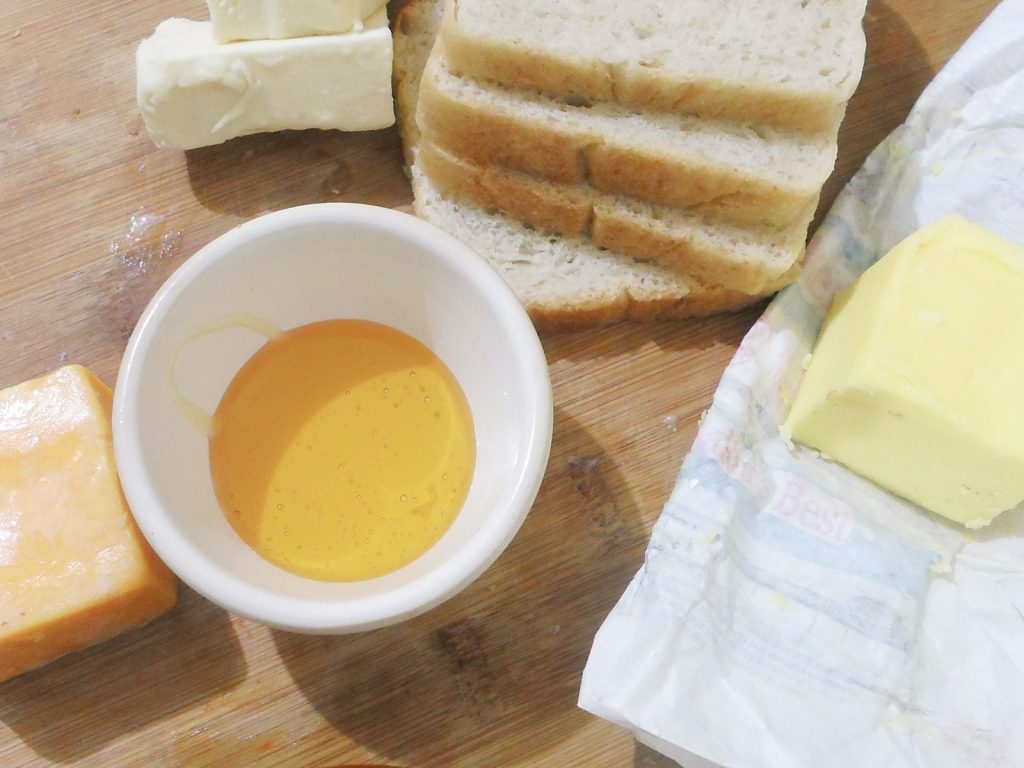
Honey Cheddar Sourdough Grilled Cheese Recipe
Craving a sweet, tangy, and cheesy breakfast sandwich? Then try this honey cheddar sourdough grilled cheese!

What You’ll Need:
- Sliced sourdough bread
- Honey
- Cheddar slices (use sharp cheddar for best contrast of flavors)
- Butter
- Any easy melting cheese of your choice
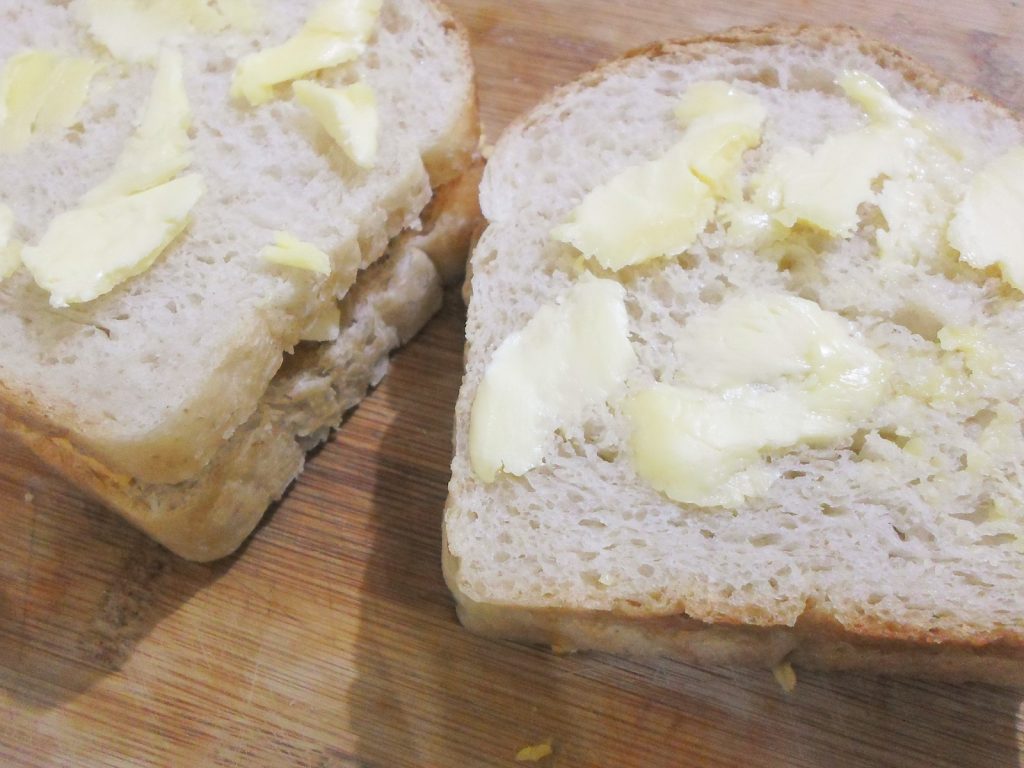
Let’s Make Some Awesome Grilled Cheese!
- Preheat your griddle your pan as you prepare all your ingredients.
- Lay down some cheddar slices on a slice of bread (photo shows two sandwiches).

- Drizzle in some honey, and then add the easy-melt cheese.

- Add another slice of bread to make a sandwich and spread some butter over it.
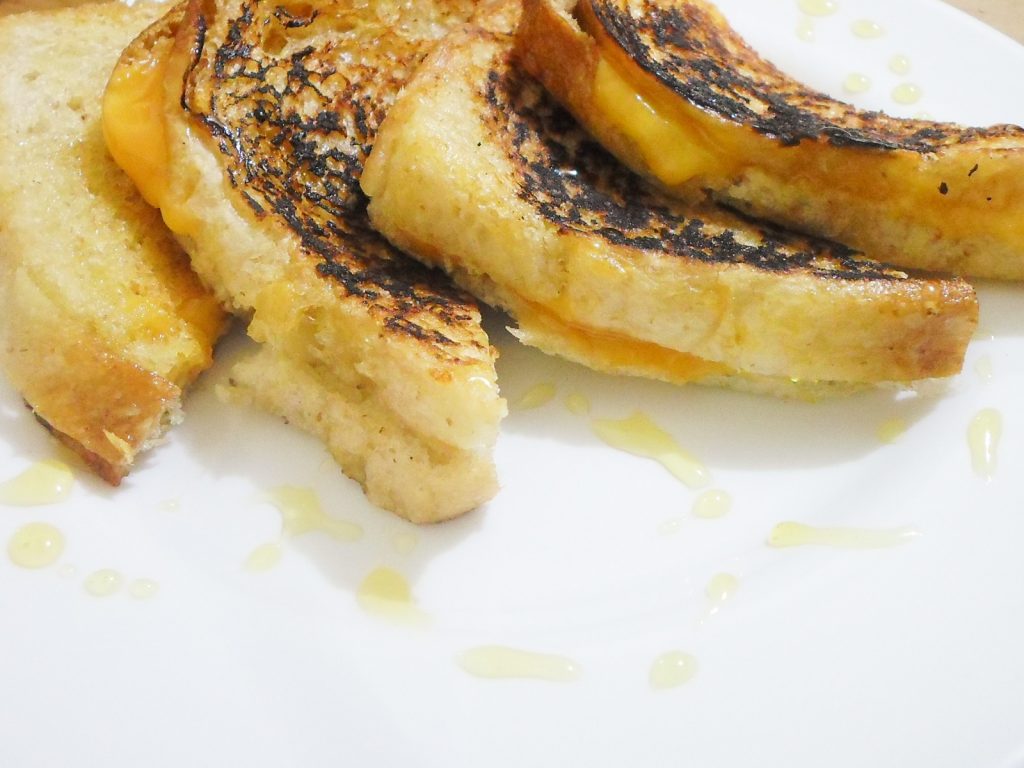
- Place on a hot pan or grill over medium high heat and ‘cook’ each side until well browned and cheese is melted.

- Slice diagonally and serve up!

- Make as much as you want or make an entire batch for everyone! You can also make this ahead of time and freeze until you are ready to heat up your pan or grill. Enjoy!
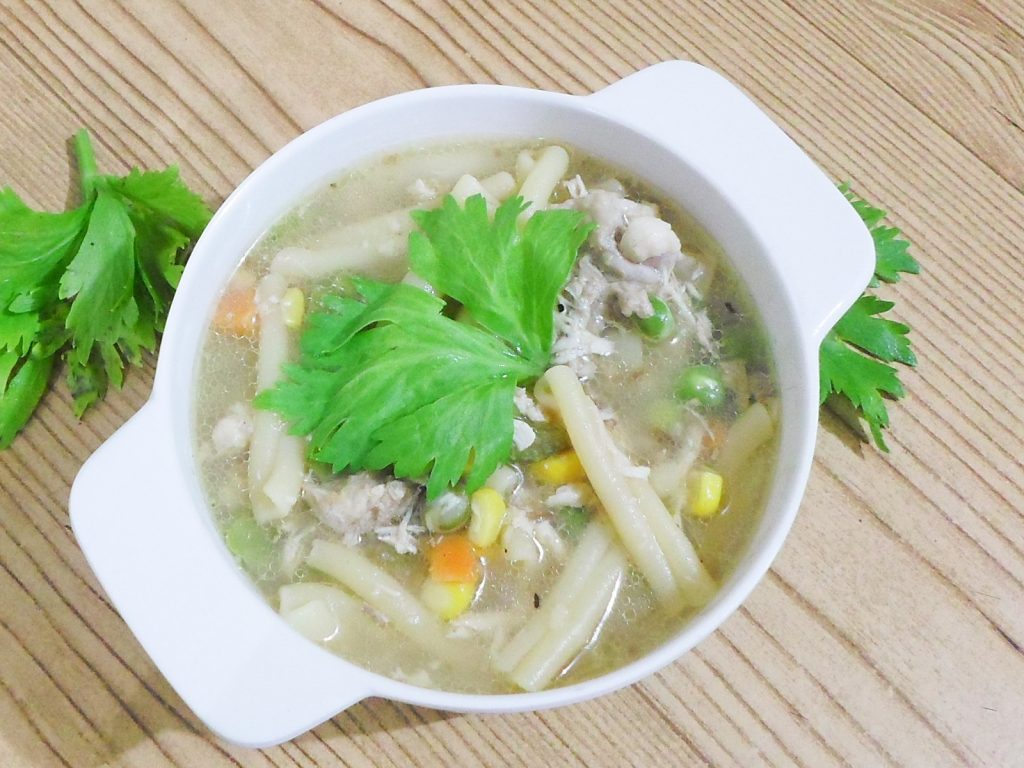
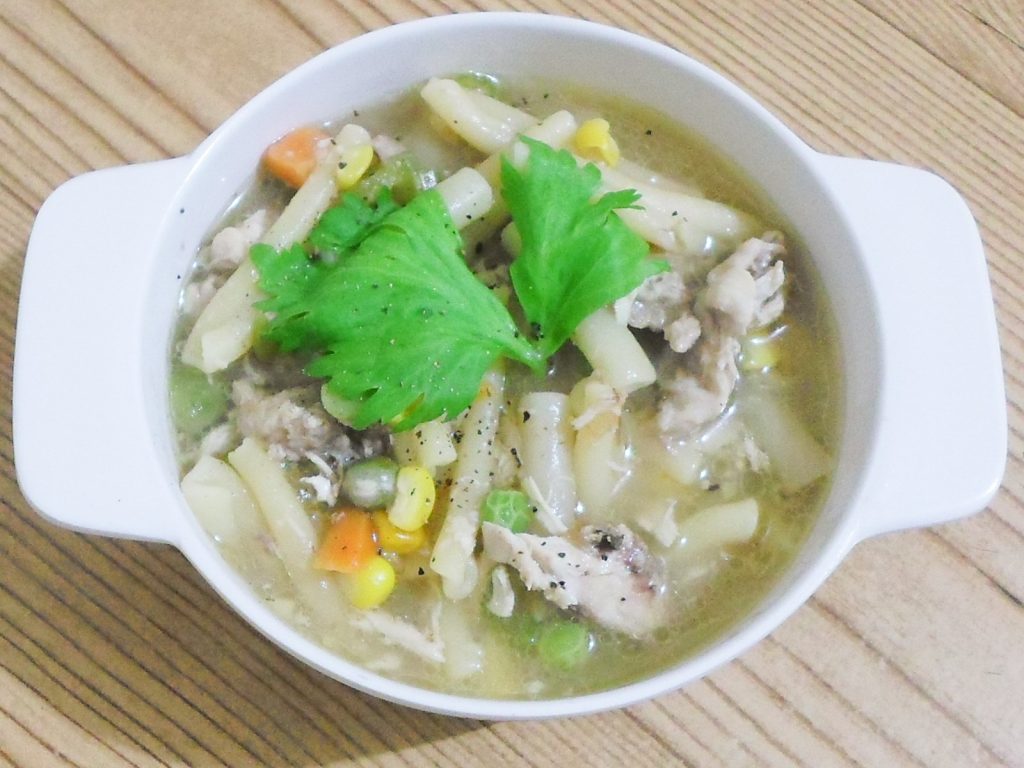
Loaded Chicken Pasta Soup Recipe
Who says you have to be under the weather just to treat yourself to a steaming bowl of savory chicken soup? This loaded chicken pasta soup gets dinner ready in 30 minutes or less but tastes like it has been cooking for a whole day. You can also make this soup ahead of time and freeze individual portions. Super easy and cozy for the cold months ahead!
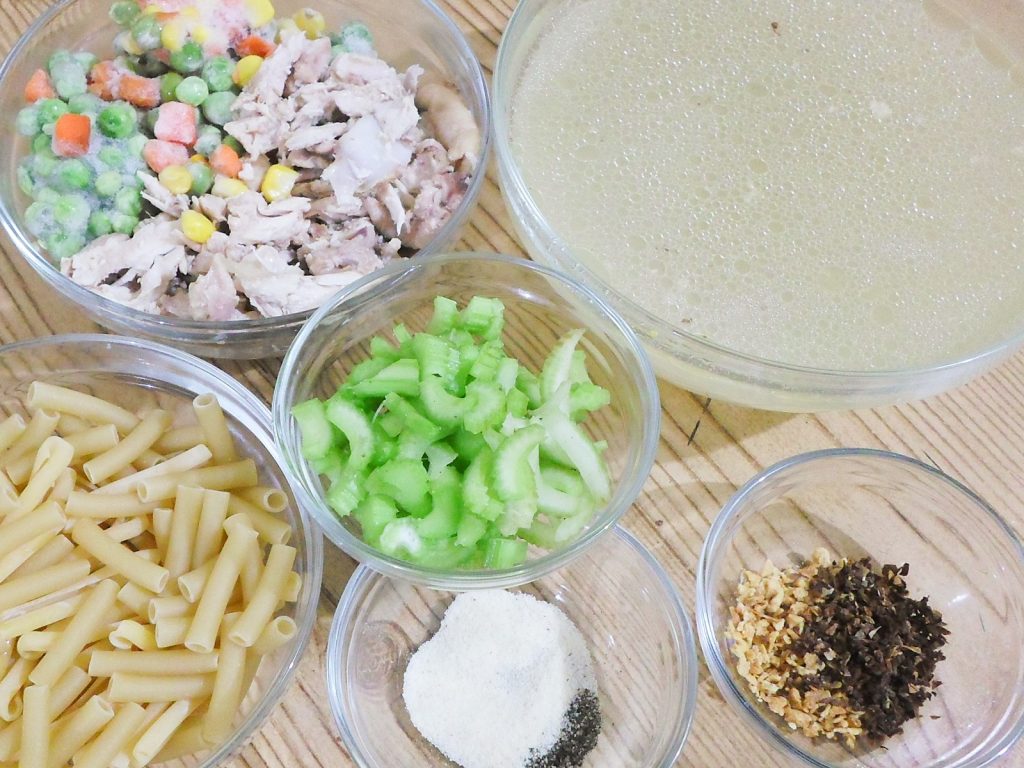
What You’ll Need:
- 2 cups of uncooked pasta (elbow macaroni, fusilli, or rotini works well)
- 2 cups of cooked and shredded chicken meat
- 2 cups mixed vegetables (carrots, peas, and corn)
- 2 stalks of celery, chopped up
- Salt and pepper to taste
- 1 tablespoon each of dehydrated onions and garlic or use 1 small onion and 3 cloves of garlic if using fresh
- 8 cups of chicken stock
Time to Whip Up Some Flavorful Chicken Soup!
- Have everything you need ready. For easier preparation, you can place all the dry ingredients in a freezer safe bag and simply thaw and simmer with chicken stock when you’re pressed for time but want a delicious and filling hot meal.
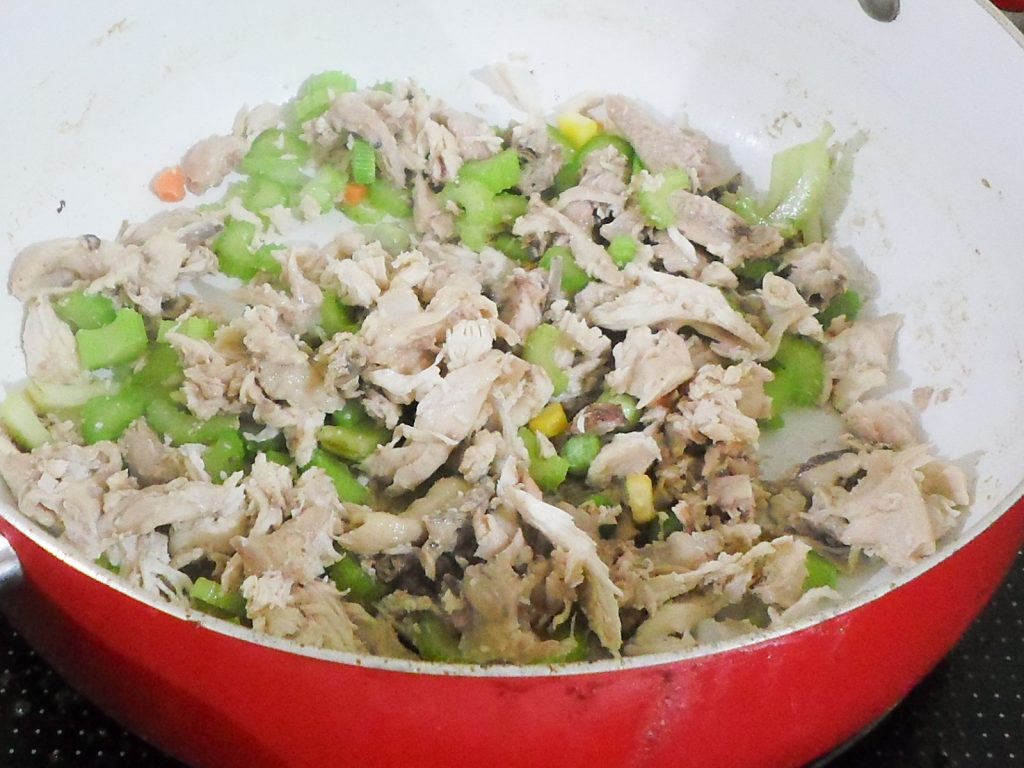
- In a saucepan, sauté the celery and chicken until the chicken shows slight color (if using fresh onions and garlic, add them in this step instead of the next). Although you can simply dump everything in a saucepan in one go, doing extra steps like this adds a depth of flavor which makes the soup heartier.
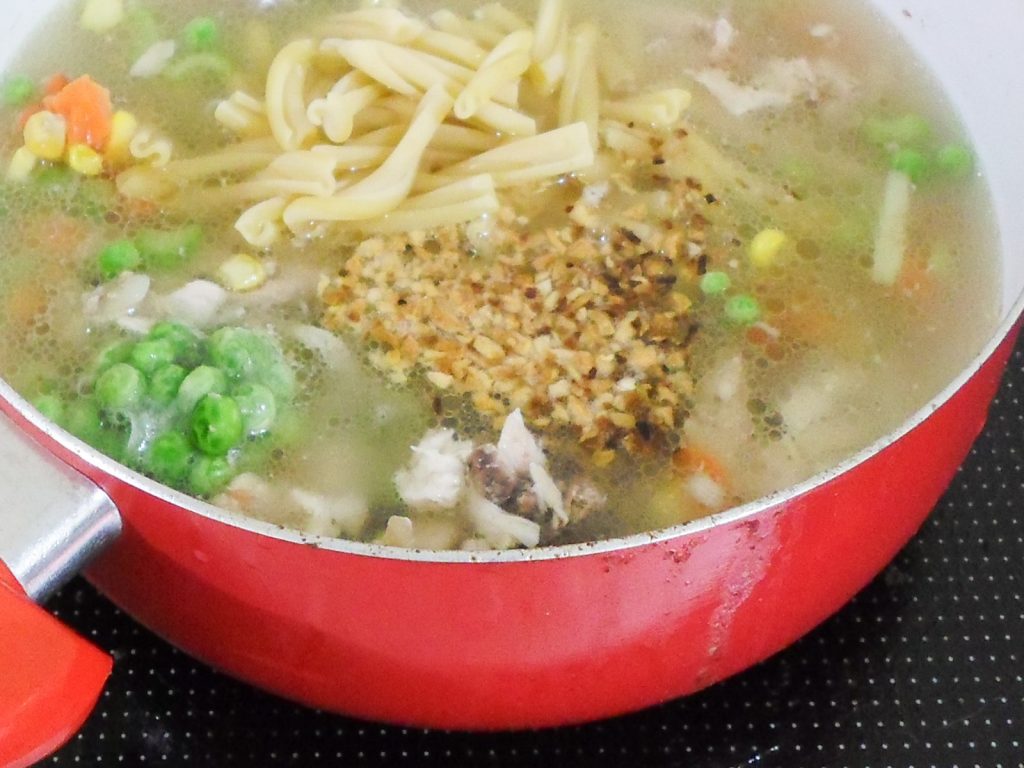
- Add in the chicken stock, frozen mixed vegetables, uncooked pasta, onions, and garlic. Allow to cook boil over medium high heat then reduce to a simmer for 10-15 minutes.
- Once the pasta is cooked, season with salt and pepper.
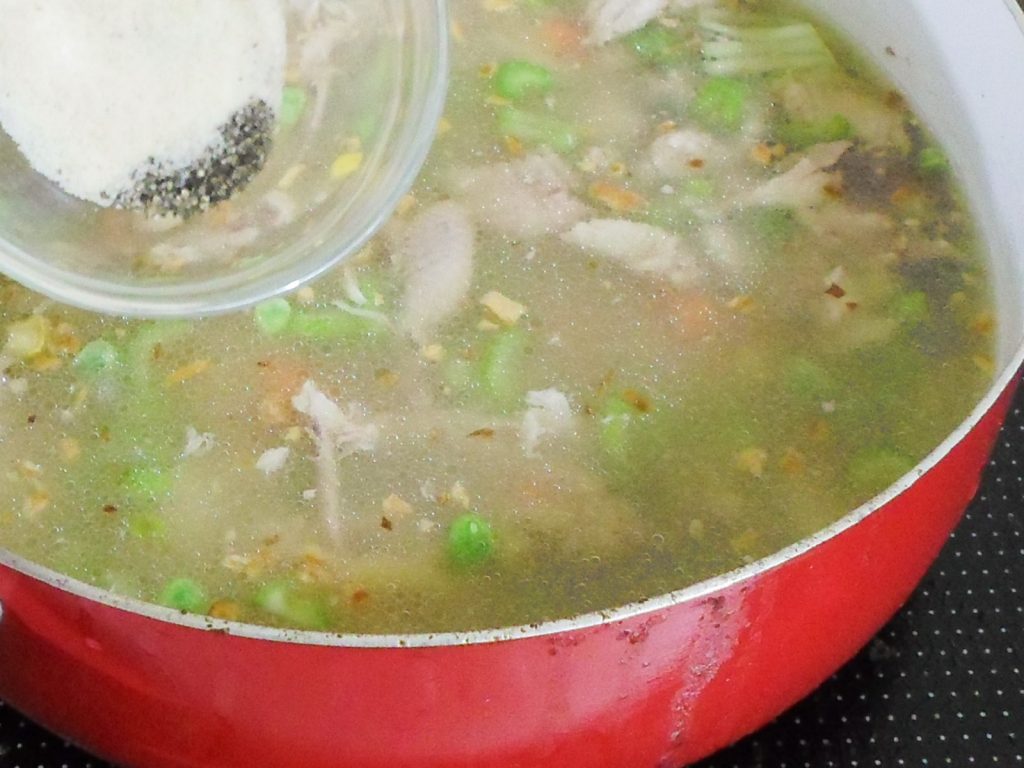
- Simmer for another minute or two.

- And you’re done!
- This recipe makes 4-6 generous servings! Enjoy!
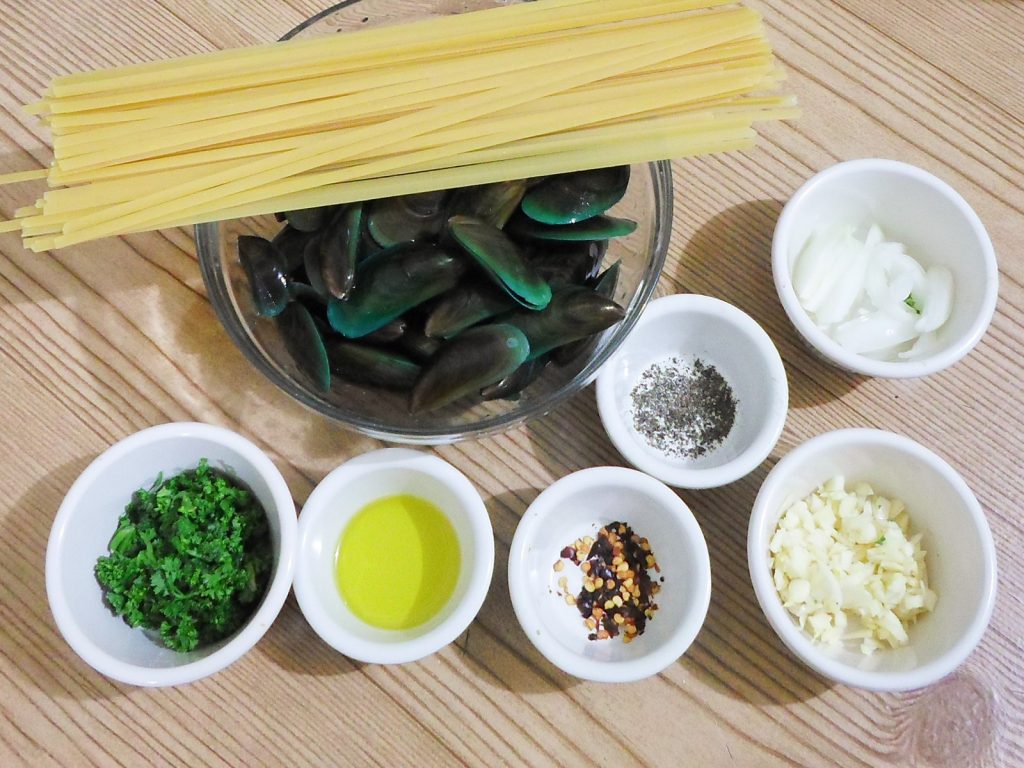
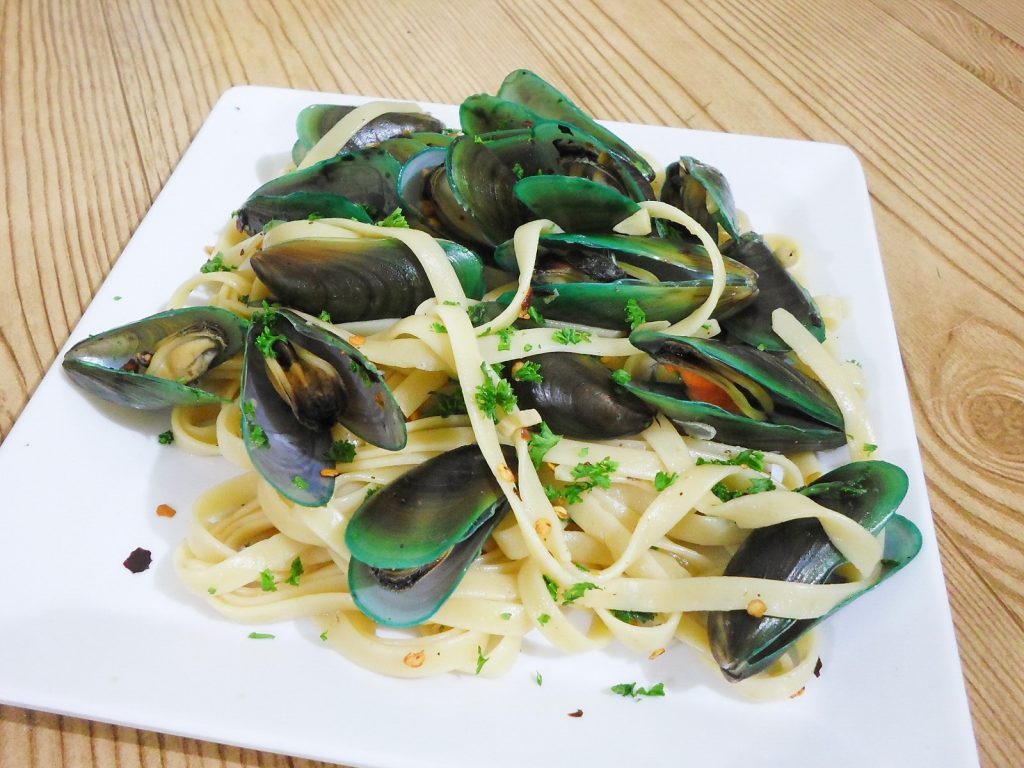
Mussels & Linguine Pasta Recipe
Looking for an easy an impressive pasta dish which only takes less than half an hour to prepare? If you love fresh pasta ideas that easy to make but is full of flavor, then you will love this recipe for mussels and linguine pasta. Perfectly al dente linguine served with fresh mussels is a great dish to serve for dinner or Mediterranean night get together.
What You Will Need:
- 1 pound fresh mussels, cleaned thoroughly
- Half a pound of linguine
- ½ – 1 teaspoon red chili flakes
- Freshly ground black pepper (to taste)
- 1 medium onion, sliced
- ¼ cup chopped garlic
- 3 tablespoons olive oil
- 4 tablespoons chopped fresh parsley
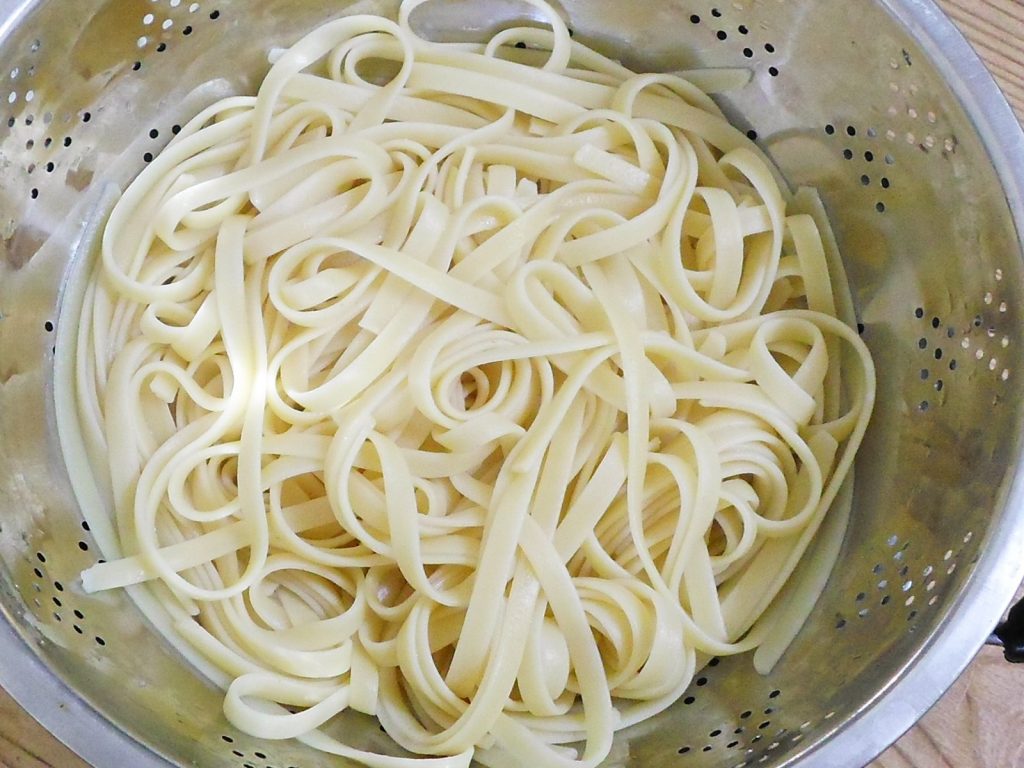
Time to Cook up Some Seafood Pasta!
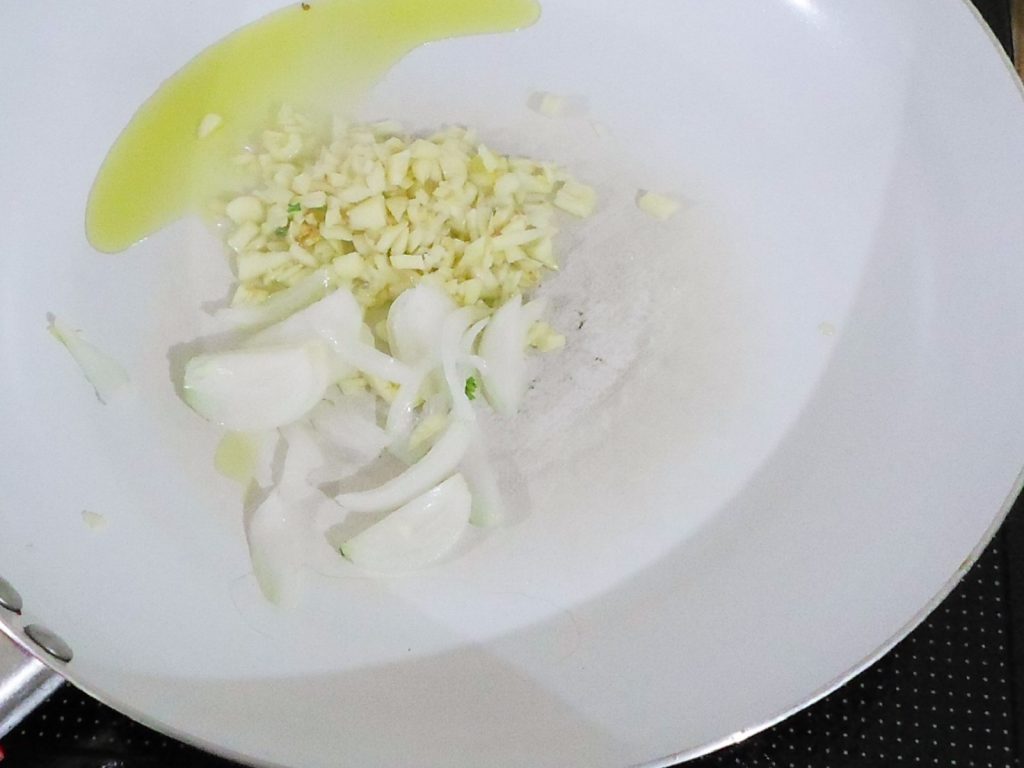
- Prepare the ingredients that you’ll need.
- Cook the linguine according to package directions until al dente. Don’t forget to add salt to the pasta water while boiling it. Drain and set aside.
- In a pan over medium heat, sauté the garlic and onion with the olive oil until the onion is translucent.
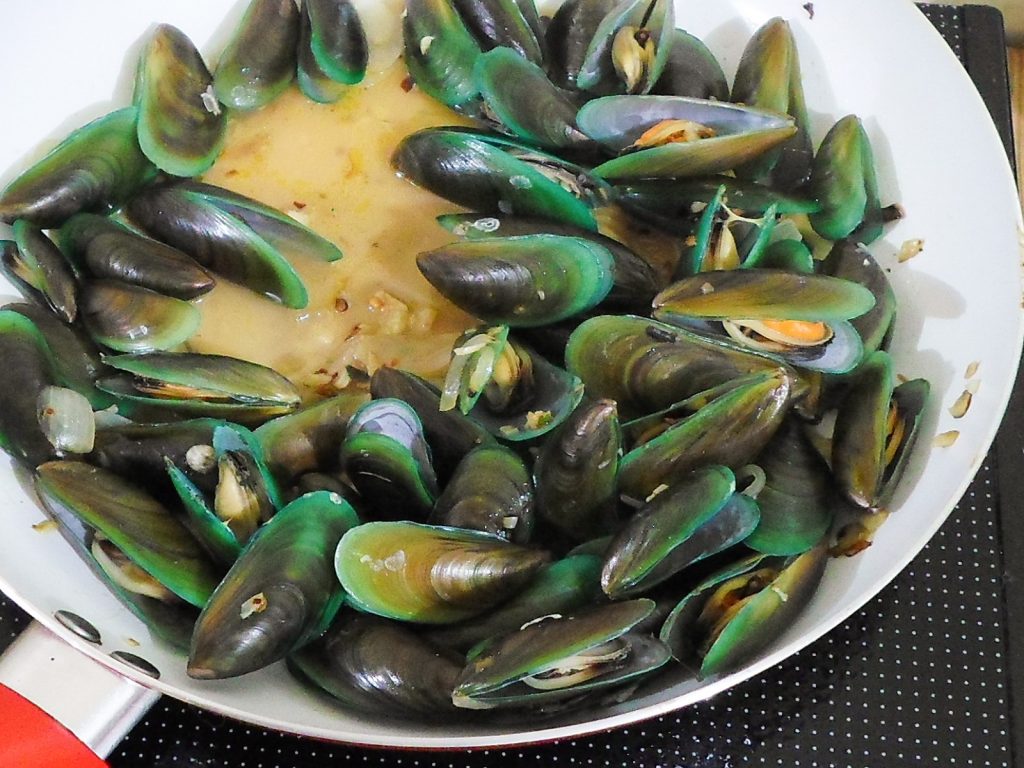
- Add in the mussels, ground black pepper and the red chili flakes. Cover and allow to cook for 5 minutes.

- After 5 minutes, take off the cover from the pan. The mussels will have released up their liquid and this will serve as the sauce for the linguine.
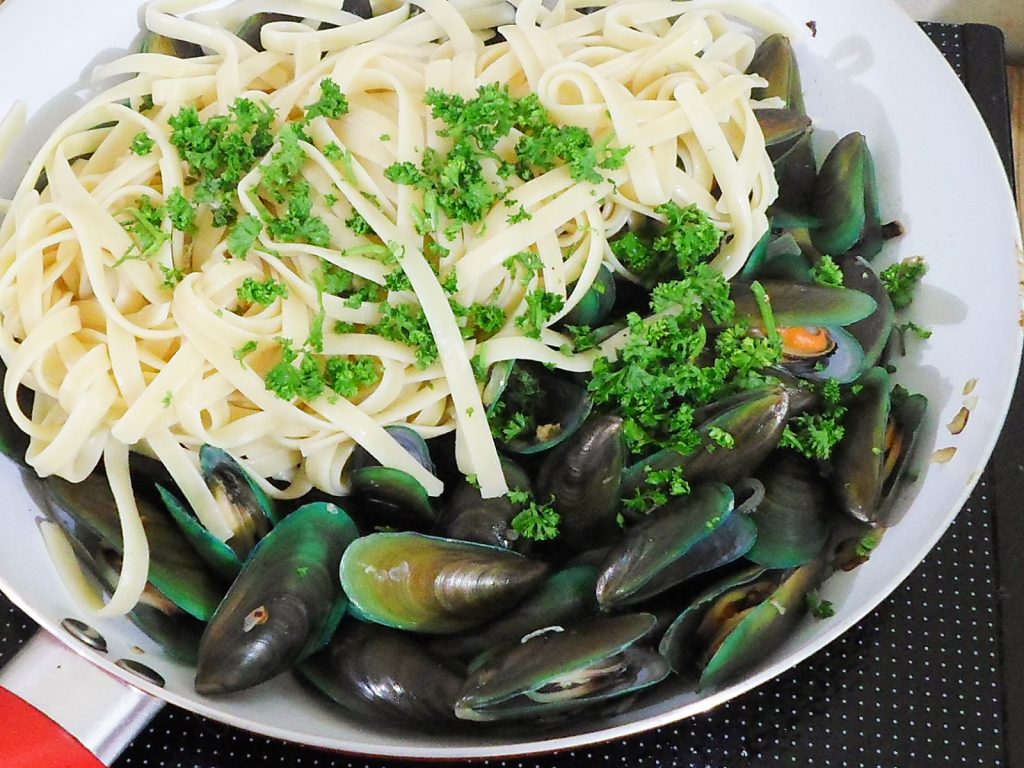
- Add the linguine and parsley. Reduce the heat to low and toss the linguine with the mussels for a minute, making sure to not let the liquid all dry out.
- Place on individual serving plates.
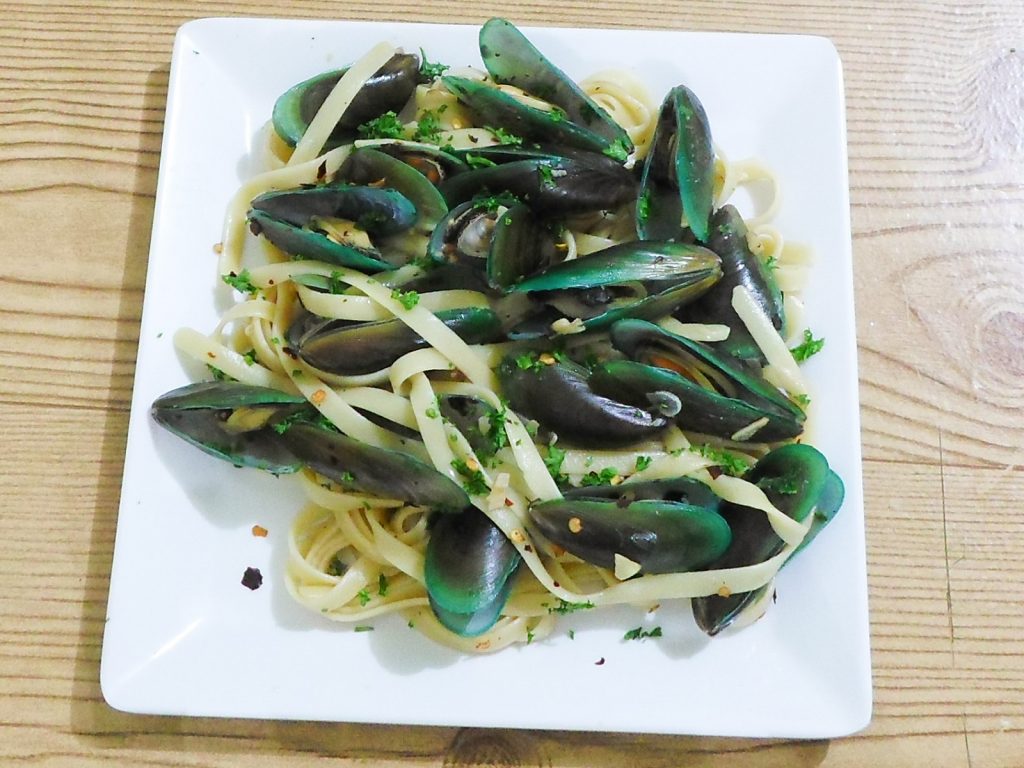
- This recipe serves 3. You can easily double or adjust the recipe for serving more people. Enjoy this seafood pasta dish!
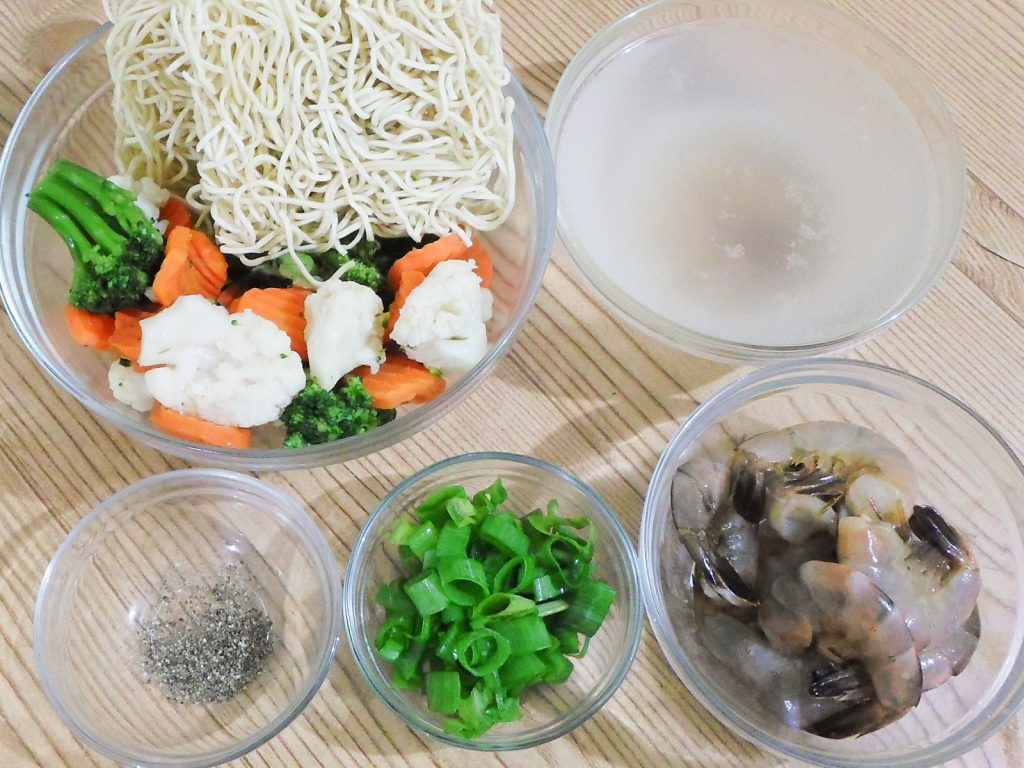
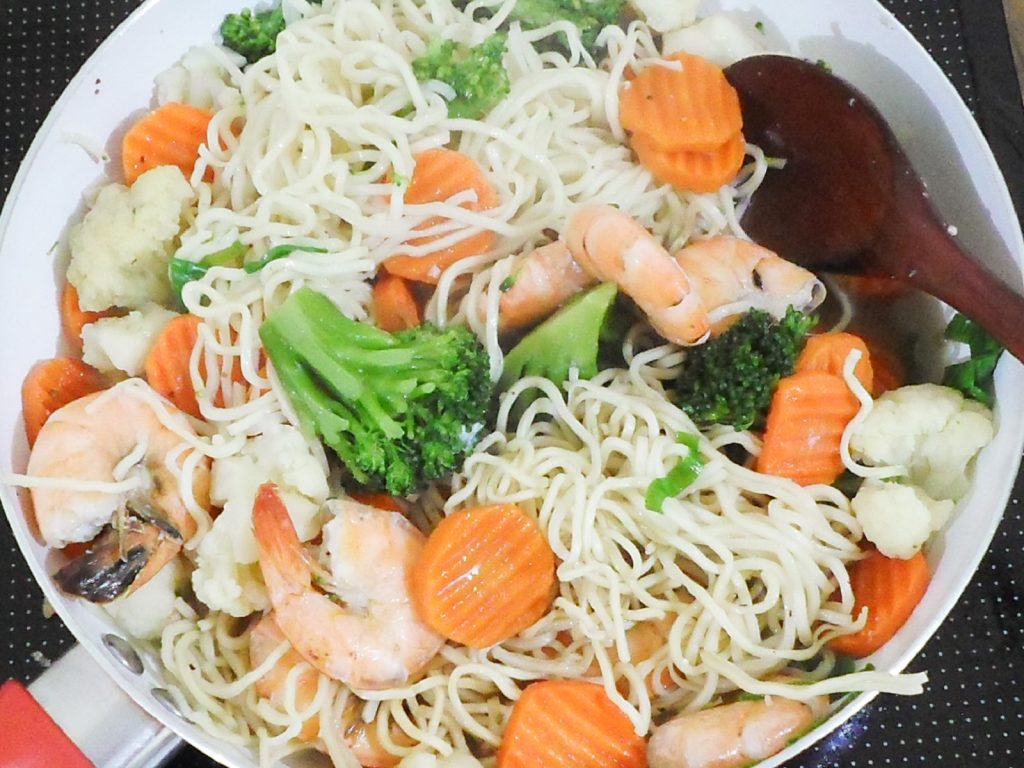
One Pot Cantonese Noodles Recipe
If you love Chinese take-out, lo-mien, or plain easy meals, this recipe is a sure treat. A balanced meal which comes together in mere minutes and uses only one pot is everyone’s friend. With this one-pot Cantonese noodles recipe, putting together a healthy dinner fix is a breeze.
What You’ll Need
- ½ lb prawns (or sliced chicken breast, or a combination of the two)
- Salt and pepper to taste
- ½ cup chopped spring onions
- 2-3 cups frozen vegetable mix of carrots, broccoli, and cauliflower
- 2 cups chicken stock (you may need to add ½ cup water)
- 4-5 ounces of Cantonese noodles (you may also use egg noodles)
Let’s Make Some Easy-Peasy Cantonese Noodles!
- Have all your ingredients ready.
- Place everything in a deep enough pan (except half of the spring onions).
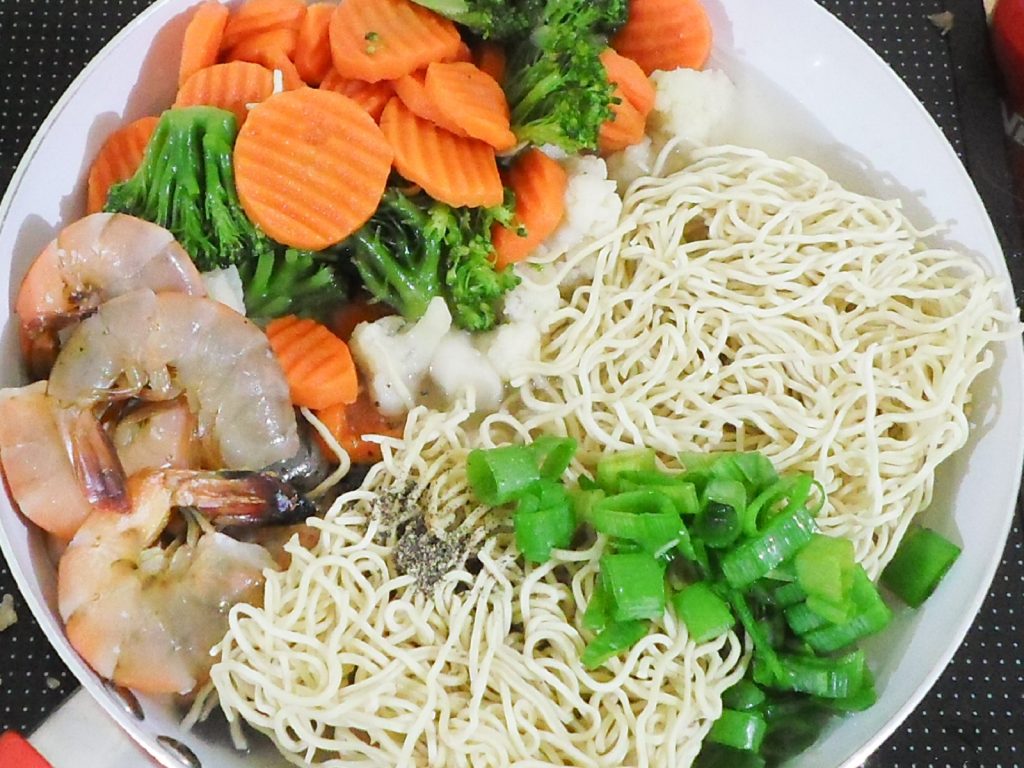
- Cover for 3 minutes over medium-high heat.
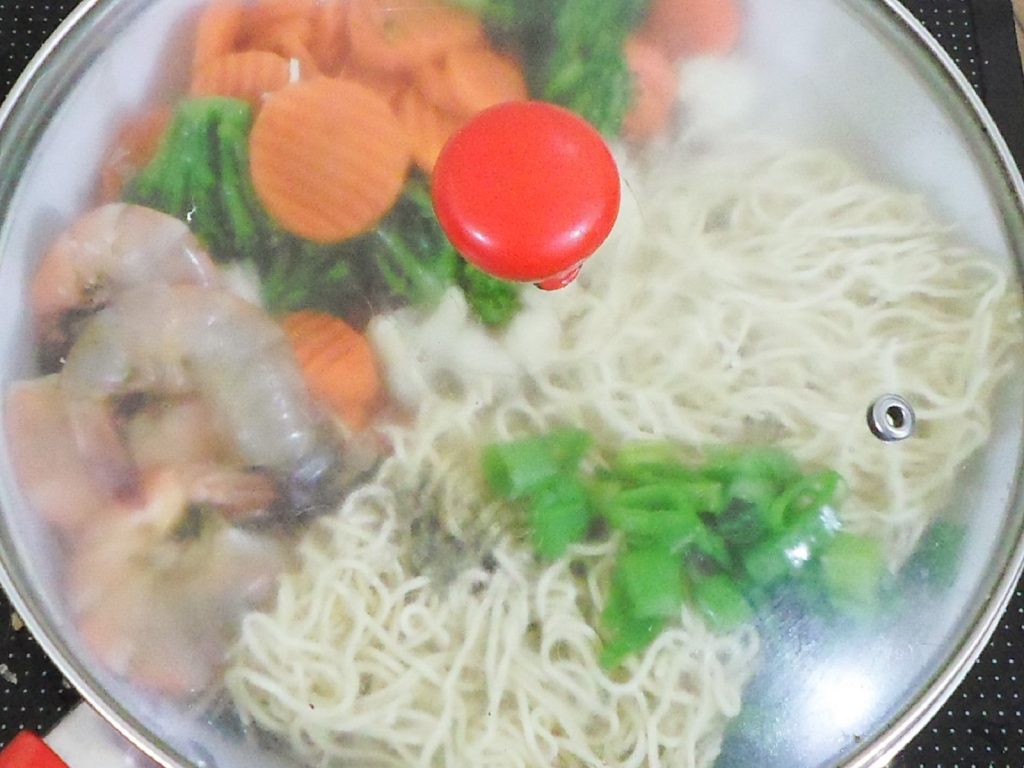
- Give it a stir to ensure the noodles cook through and the veggies and prawns are done nicely as well. At this point, you may add soy sauce for color but it’s not that important. Season with salt and pepper.
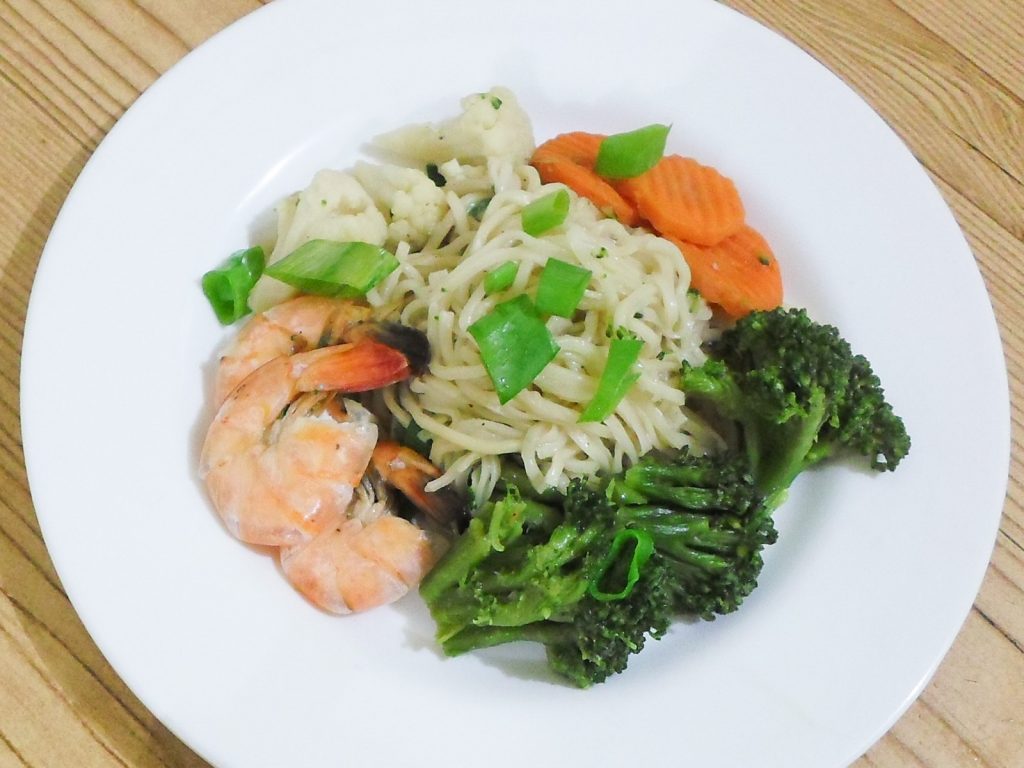
- Cover again for another 3 minutes until the noodles has absorbed all the liquids.

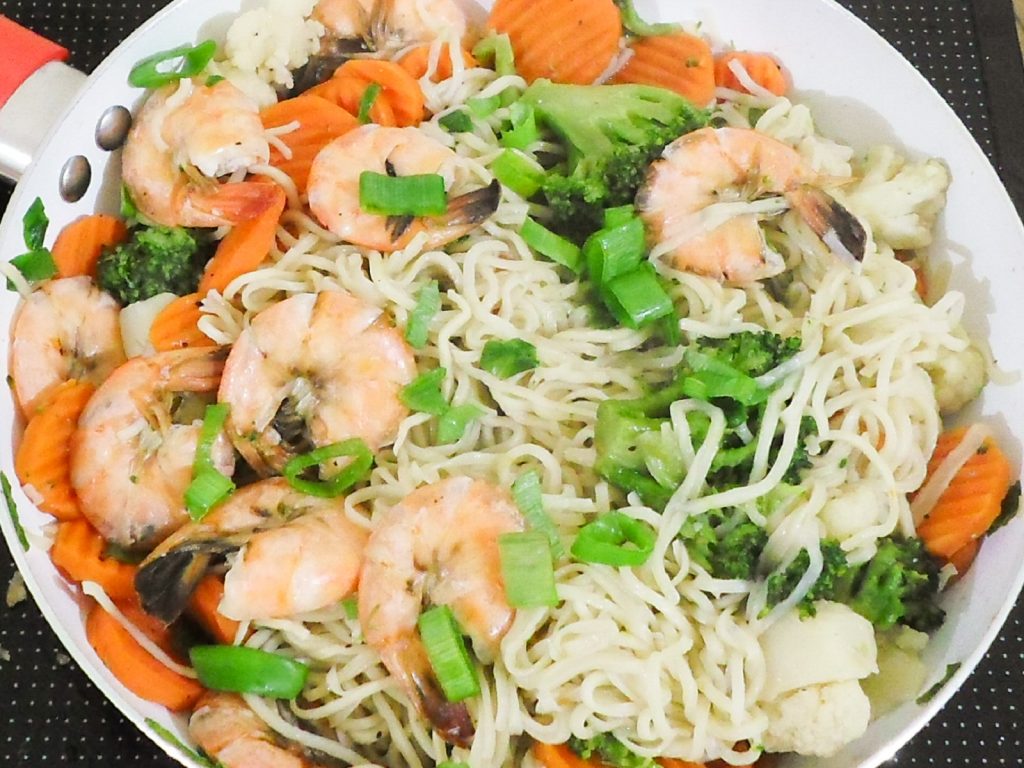
- Serve with a sprinkling of chopped green onions, enjoy! This recipe makes 2-3 generous servings.
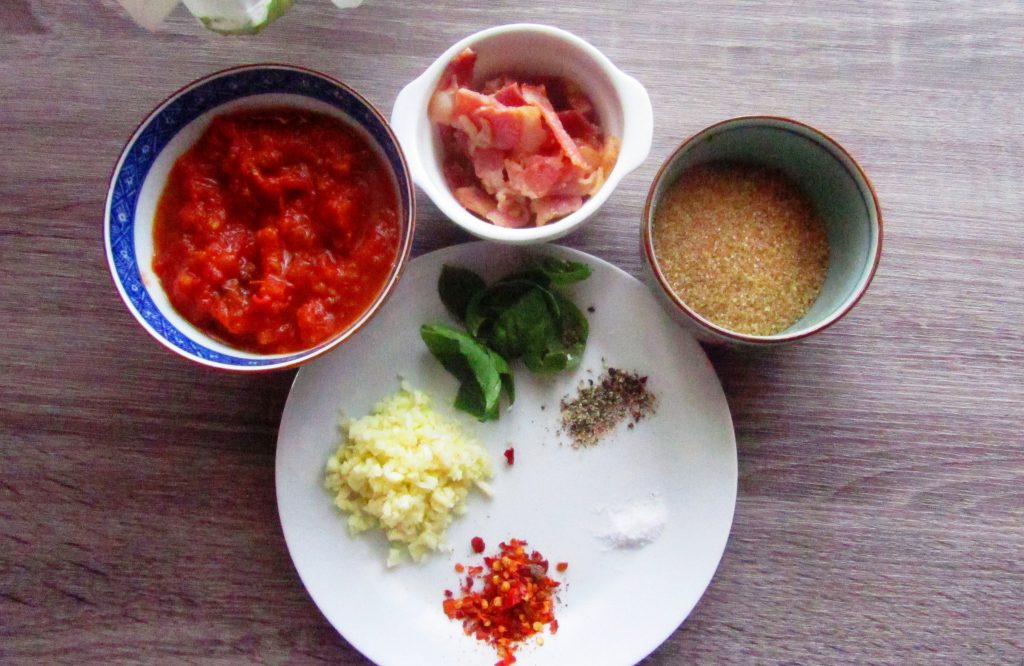
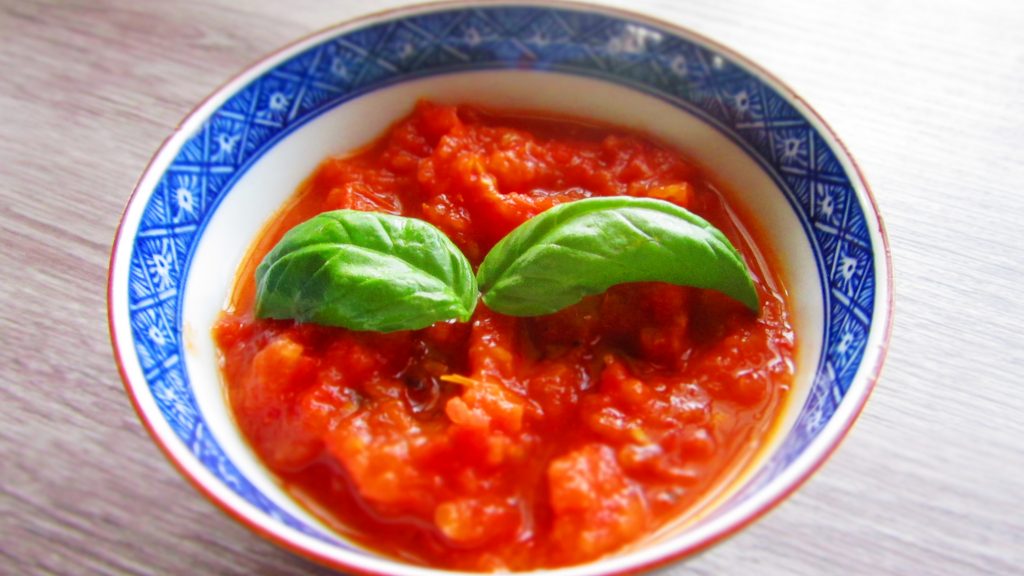
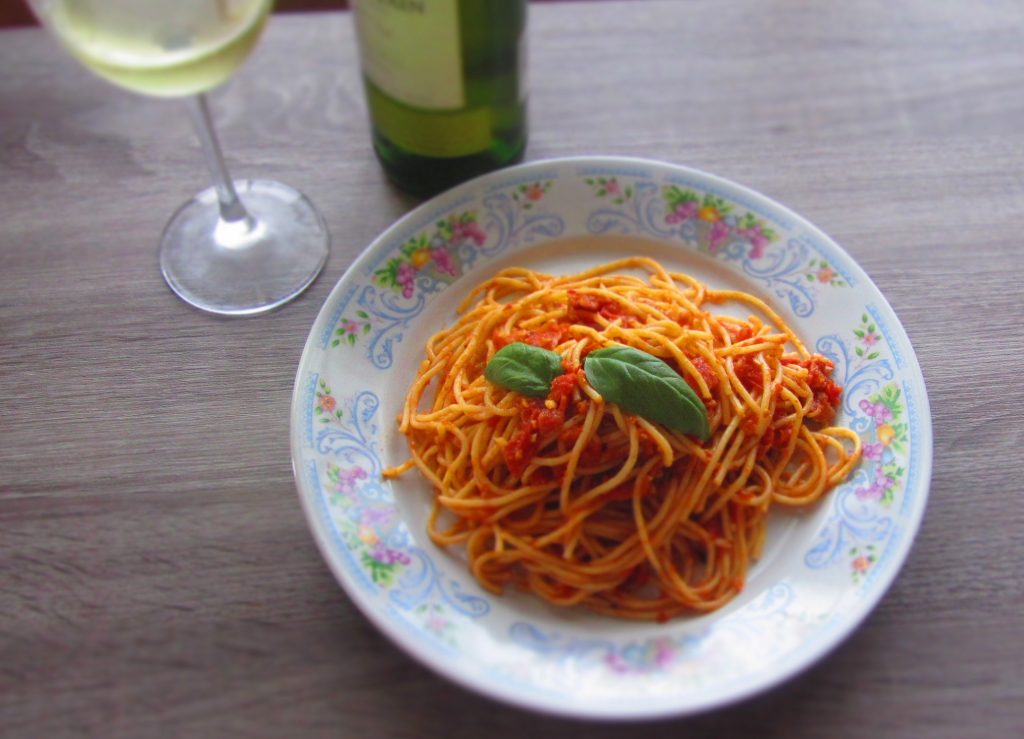
Pasta Arabiata (Filipino Style) Recipe
This may be an Italian classic but this time we will be using locally grown ingredients. It’s very easy to do and something that I turn to when I am craving for pasta but I don’t have the luxury of time to do it.

What You’ll Need:
- 500 g Spaghetti noodles or Penne Rigatte – Cook pasta per package direction, when briskly boiling put salt and oil before adding the pasta
- 2 cans of good quality chunky tomato
- 120 g of bacon – chopped, any bacon will do but I prefer using honey cured because I like it a bit sweet, Yes, 120 g only because you just want a kick of bacon flavor to your sauce
- 1 teaspoon of brown sugar – yes, Filipinos have a sweet tooth but don’t worry it won’t be overwhelming
- Fresh basil
- 4 cloves garlic, chopped
- 1 teaspoon chili-flakes – you may adjust it according to preference
- 1 teaspoon olive oil
- Salt and pepper to taste
- Parmesan cheese (optional)
Method:
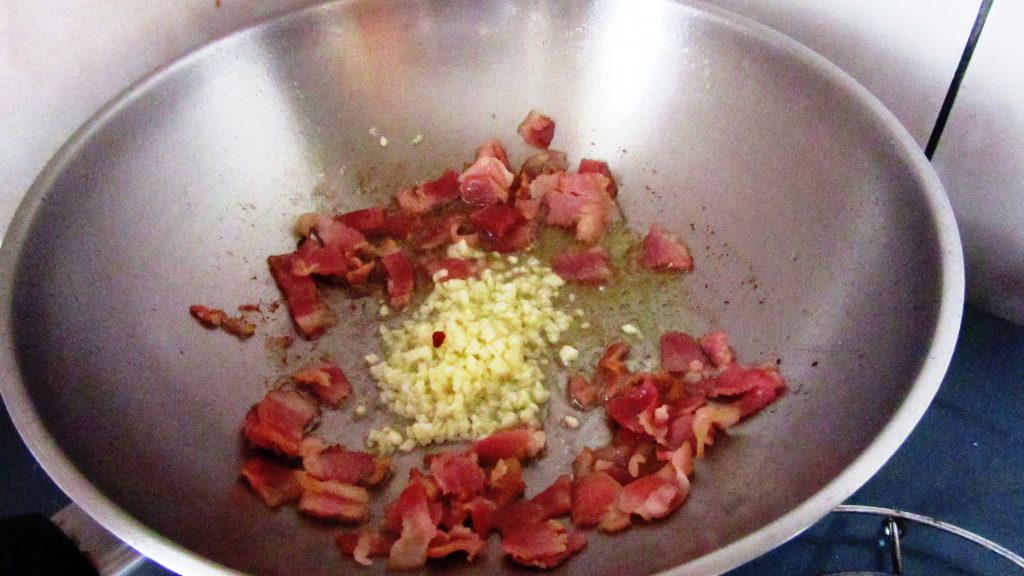
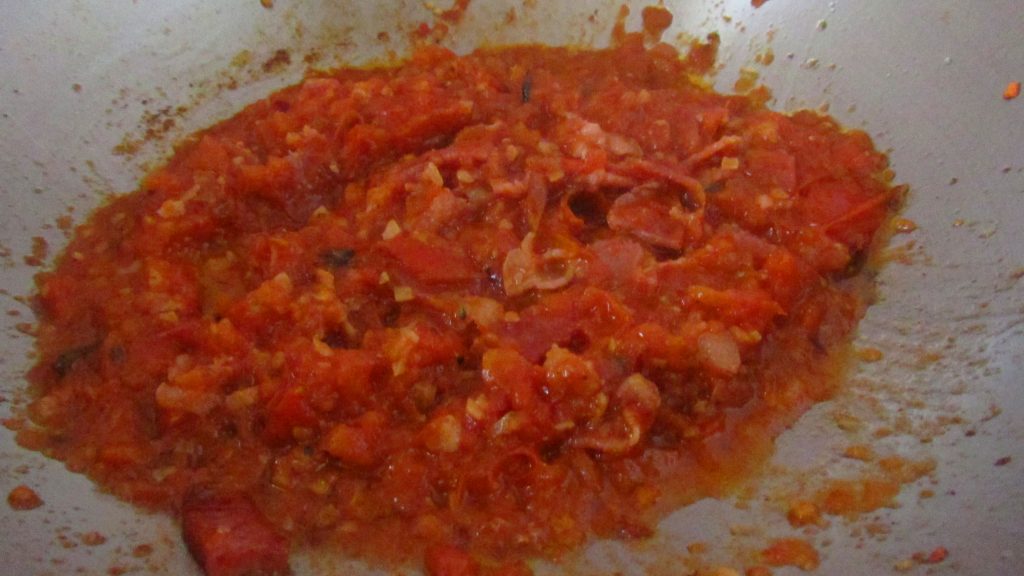
- In a large skillet, put a teaspoon of olive oil. The reason why I only use a teaspoon of oil is because the bacon will release its natural fat which will add flavor to the sauce. When the oil is hot enough, add the bacon, cook it for a few minutes under medium heat or until the bacon is slightly golden brown and has released a lot of its own fat or juices. Then add in the garlic.
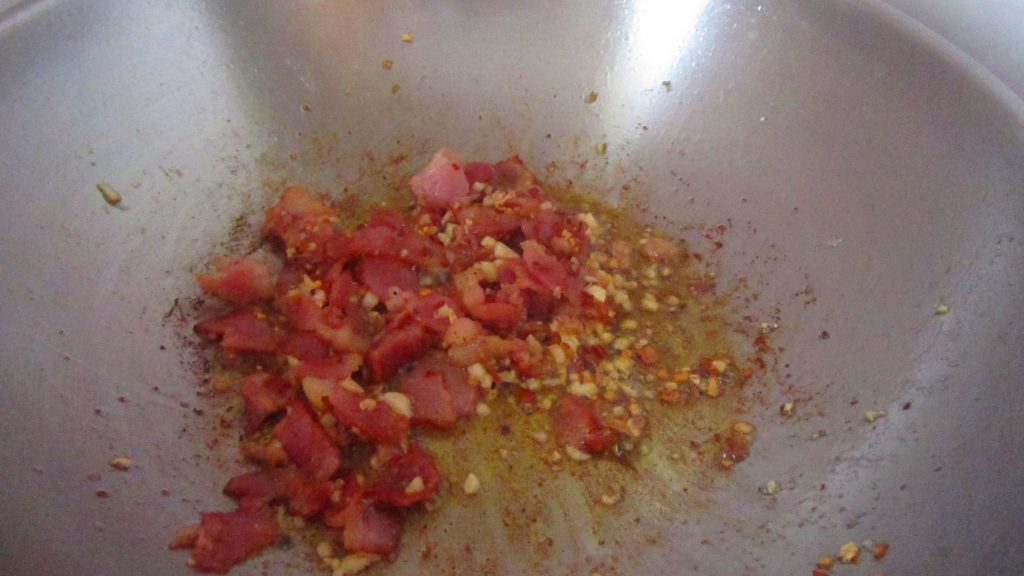
- Add a pinch of hot pepper flakes. You can put as much as you want until you get the right kick that suits your taste.
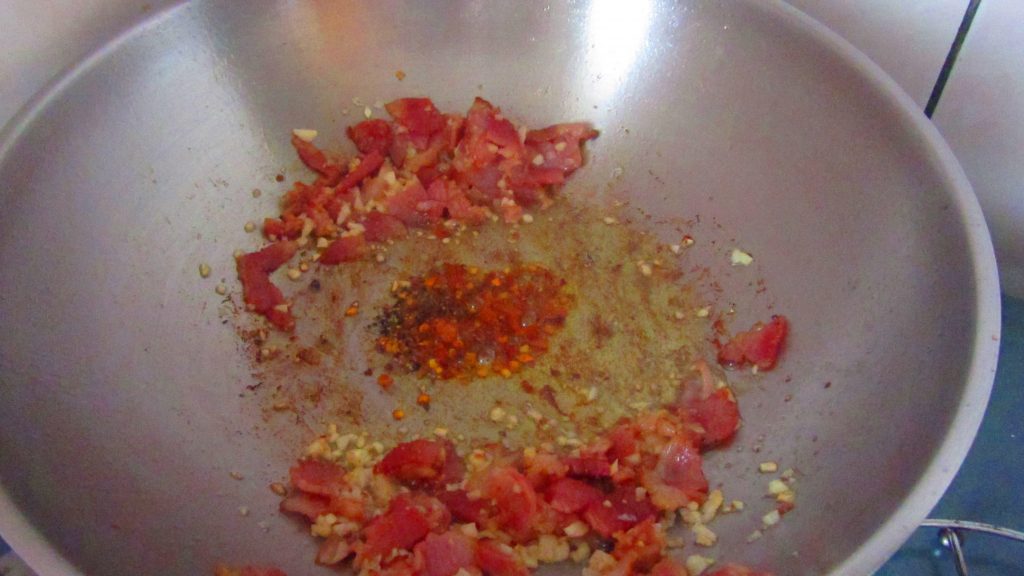
- Cook it for a minute or so or until the garlic becomes lightly brown.
- Now, add in the crush tomatoes and sugar. Again, make sure you get yourselves good quality ingredients. When it comes up to a boil, reduce the heat on medium low and let it simmer for 10-15 minutes. Add salt and pepper. Make sure you taste your sauce first before adding in the pasta.
- Turn off the heat and toss in the pasta. Mix to perfection! Add parmesan cheese should you prefer to.
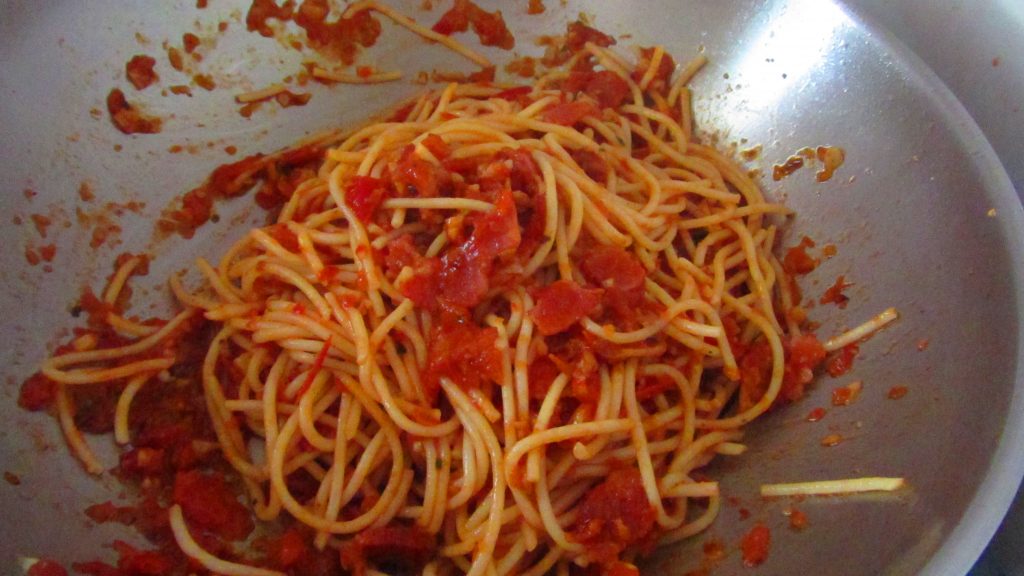
- Serve the pasta and enjoy!
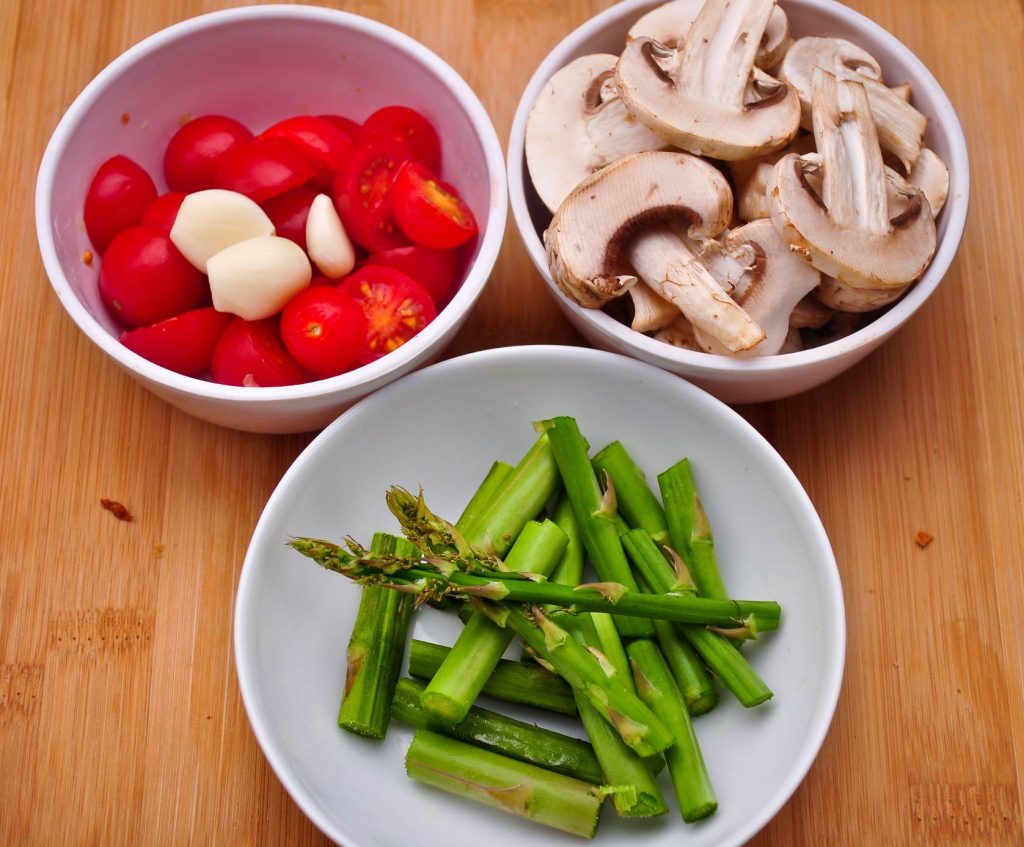
Pasta With Mushroom & Asparagus Recipe
Pasta is such a versatile dish; one can have it for breakfast or as an evening snack or a meal. You can serve it as a main course or pair it with soup for a light and fulfilling meal. It’s easy to make and you can add any flavor or ingredients, vegetables as per your choice. This recipe serves two people and takes just 35 minutes to prepare.
What You’ll Need:
- 1 cup farelle pasta
- ½ cup mushrooms
- 6-8 cherry tomatoes, sliced
- 3-4 asparagus stalks
- 2 tablespoon oil
- salt and pepper to taste
Let’s Cook!
- Boil four cups of water, add pasta to boiling water.
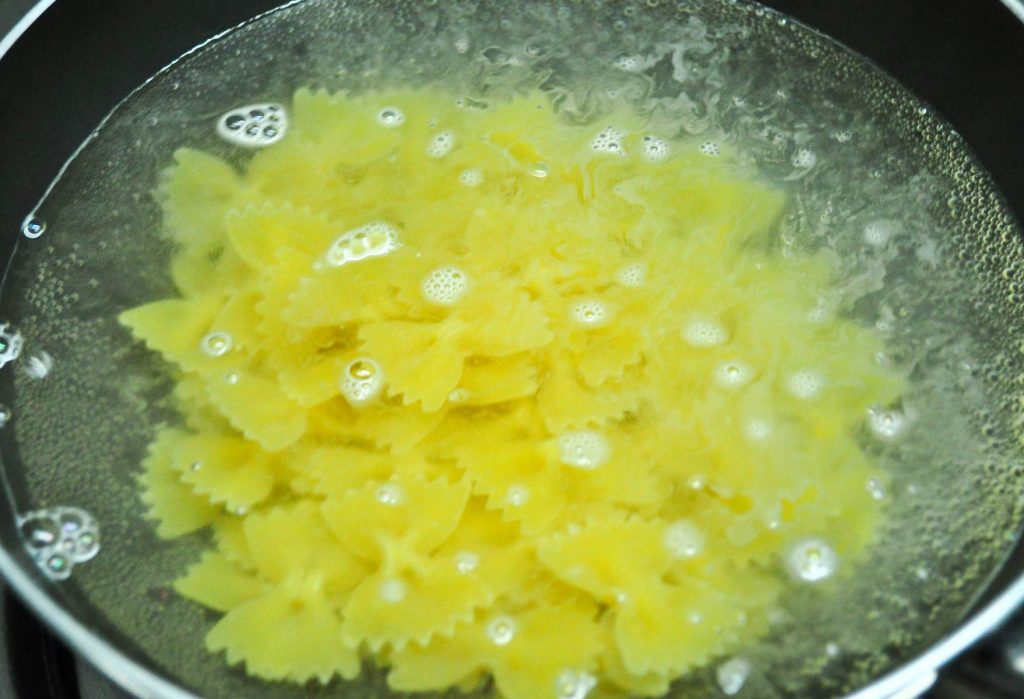
- Add 1 tablespoon salt and let it cook for 15-20 minutes or until cooked, then turn off the heat and drain the excess water.
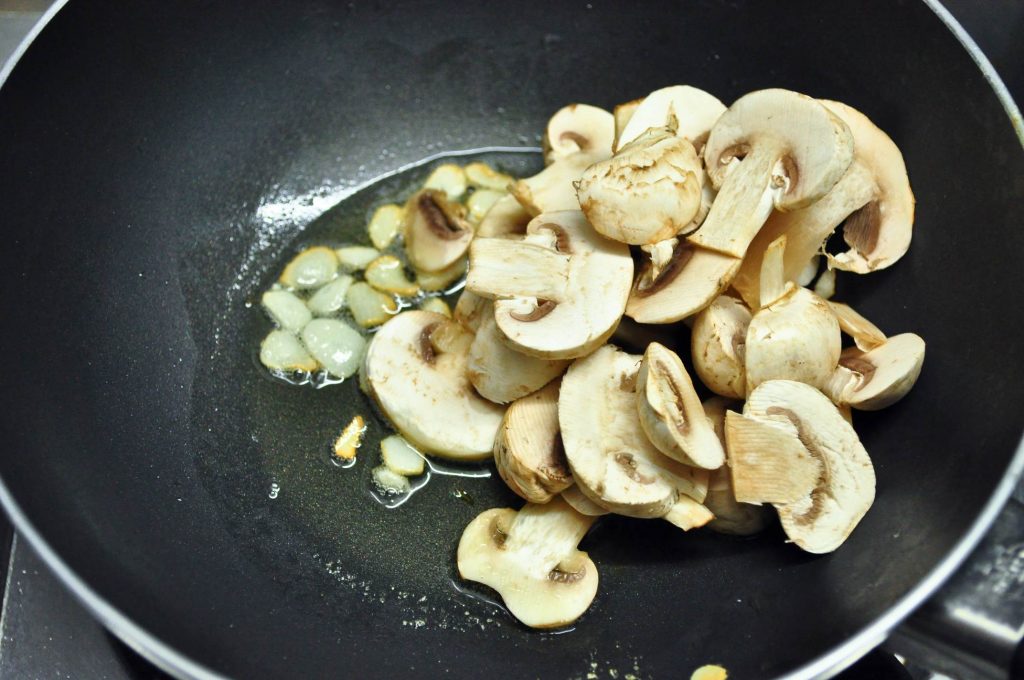
- Heat a pan with oil, add the garlic and mushrooms, then sauté for 5 minutes.

- Add the asparagus and sauté for 5 minutes.

- Add the pasta, salt and pepper.
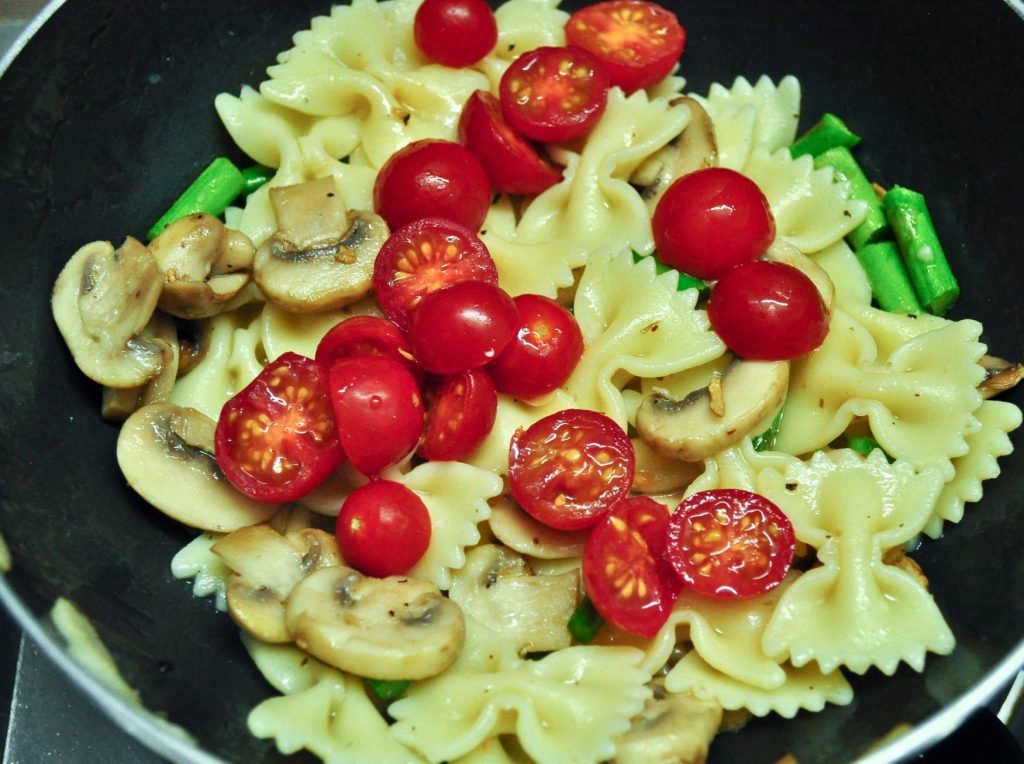
- Add the tomatoes and sauté for 5 minutes.
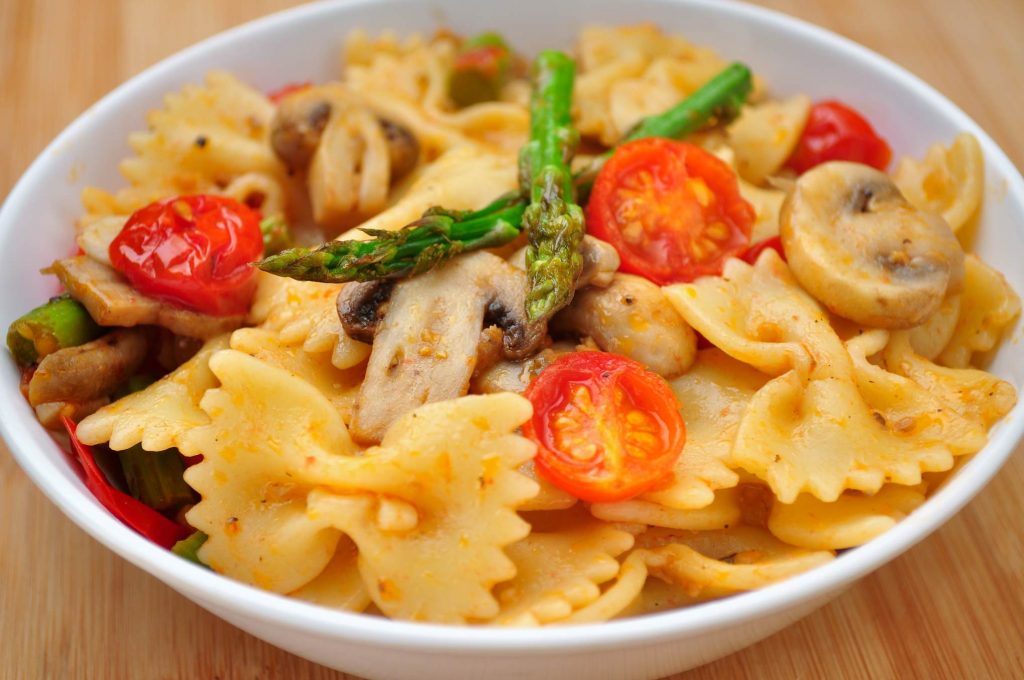
- Serve warm. It tastes great as it is and can also be enjoyed with other mixed veggies of your choice.
Quick and Easy Lomein Recipe
Wherever you may be from, there is no question that almost everyone loves lomein. Sadly, not everyone lives nearby a great take-out place (oh, we can only dream!). This lomein recipe is for everyone who craves some mouth-watering lomein but don’t have the time to slave for hours in the kitchen. In just less than half an hour, you’ll have tasty lomein for two which rivals those which you can get from Chinese take-out places.
What You’ll Need:
- 4 ounces dried canton noodles
- 3 cups chicken stock
- 1 cup shredded cooked chicken (or use 1 thinly sliced chicken breast)
- 1 cup carrots, cut into strips
- 1 cup baby corn, sliced diagonally into quarter inch thickness
- 2 tablespoons oyster sauce
- 1 clove minced garlic (or use 1 teaspoon garlic flakes)
- 1 small red onion sliced thinly (or use 2 teaspoons onion flakes)
- 1 cup snow peas
- 1 tablespoon regular vegetable oil
- 1 teaspoon sesame oil
- 2 tablespoons Chinese parsley (or Chinese celery leaves) for garnish
Let’s Cook Some Lomein!
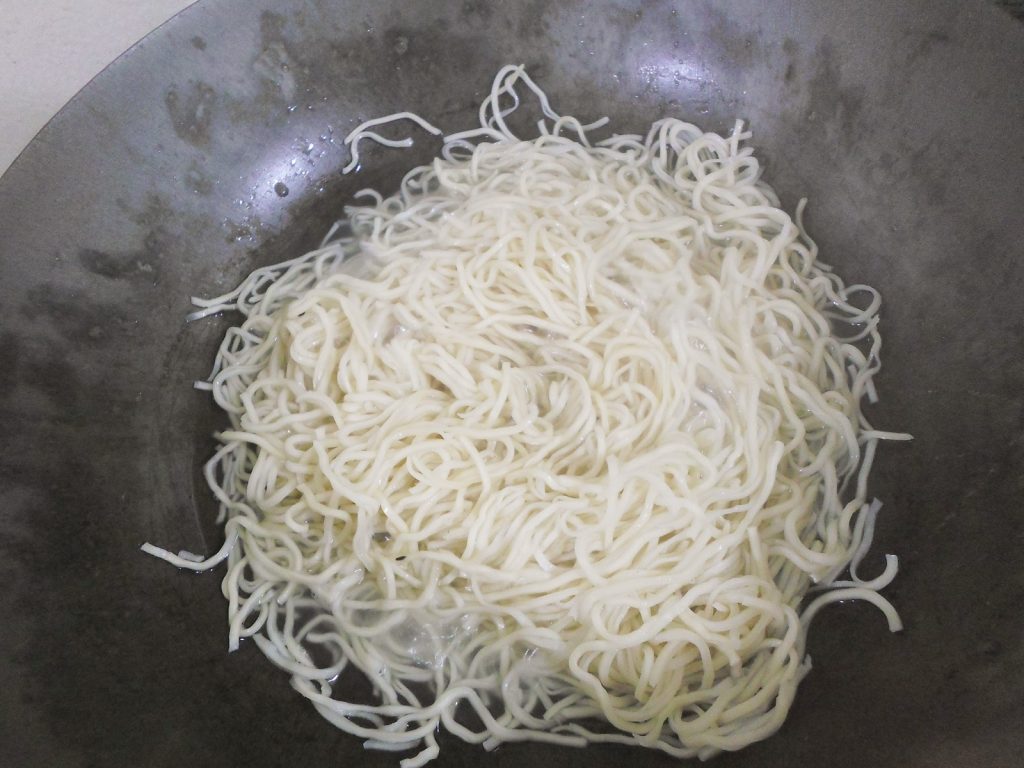
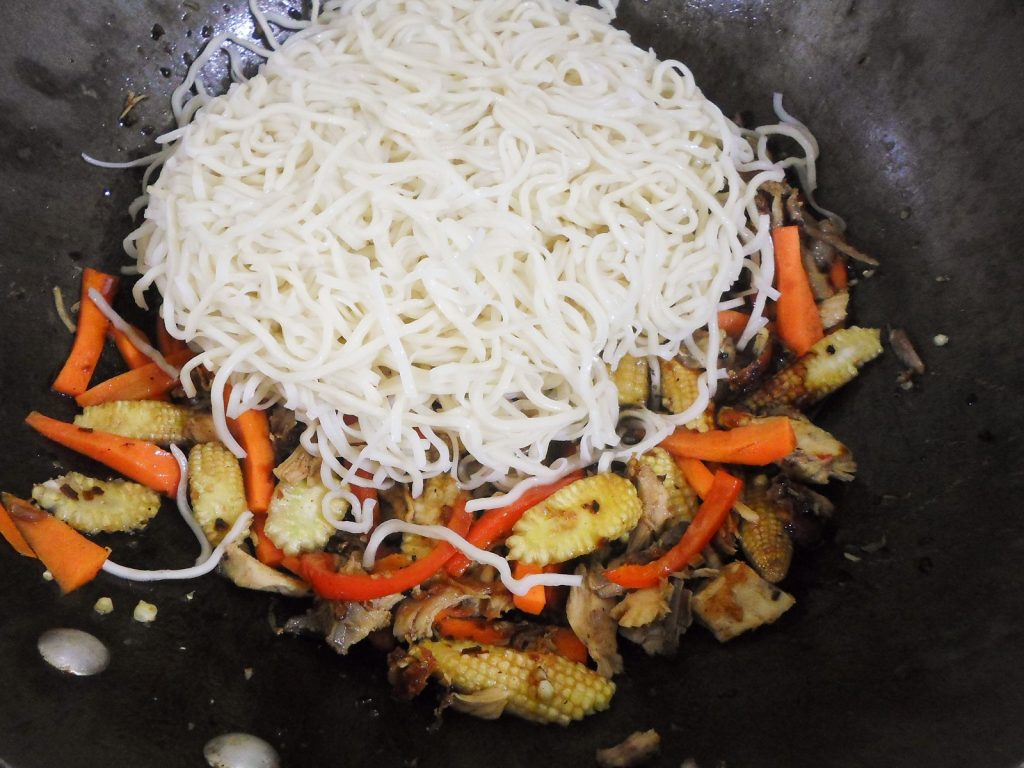
- Place the chicken broth in a pan and allow to boil. Place the dried canton noodles and cook until soft but still has a bit of bite (about 3-5 minutes depending on noodle’s thickness). Drain and set aside. Save remaining liquid for later if the lomein is too dry.
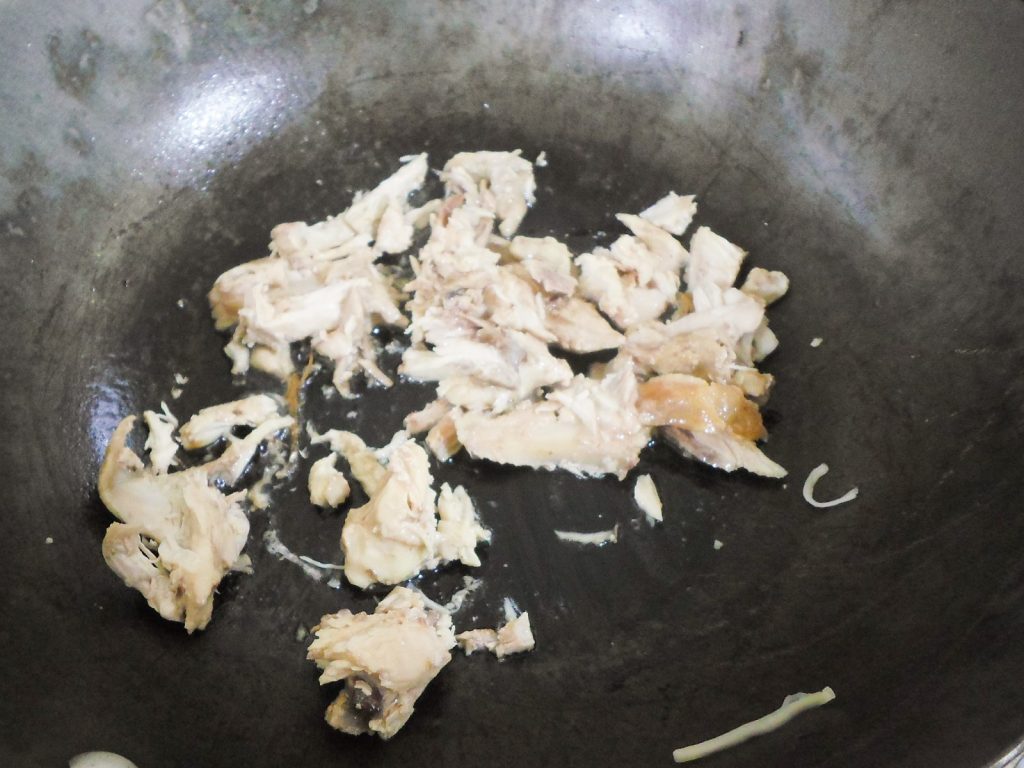
- In the same pan over high heat, stir fry the chicken in the vegetable oil until browned. Sauté the garlic and onion for about a minute after the chicken has been browned.
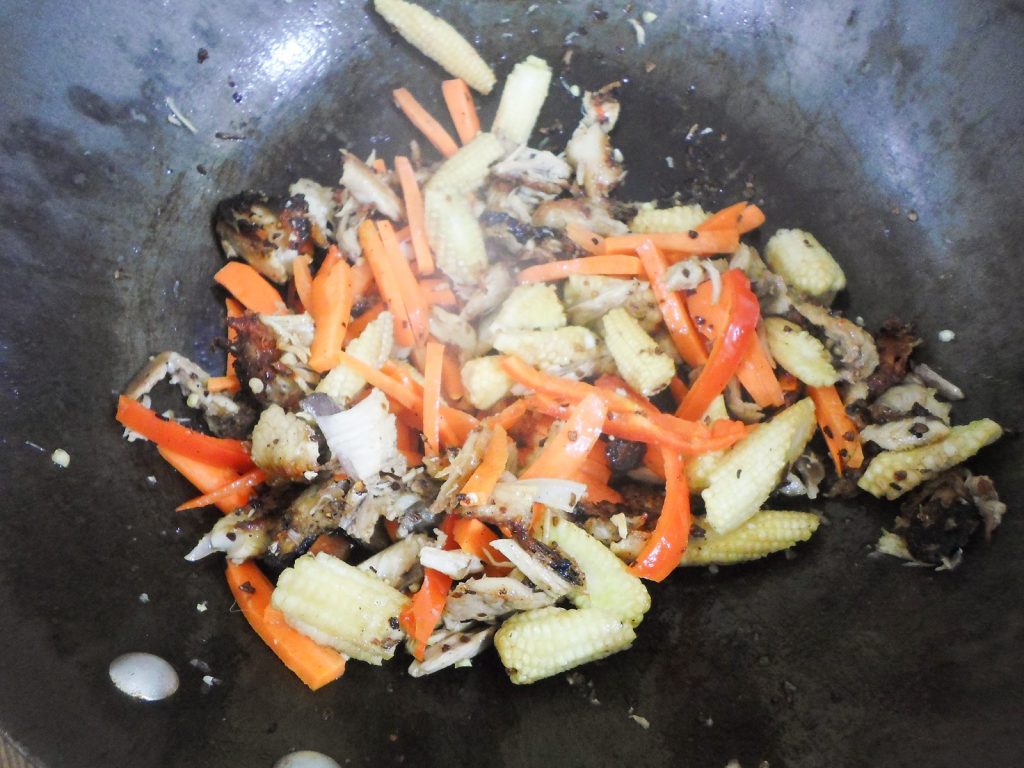
- Add the carrots and baby corn. If you love mushrooms, you may add them at this point. Stir-fry for about 1-2 minutes.
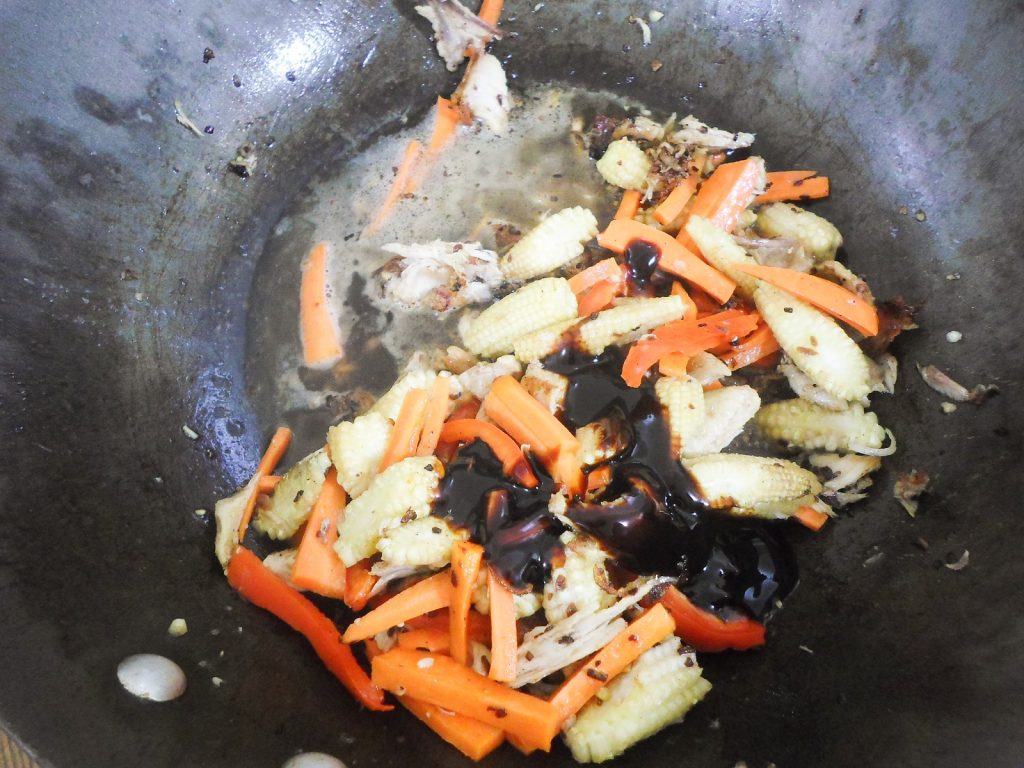
- Add about a quarter cup of water or reserved liquid and then the oyster sauce. Allow to heat through.
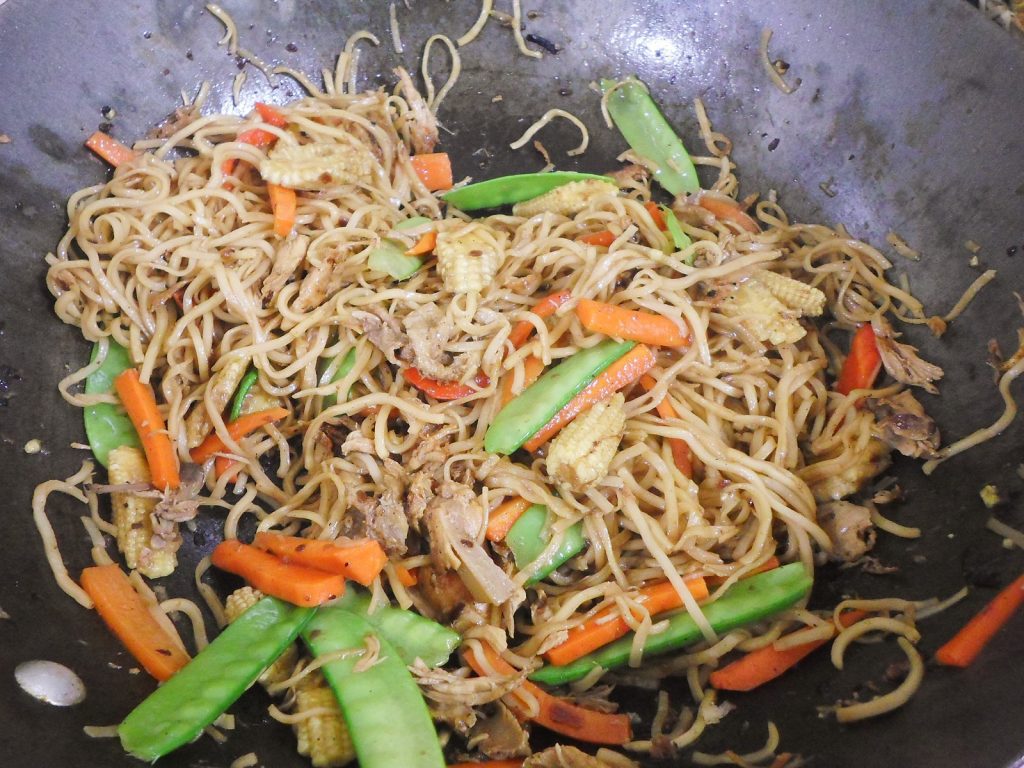
- Dump in the cooked canton noodles and mix the sauce through until all liquid has been absorbed.
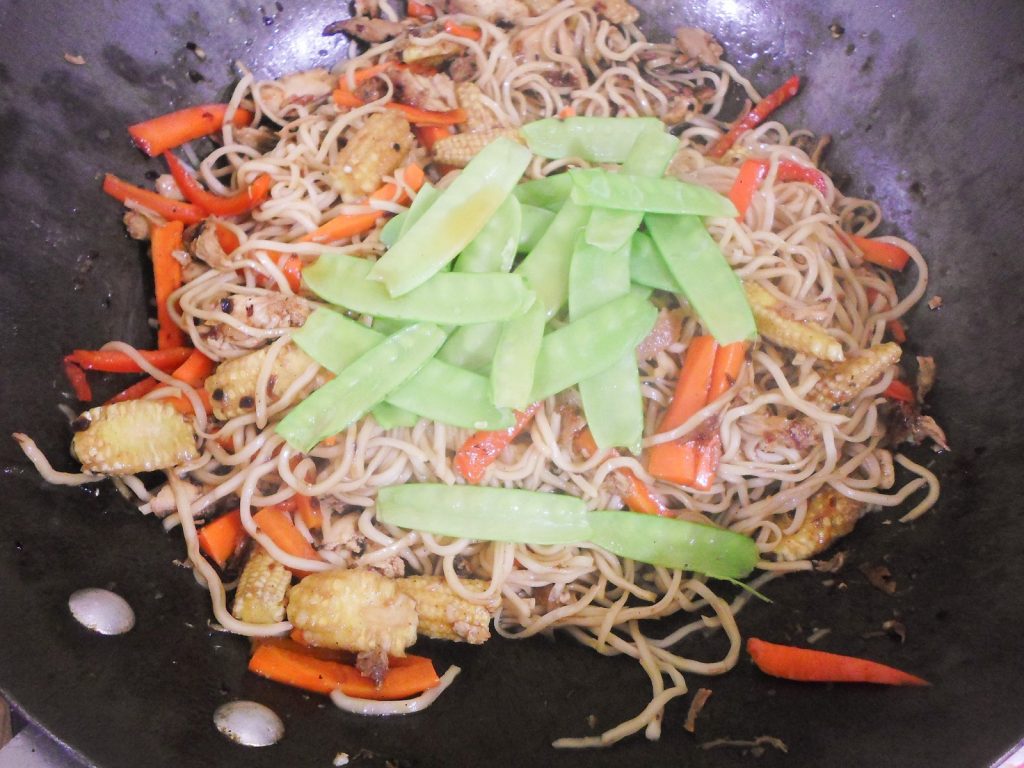
- Turn off the heat and add the sesame oil and snow peas. Continue stirring and mixing for 1 to 2 minutes allowing the residual heat to cook the peas.
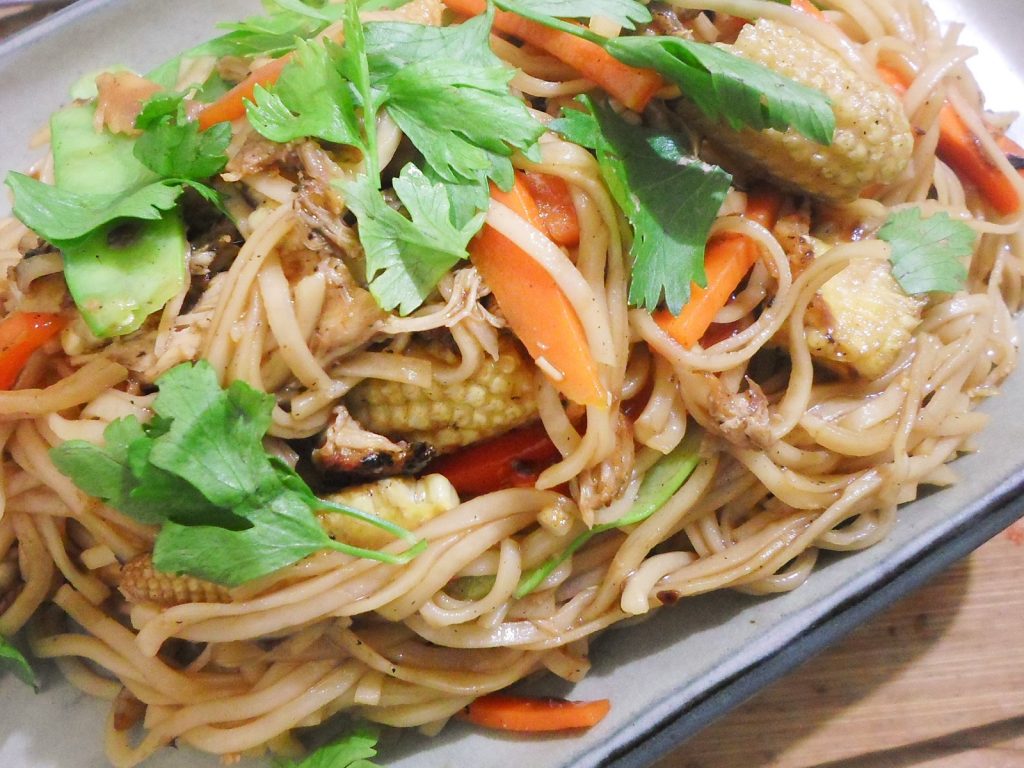
- Serve with a generous sprinkling of Chinese parsley!
- You’ll love this colorful recipe! This recipe serves 2 to 3 persons.
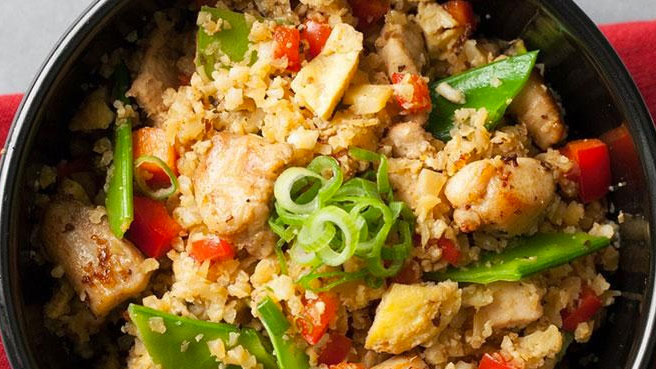
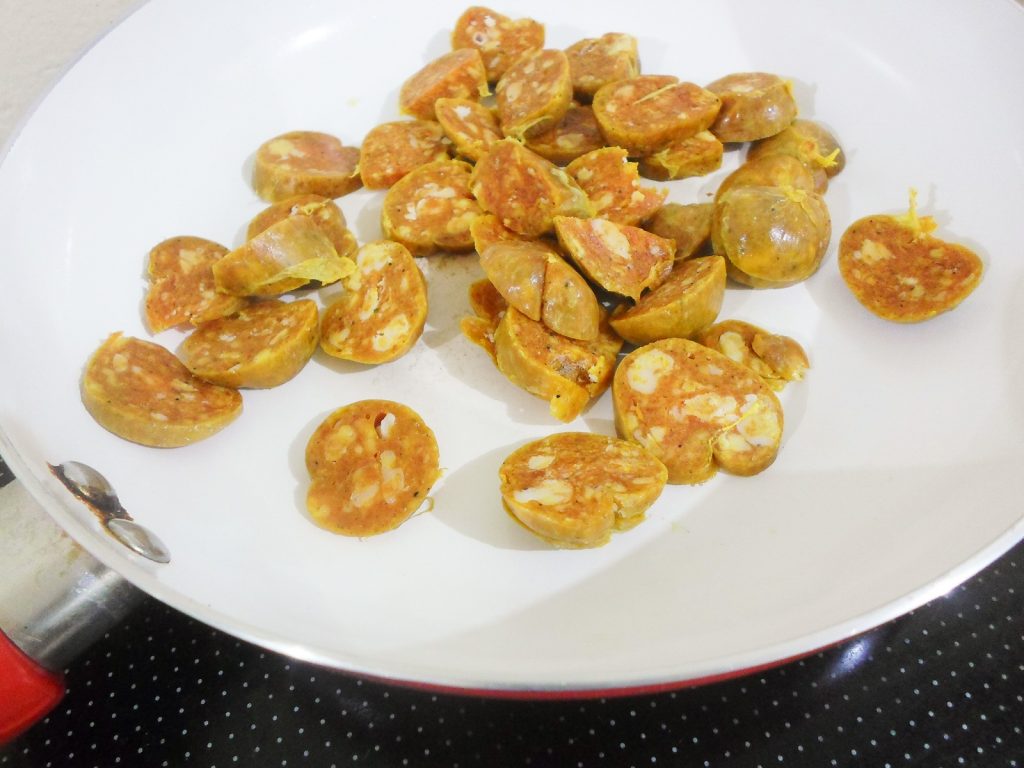
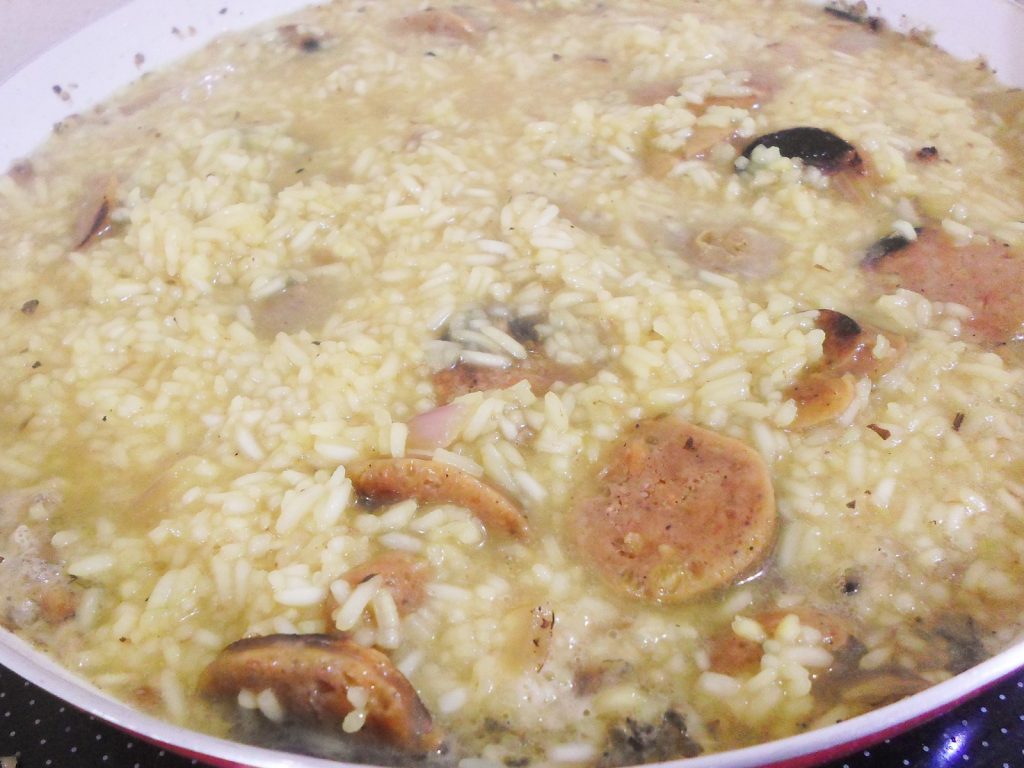
Sausage & Shrimp Recipe
An easy one pot dinner made with fluffy tasty rice, spiced sausage, and mellow shrimp. This sausage and shrimp rice recipes is not only easy, it looks pretty awesome too.
What You’ll Need:
- 1 cup uncooked rice, use whatever kind you prefer
- 1 cup shrimp
- Half a cup frozen peas
- ½ lb your favorite spicy sausage, sliced
- 3-4 cups chicken stock or seafood stock depending on which you prefer and how much water your rice needs to cook
- 1 red onion, roughly chopped
- Half a tablespoon of dried oregano
- Salt and pepper to taste
Let’s Cook!
- In a heated pan over medium high heat, fry your sliced sausage in its own oil until browned.
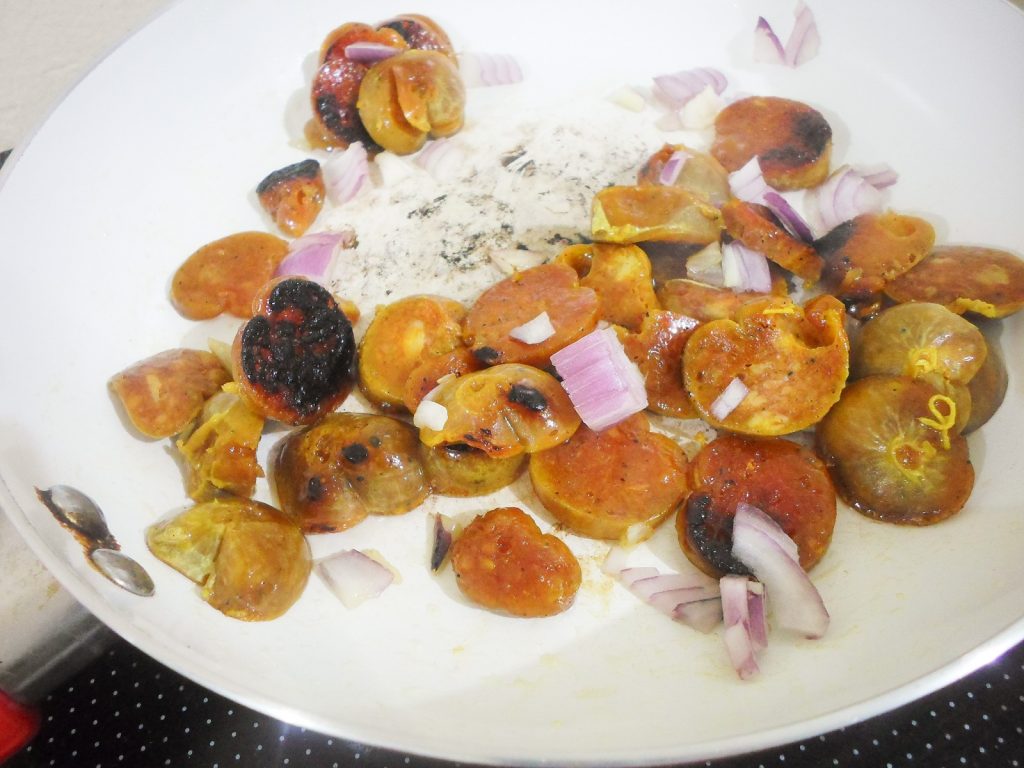
- Add in the chopped onion and sauté until the onion becomes translucent.
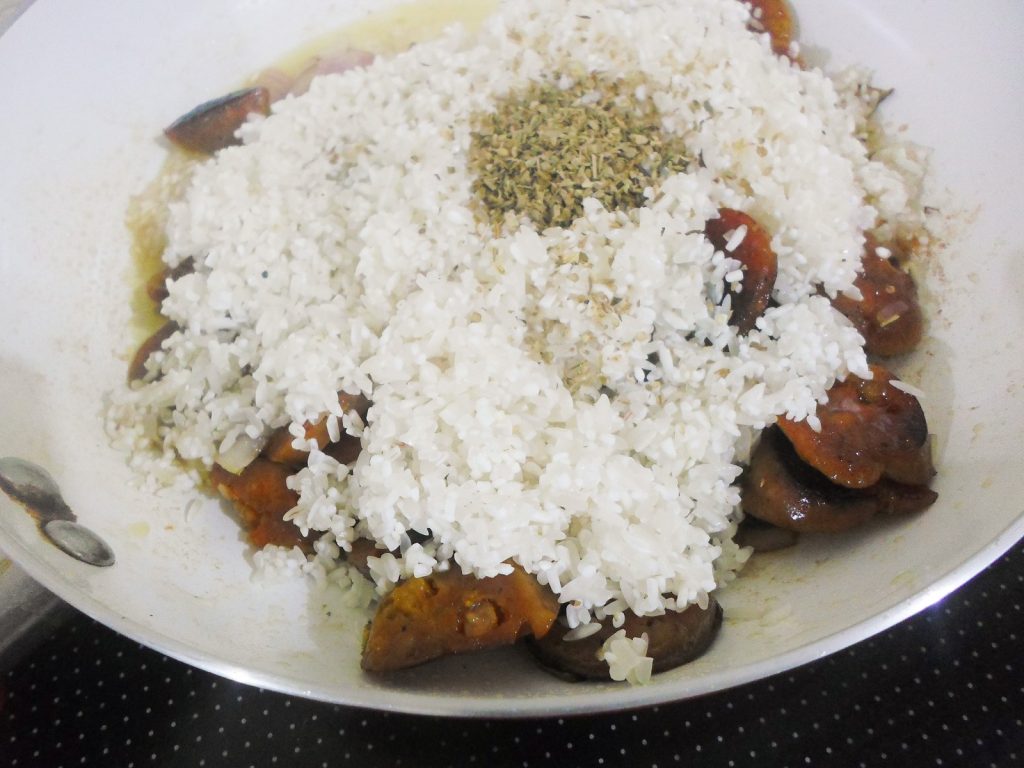
- Add in the rice and oregano. Stir until the rice is coated with the oil from the sausage.
- Add the chicken broth, wait until it boils and then reduce heat to a simmer and cover until the rice has absorbed most of the fluid. No more stirring from this point. Season with salt and pepper to taste.
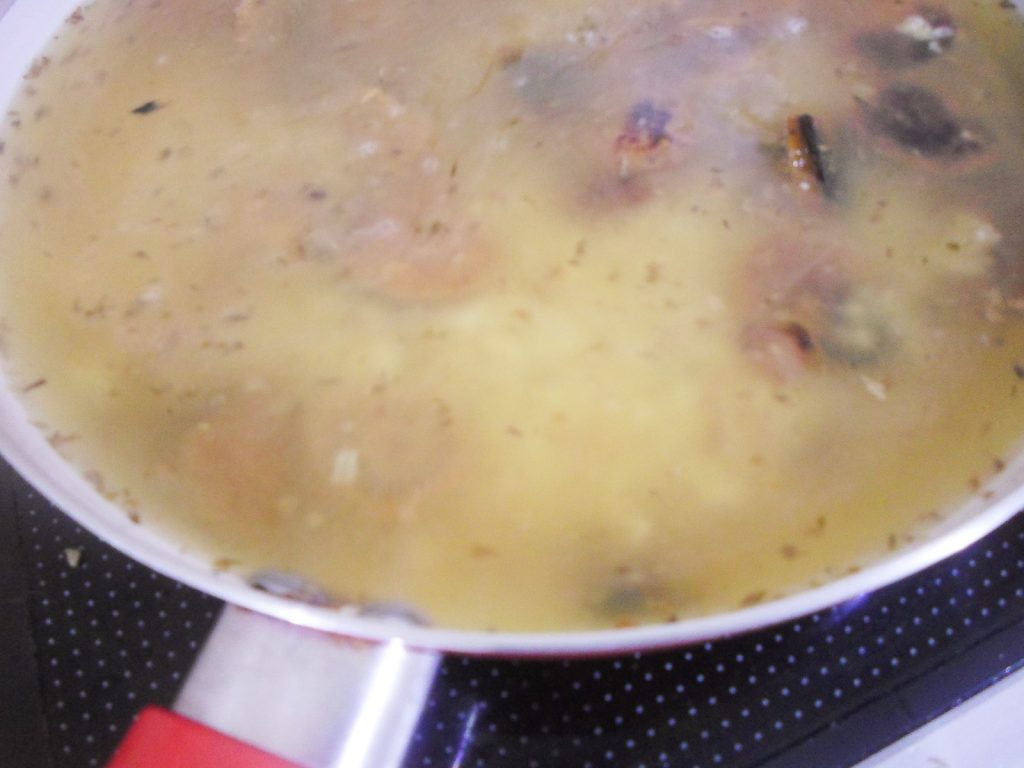
- After 10 minutes, the rice will be almost fully cooked and the mixture will be moist but some liquid will still be visible.
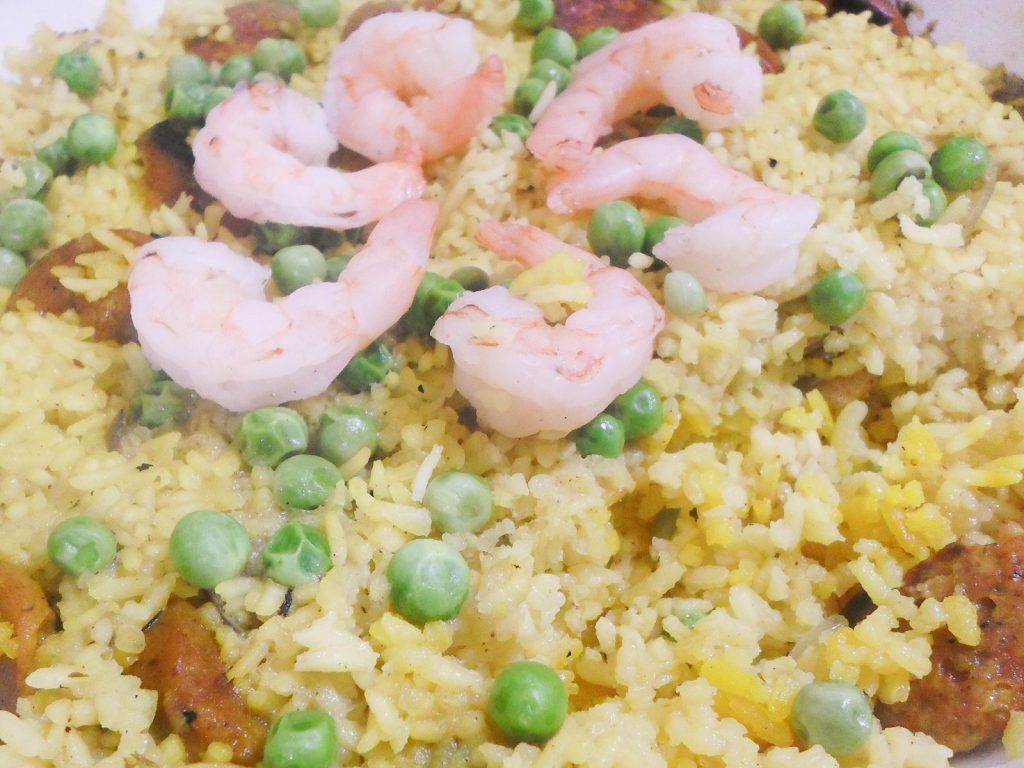
- Add in the shrimps and peas, make sure the heat is set to low and cover for another 10 minutes.
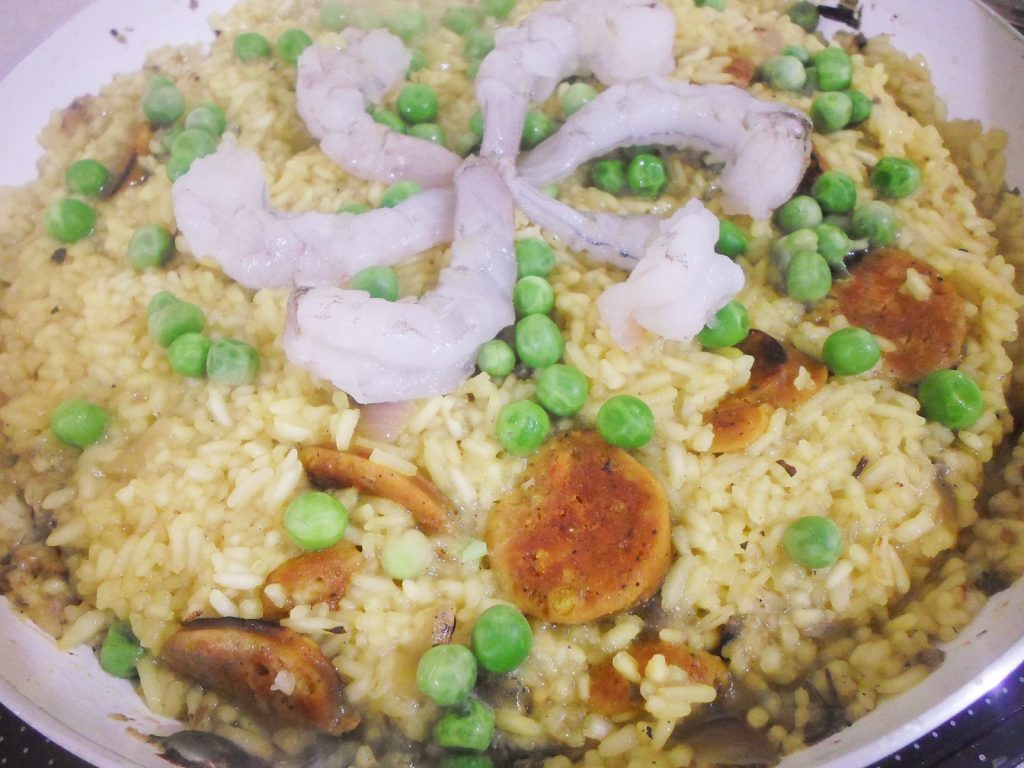
- Voila! A delicious and gorgeous dinner for 3-4 persons! Best served with some chili oil and a slice of lemon. Enjoy!
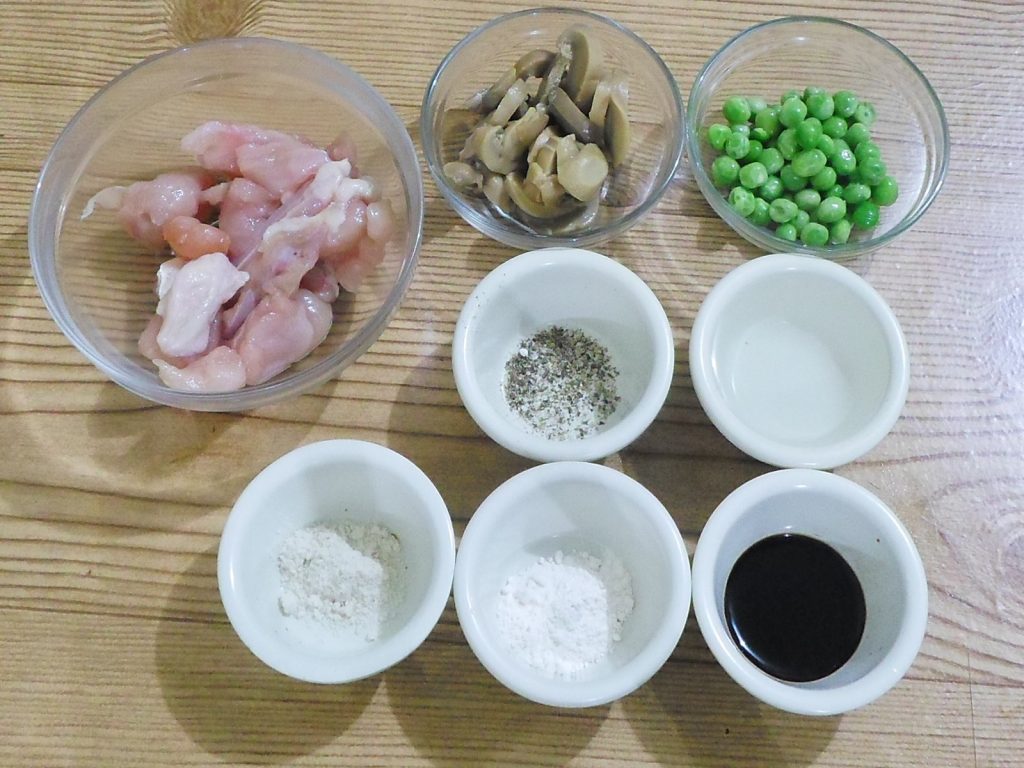
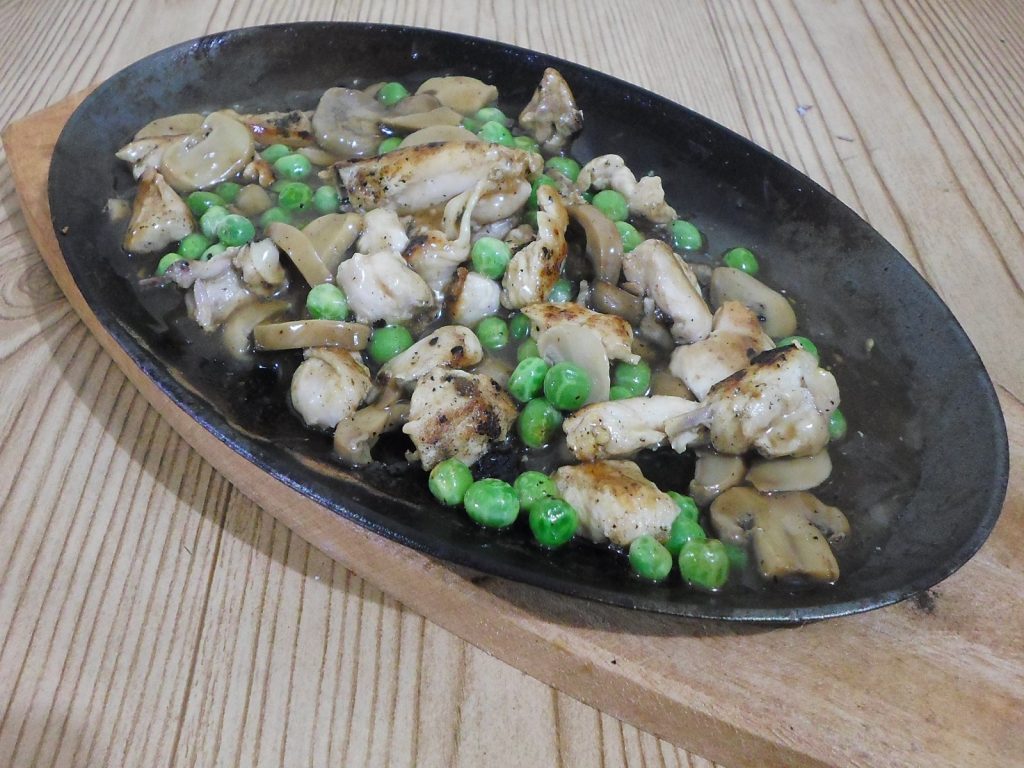
Sizzling Chicken Mushroom Recipe
Want a new idea to use your sizzling plate or stove top griller? Why not try this easy peasy chicken for a no-fuss crowd pleaser meal for your grilling party? It will make your cooking time really sizzle!
What You Will Need:
- ½ pound chicken breast, cut into strips
- ½ cup button mushrooms, sliced
- ½ cup frozen green peas, thawed
- ½ cup water
- 1 tablespoon soy sauce
- A pinch of ground black pepper
- 1 heaping teaspoon cornstarch
- 1 teaspoon onion powder
Lets Get the Chicken Sizzling!
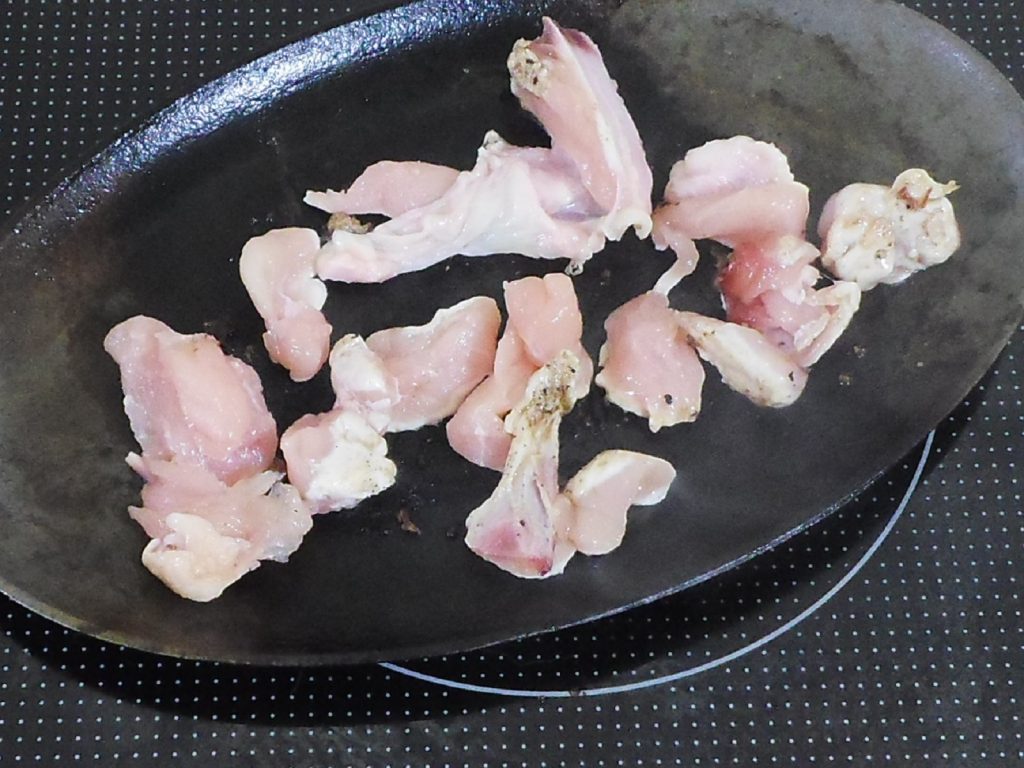
- Make sure you got all of your ingredients ready to go.
- Heat your sizzling plate over high heat and grill the chicken on it until cooked.
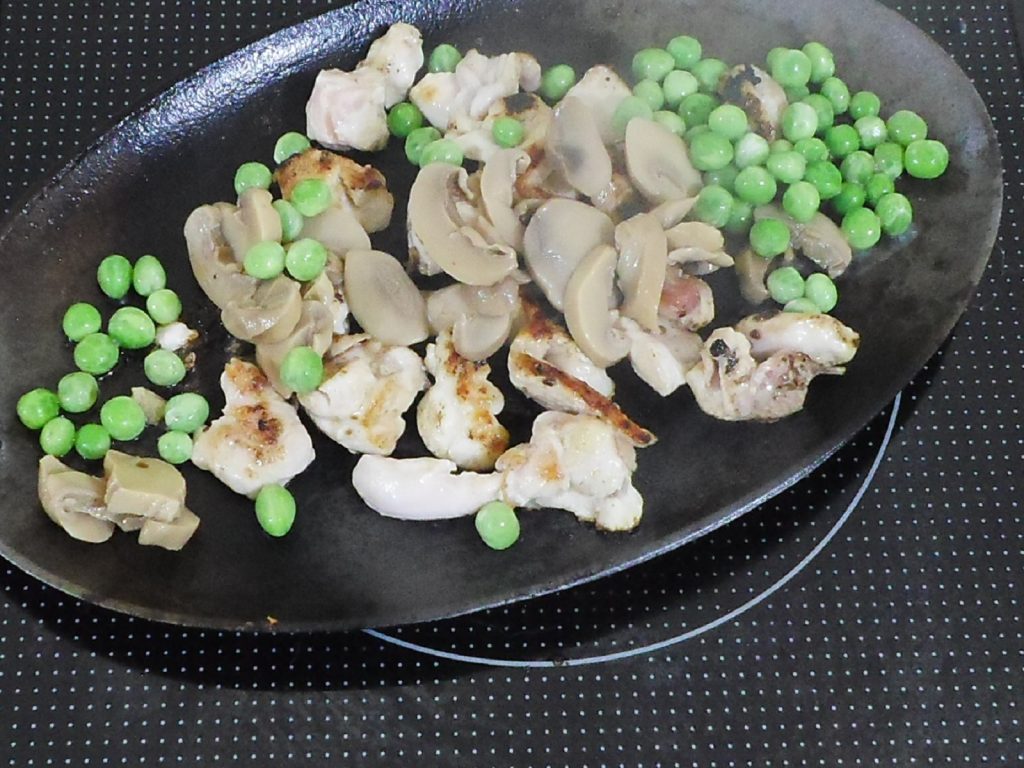
- Add the mushrooms and the peas and cook for 3 minutes.
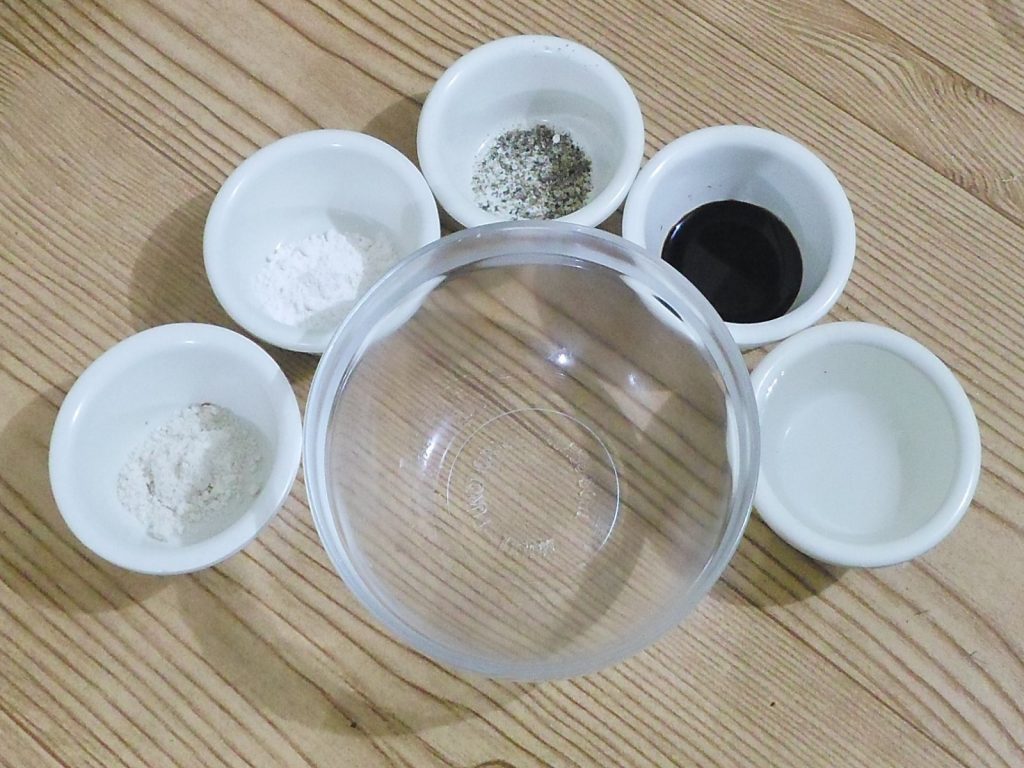
- To make the sauce or the gravy, mix together the water, soy sauce, ground pepper, onion powder and cornstarch.
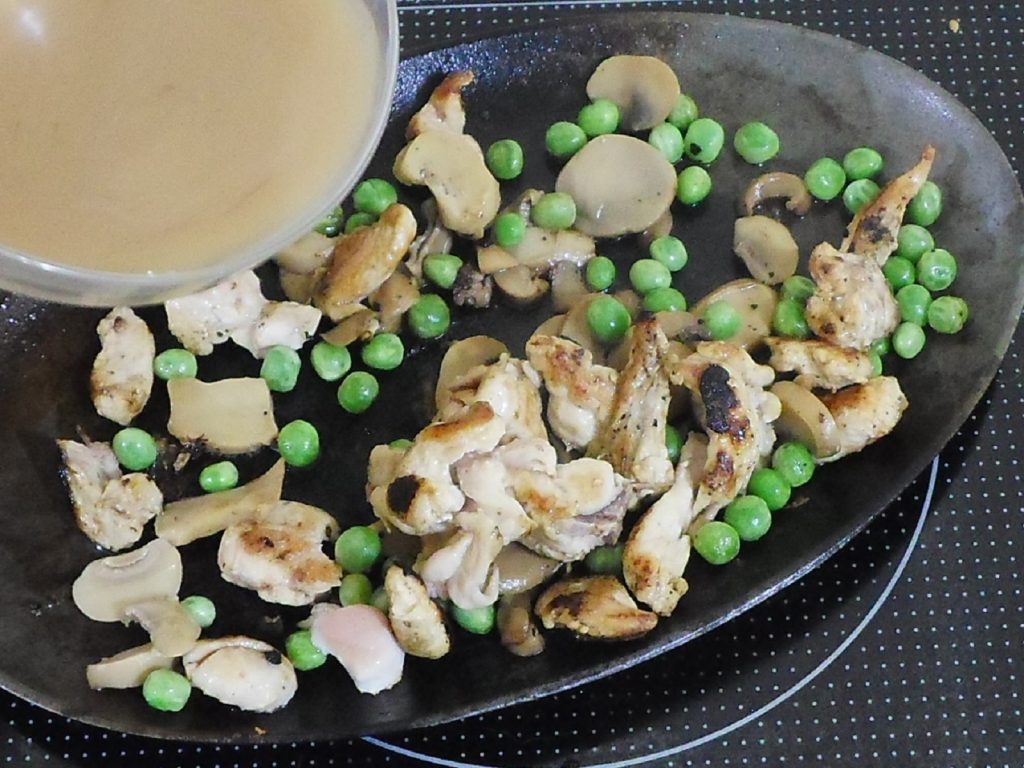
- Pour over the chicken, mushrooms and peas mixture. It will thicken immediately. Take off the heat and serve.
- The dish easily serves two persons and the recipe can be easily doubled to feed more. Enjoy!
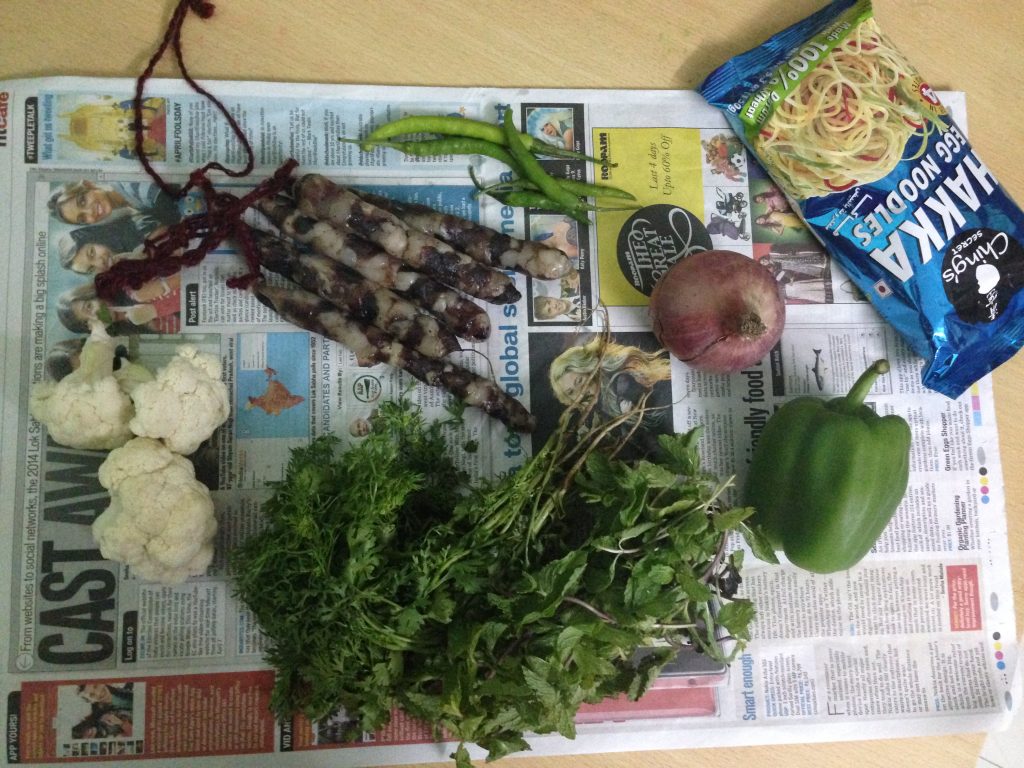
Smoked Pork Sausage Hakka Noodles Recipe
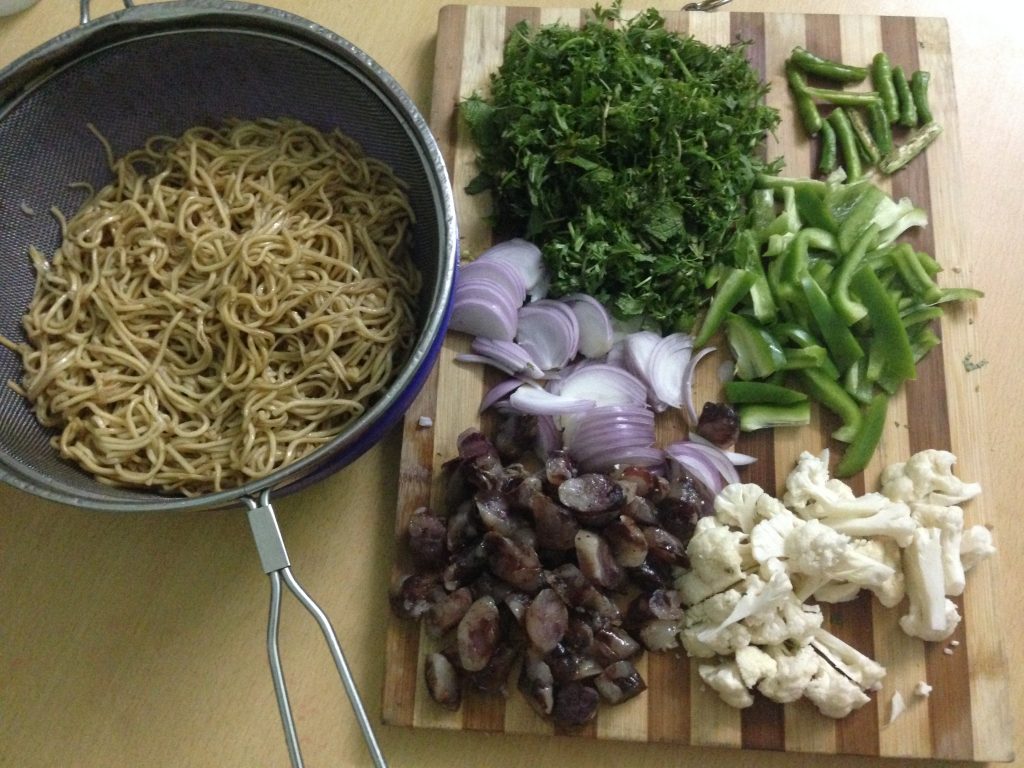
Noodles are something which will always make people happy and they can be stirred up in just 30 minutes. You can generally add anything you like so today I decided to experiment with cauliflower; something I have never used in Hakka noodles. So let’s get started!
What You Will Need:
- Hakka Noodles – 1 packet
- Smoked Pork Sausages – 5
- Coriander Leaves – 50gms
- Soya Sauce – 1 tbsp
- Mint Leaves – 50gms
- Onion – 1
- Green Chilies- 3
- Capsicum – 1
- Salt to Taste
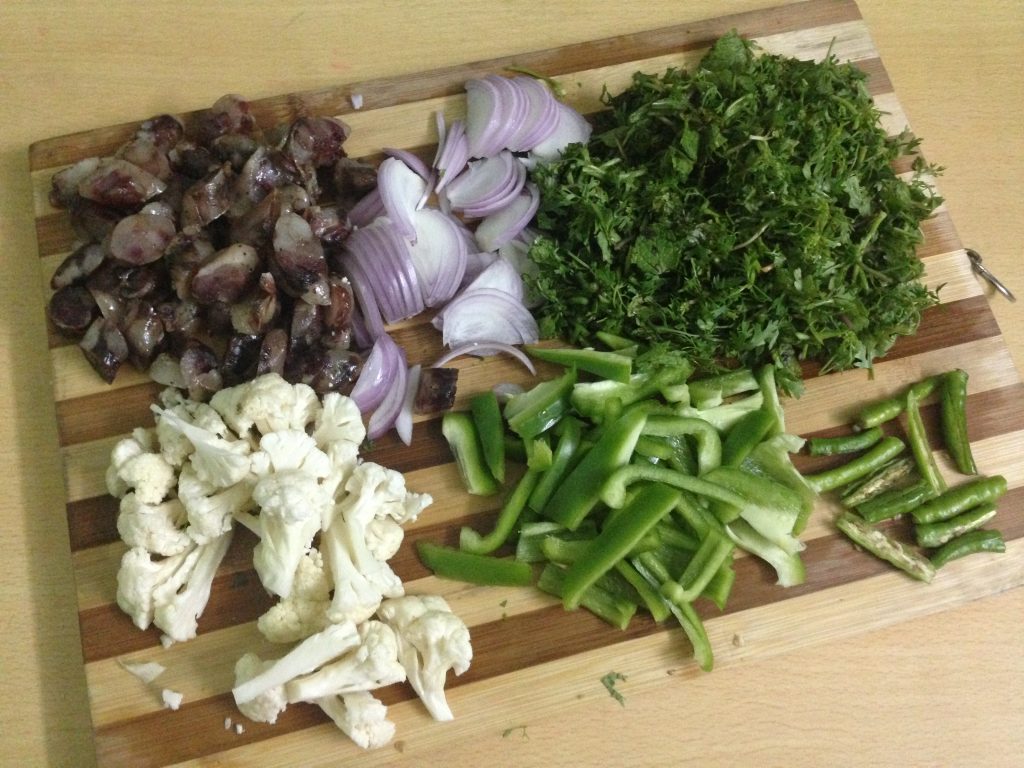
Method:
- Firstly cut and slice all the pork vegetables and keep it aside.
- Then cook the packet of Hakka noodle in a container. Make sure to add a little bit of oil so that they don’t stick together. Boil the noodles for 5-6 minutes.
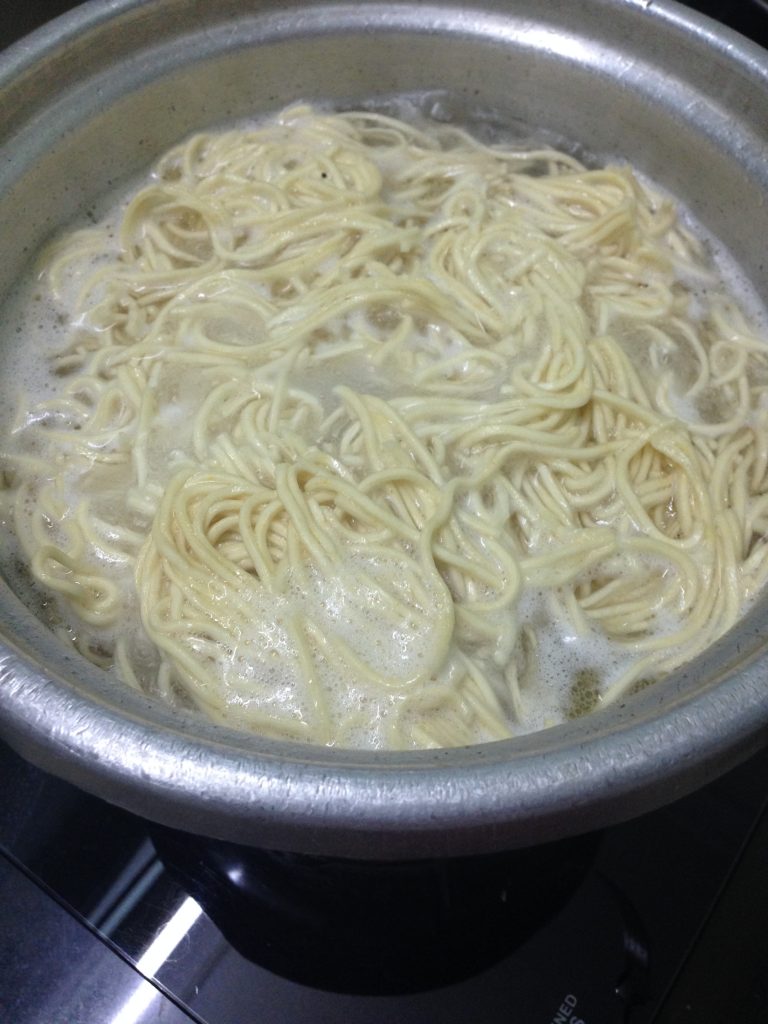
- Take the noodles of the gas, transfer them to a strainer and wash them under the tap so that they stop cooking.

- Then add a little bit of oil and soya sauce to the noodles. Once this is ready, we are ready to cook the rest of the meal.
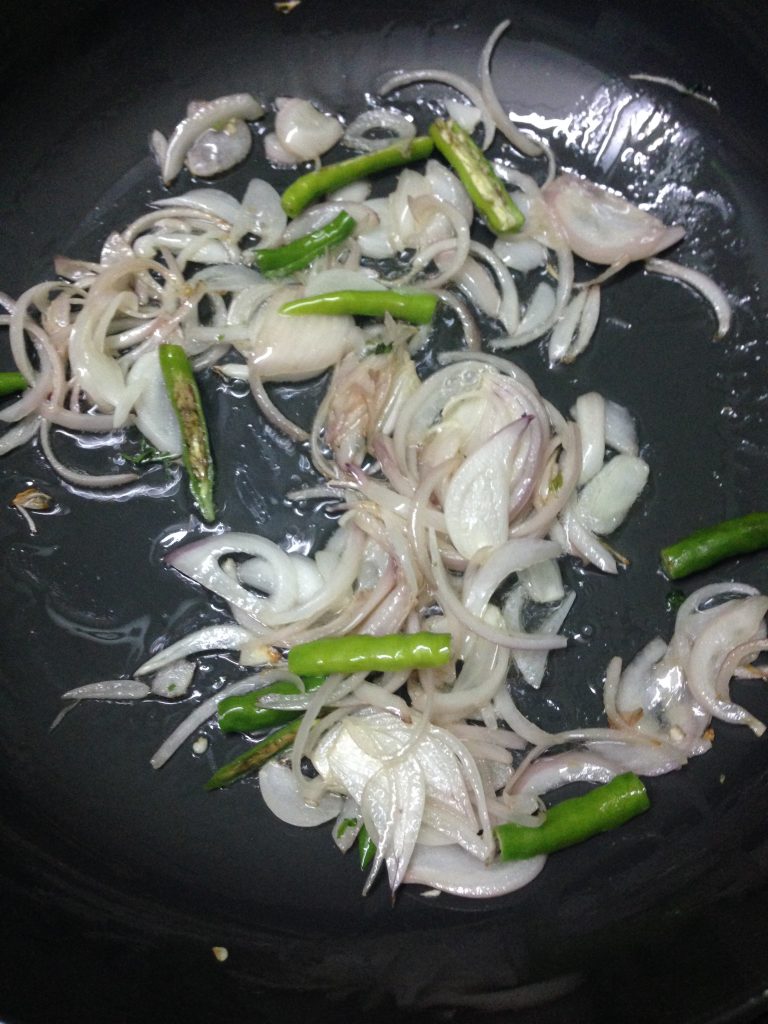
- In a pan put some vegetable oil. Add the onions and chilies till they turn light brown.
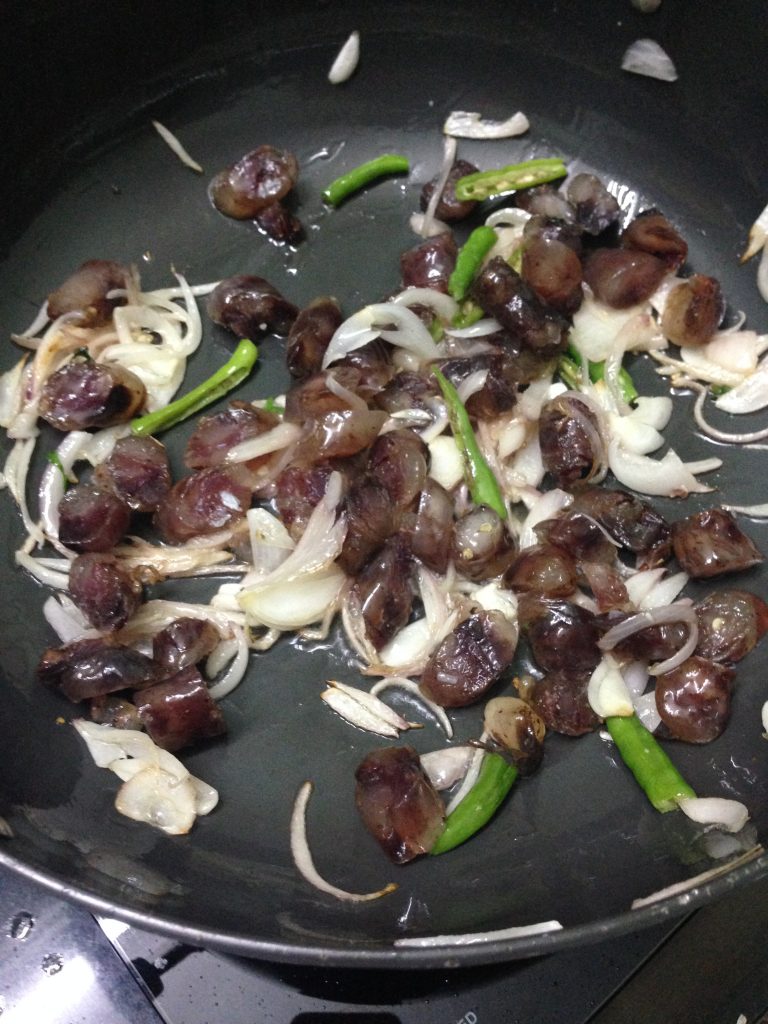
- Then add the smoked pork sausages and cook it for 5 – 7 minutes.
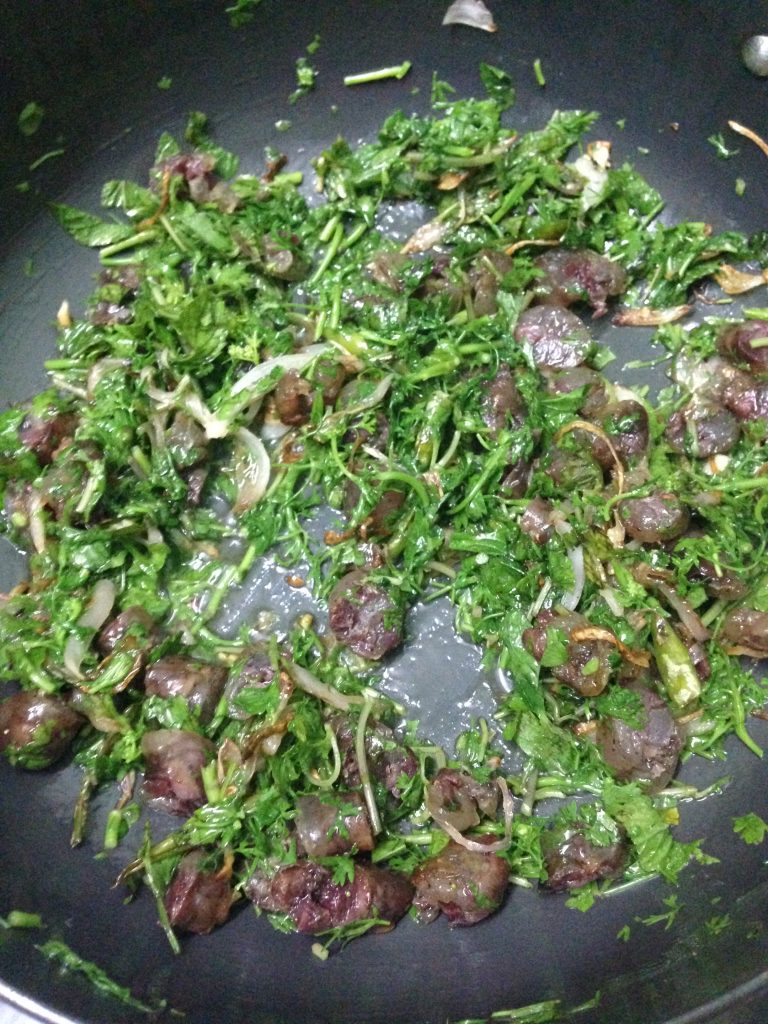
- Add the coriander and mint leaves and cook for another 5 minutes. The major aroma will be from the coriander and mint leaves.
- Then add the cauliflower, capsicum and salt to taste.
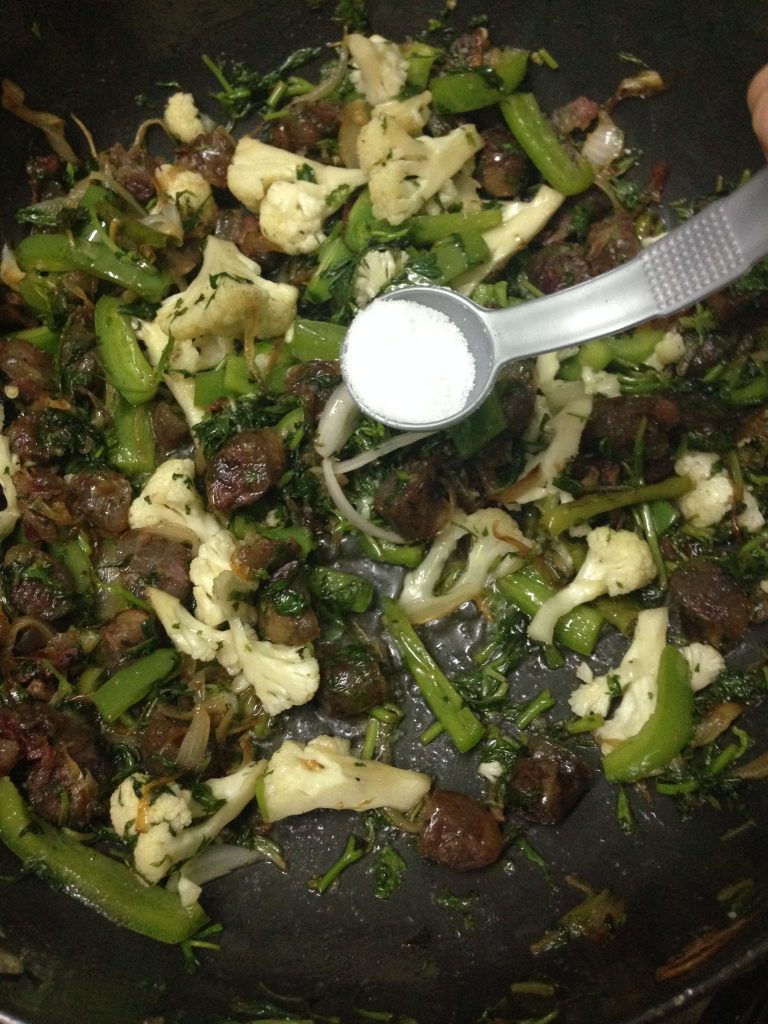
- Then add the noodles and then cook it for another 5 minutes.

- Take it off the gas and then serve it with mint leaves.

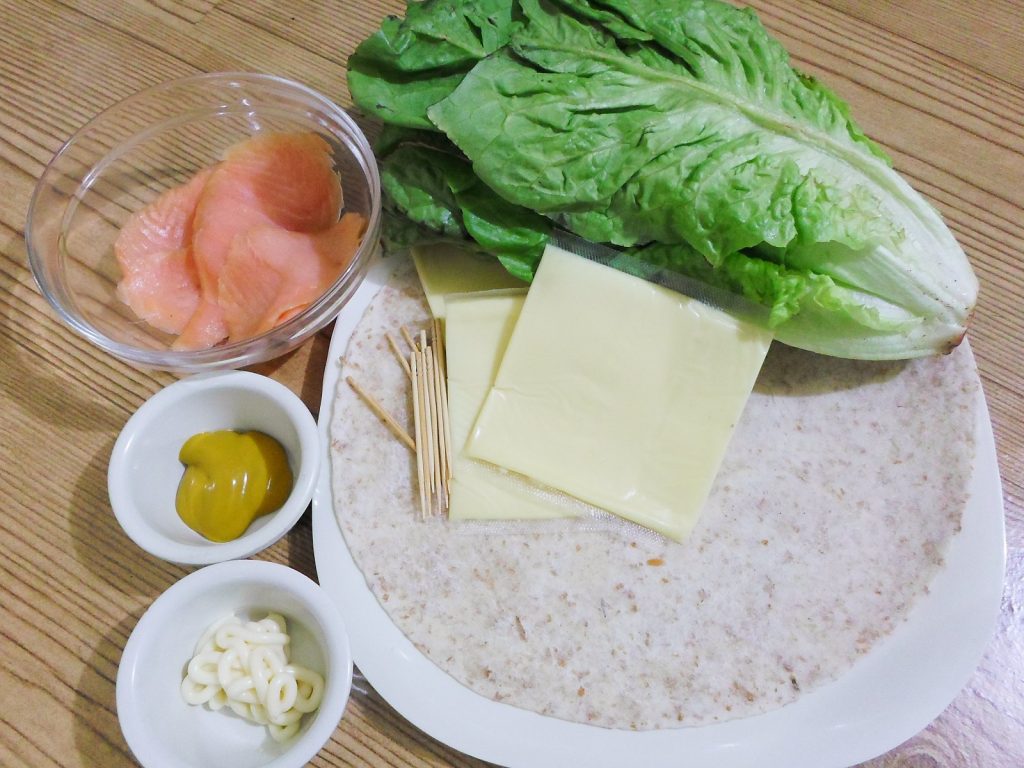
Smoked Salmon Rollups Recipe
Want some new appetizer or cocktail recipe which is easy and palate friendly? This smoked salmon tortilla rollups is a crowd pleaser, perfect for gatherings with guests or for pot lucks. The best part is they look fancy and guests will think you got them from a specialty deli or restaurant although it is so easy that even someone who is a complete kitchen neophyte can do it.
What You Will Need:
- 12 inch flour tortilla (we are using whole wheat flour tortillas in this recipe)
- 1 tablespoon mayonnaise
- 1 tablespoon mustard
- Toothpicks or cocktail skewers
- 3 ounces of smoked salmon, sliced thinly
- A few leaves of lettuce (either ice berg or romaine)
- 3 slices of mild cheese (the one used for sandwiches)
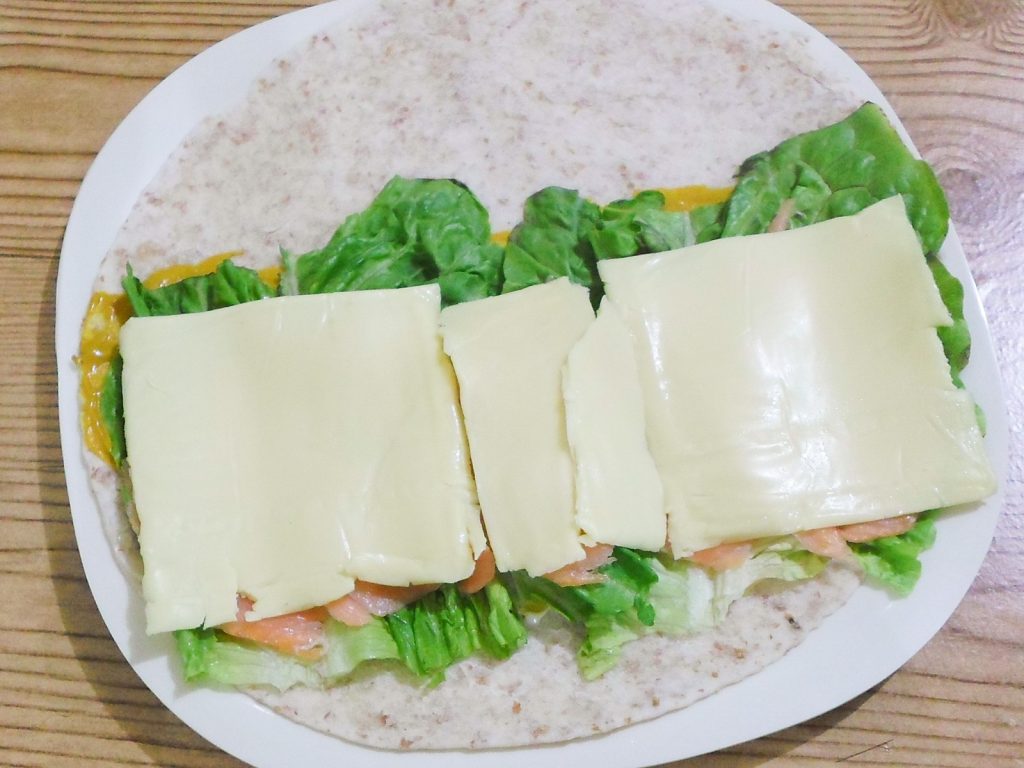
Time to Roll up Some Appetizers!
- Get all of your ingredients ready.
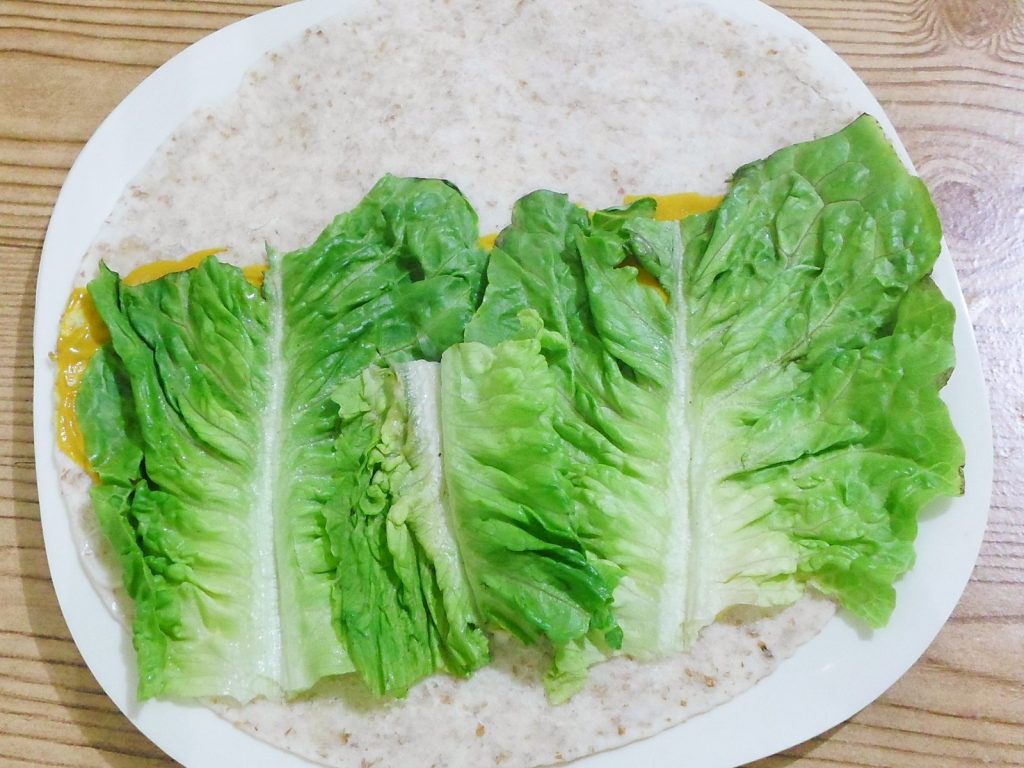
- Spread the mayonnaise and the mustard over a rectangular area of the flour tortilla.

- Add in the lettuce.
- Add a layer of smoked salmon.
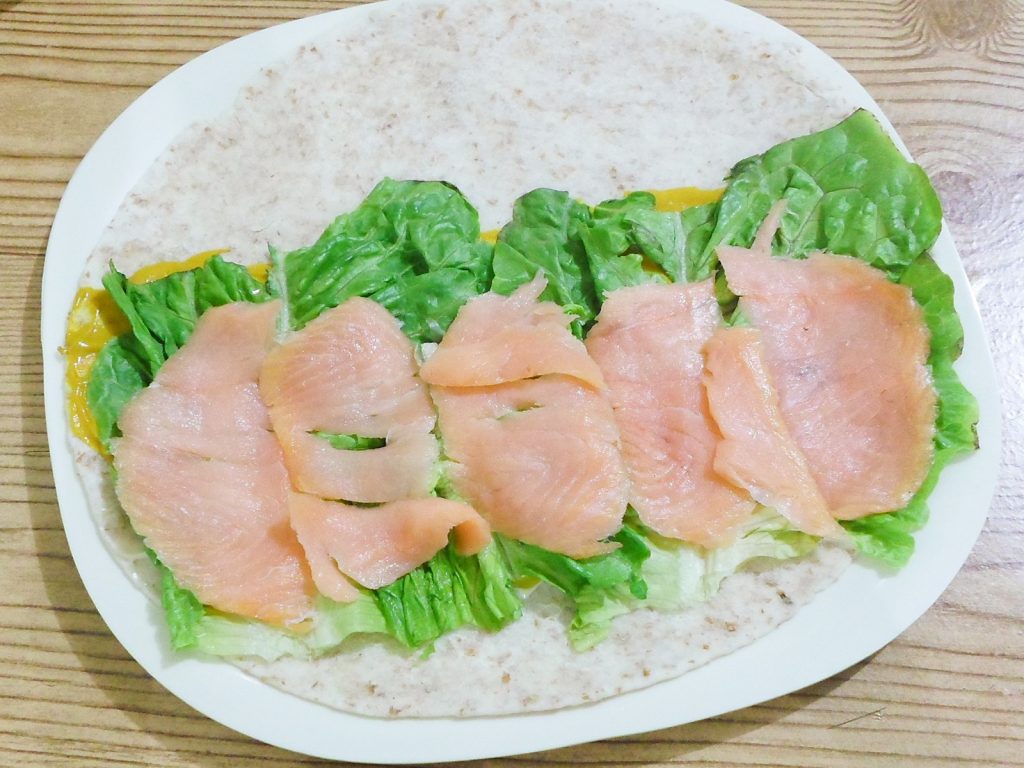
- Then a layer of cheese. Arranging them this way will create a nice color contrast when you cut the roll up into slices.
- Roll the tortilla tightly, secure with toothpicks/cocktail skewers about an inch apart. Use this as a cutting/slicing guide. Cut the rolled up tortilla using a very sharp knife.

- This recipe is for a single roll which makes 10-12 slices.

- You may serve this for brunch, cocktails, or even dinner! Enjoy!
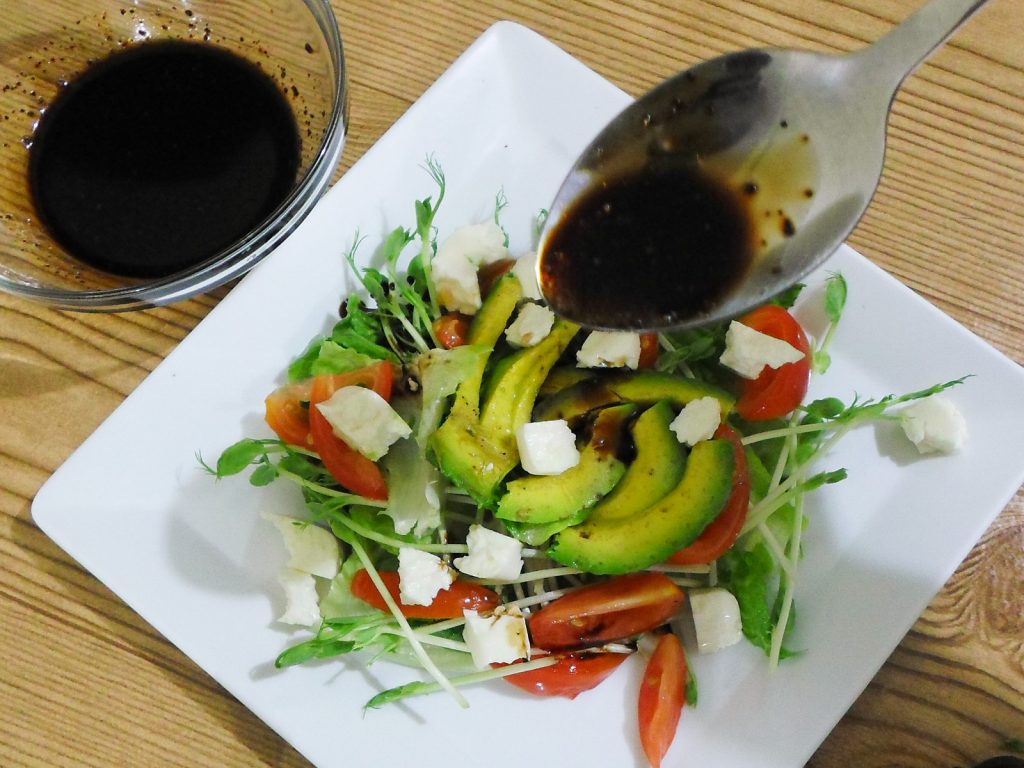
Smoked Salmon Rollups Recipe
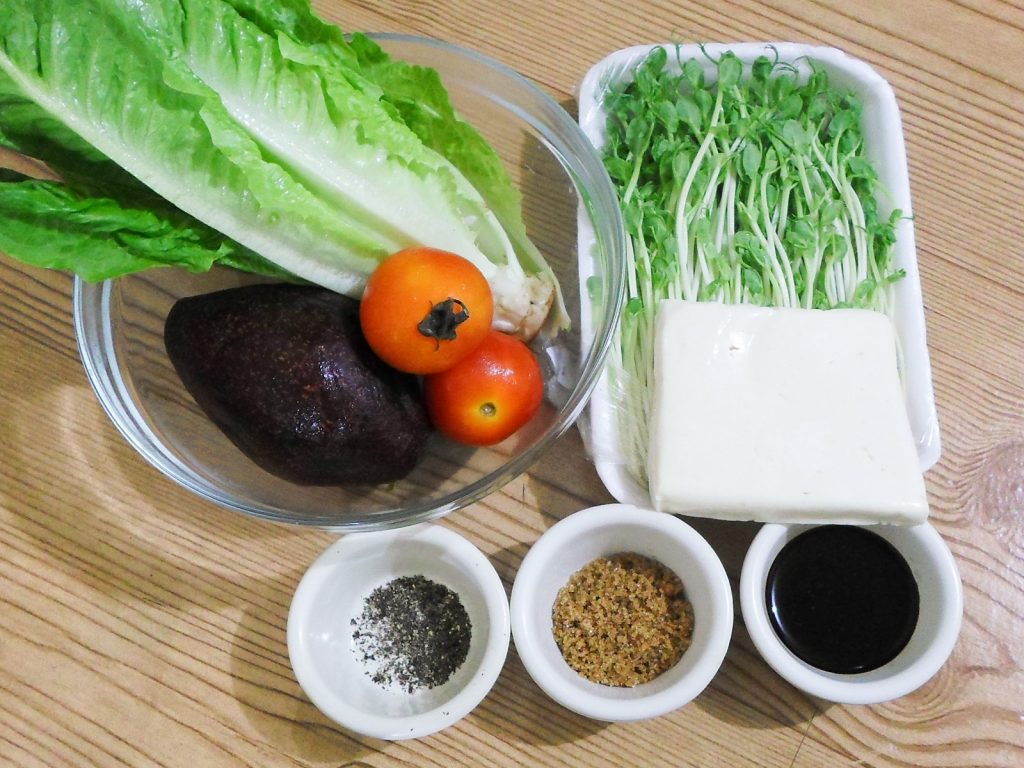
Tomyao is a type of sprouts typically used in Chinese cuisine. It is very crunchy and has a slightly nutty and earthy refreshing taste which complements a lot of other food items. Try this tomyao sprouts salad with black pepper dressing next time you see this vegetable at your grocer.

What You Will Need:
- 1 ½ to 2 cups tomyao sprouts
- 3-4 ounces fresh mozzarella
- 1 big head iceberg or romaine lettuce
- 1 medium size ripe avocado, either cubed or cut into thin wedges
- 2 large tomatoes, seeded, cut into strips or cubes
- 2 ½ tablespoons brown sugar
- ¼-1/3 cup good quality balsamic vinegar
- 1 teaspoon or more freshly cracked black pepper
Mix
Up an Asian Fusion Salad!
- Prepare all the ingredients you need.
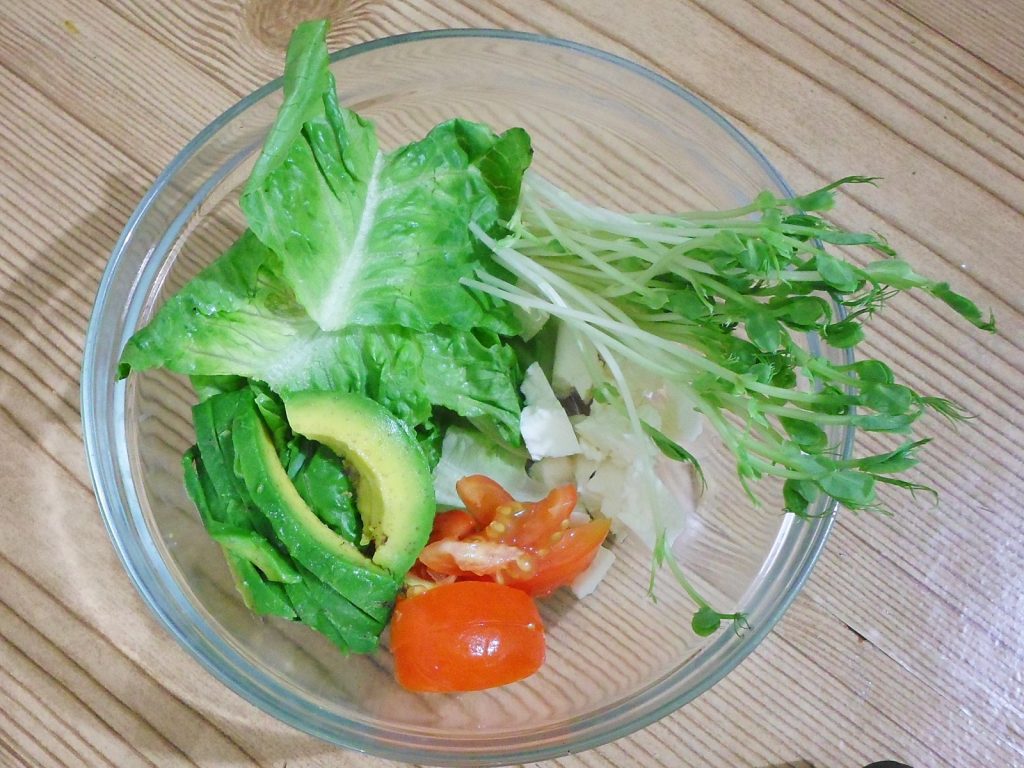
- Wash and cut up the vegetables. Make sure they are well drained.
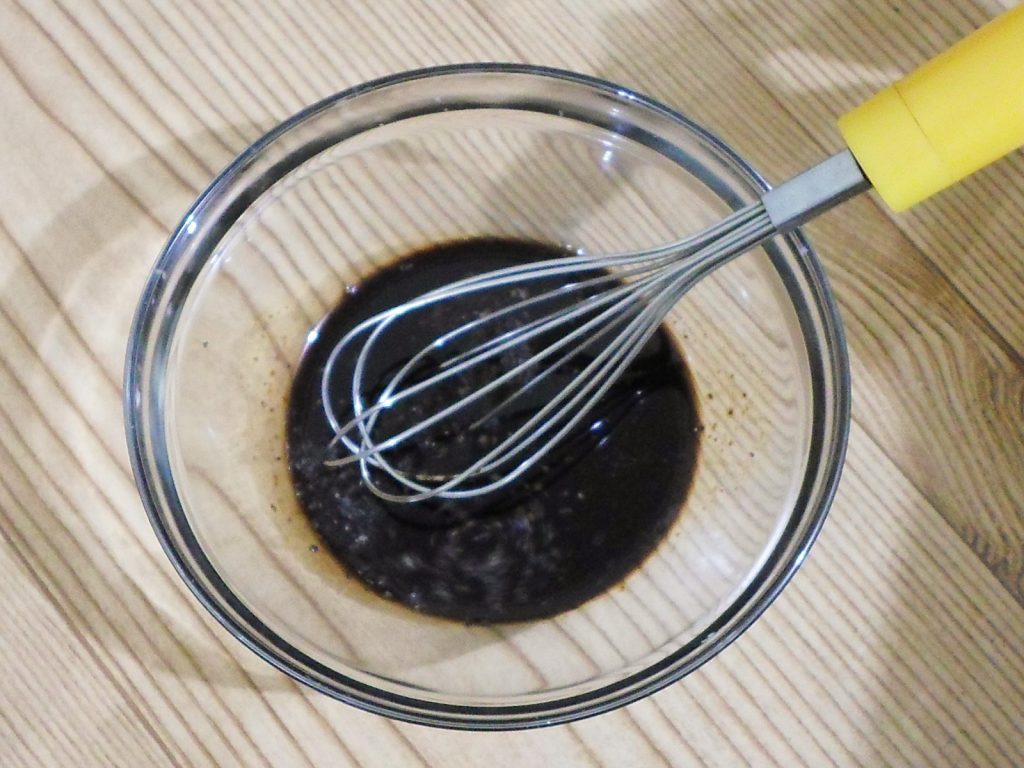
- Mix up the black pepper, brown sugar, and balsamic vinegar for the dressing.
- Arrange the vegetables on individual serving plates (this recipe serves 3-4). Crumble the mozzarella over the vegetables and spoon the dressing over prior to serving.
- Serve up and sprinkle with more pepper if desired.